Pavement striping is the application of painted lines, symbols, and markings to asphalt or concrete surfaces that organize traffic flow, define parking stalls, and designate accessible spaces, fire lanes, and pedestrian corridors. For commercial properties, the choice between handling this work yourself and hiring a professional contractor carries real consequences for safety, legal compliance, and long-term cost.
This guide covers the core distinctions between DIY and professional approaches, compliance and liability factors, materials and climate considerations, layout and design planning, maintenance timing, and contractor evaluation.
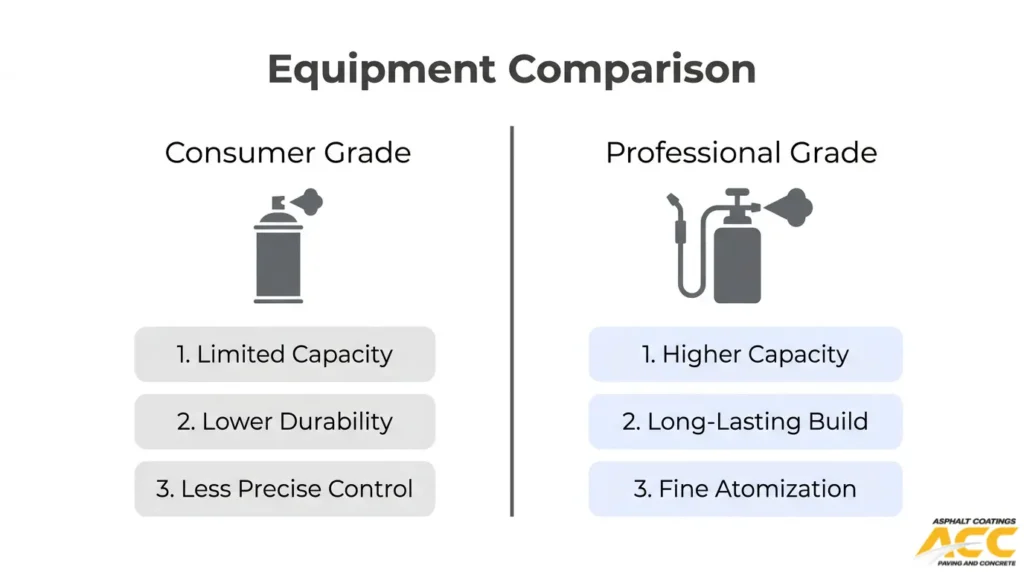
Equipment capability, material quality, and regulatory knowledge separate DIY striping from professional work. Consumer-grade tools lack the pressure regulation and bead dispensers needed for uniform film thickness, while professional airless machines deliver controlled coverage across thousands of linear feet.
ADA dimensional standards, fire lane width requirements, and local code variations create compliance risks that DIY projects frequently miss. Federal civil penalties for non-compliant accessible spaces can reach $75,000 for a first violation, making precision layout planning a financial safeguard rather than an optional upgrade.
Professional coatings, including thermoplastics and high-mil waterborne formulations, outlast hardware-store paint by years. Freeze-thaw cycling, UV exposure at elevation, and narrow temperature windows for proper adhesion all favor materials and scheduling practices that trained crews manage routinely.
Optimizing stall count, pedestrian corridors, and traffic circulation requires integrated site planning that accounts for turning radii, aisle widths, and ADA access routes simultaneously. Recognizing when faded markings or property-use changes trigger a repaint or full redesign keeps lots compliant between service cycles.
Verifying a contractor’s insurance, licensing, in-house crew structure, and single-source accountability protects property owners from absorbing liability for substandard work or on-site injuries.
What Is Pavement Striping and Why Does It Matter for Commercial Properties?
Pavement striping is the application of painted lines, symbols, and markings to asphalt or concrete surfaces to organize traffic flow, define parking stalls, and designate accessible spaces, fire lanes, and pedestrian corridors. For commercial properties, striping matters because it directly affects safety, legal compliance, and property value.
Poorly maintained or incorrectly applied markings expose property owners to ADA violations, fire code citations, and liability claims. Well-executed striping maximizes usable parking capacity, guides drivers and pedestrians safely, and signals professional property management. According to the Federal Highway Administration, nationwide annual pavement-marking expenditure was approximately $2 billion in 2007, excluding parking lots and private roads, which underscores the scale of investment tied to marking quality. Understanding what striping involves and why it carries real consequences is essential before deciding between a DIY approach and professional service.
What Are the Main Differences Between DIY and Professional Pavement Striping?
The main differences between DIY and professional pavement striping come down to equipment capability, regulatory knowledge, material quality, and long-term durability. Each factor shapes whether markings hold up under traffic, weather, and code enforcement. The sections below break down how these two approaches diverge across the areas that matter most for commercial properties.
What Are the Pros and Cons of DIY Pavement Striping?
The pros and cons of DIY pavement striping center on cost savings versus quality, compliance, and durability trade-offs. Below is a balanced breakdown of the advantages and disadvantages.
Pros of DIY pavement striping:
- Lower upfront cost is the primary advantage, since property owners avoid labor fees by handling the work themselves.
- Flexible scheduling allows small touch-ups or restripes to happen on the property owner’s timeline without waiting for contractor availability.
- For very small lots with simple layouts, basic restriping over existing lines can be a manageable task with a walk-behind striper.
Cons of DIY pavement striping:
- Inconsistent line quality results from consumer-grade equipment, which lacks the pressure regulation and bead dispensers needed for uniform wet-film thickness. According to the Iowa Department of Transportation, durable waterborne paint markings require a minimum binder thickness of 25 mils and a retroreflected luminance coefficient of 300 mcd/m²/lx for white lines.
- ADA compliance errors carry serious financial risk. Accessible stall dimensions, access aisle widths, signage heights, and van-accessible ratios must meet federal standards, and mistakes can trigger civil penalties.
- Shorter marking lifespan is common when surface preparation, temperature thresholds, and application rates are not followed precisely.
- Code violations for fire lanes, loading zones, and pedestrian corridors can result from layouts that do not meet local authority requirements.
- Hidden rework costs often eliminate the initial savings when lines fade prematurely or fail inspection.
For most commercial properties, the cons of DIY striping outweigh the upfront savings. The risk of non-compliant markings, premature wear, and liability exposure makes professional application the more cost-effective choice over a full maintenance cycle. Understanding professional striping benefits clarifies this contrast further.
What Are the Pros and Cons of Professional Pavement Striping?
The pros of professional pavement striping include code-compliant layouts, durable materials, and reduced liability risk. The cons include higher upfront cost and scheduling dependence on contractor availability. The sections below break down each advantage and disadvantage.
Professional striping delivers several measurable advantages over DIY approaches:
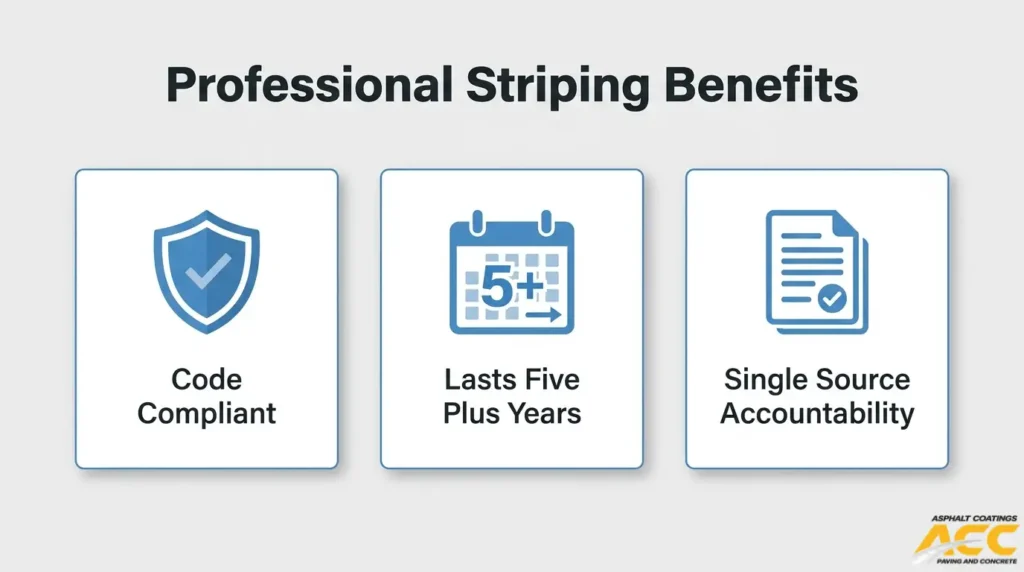
- Code and ADA compliance. Professional crews design layouts that meet ADA accessible-space dimensions, fire lane widths, and local zoning requirements, reducing the risk of violations and fines.
- Material durability. Professionals apply commercial-grade coatings at correct film thicknesses. According to the Texas Department of Transportation, properly formulated and applied thermoplastic markings can last five to eight years depending on traffic volumes.
- Optimized lot design. Experienced contractors maximize stall counts while maintaining safe pedestrian corridors and compliant traffic flow patterns.
- Liability reduction. Precise line placement, retroreflective glass bead application, and correct signage lower the chance of accidents and the insurance exposure that follows.
- Single-source accountability. When one contractor handles surface preparation, striping, and ADA markings, responsibility for the finished result stays with one team.
The disadvantages, while fewer, still deserve consideration:
- Higher upfront cost. Professional labor, commercial equipment, and premium materials cost more per project than a rented striper and consumer-grade paint.
- Scheduling constraints. Contractors work within weather windows and existing project queues, so property managers may wait longer to start compared to handling the work internally.
- Less owner control over timing. Urgent touch-ups between scheduled service visits may require a separate mobilization or change order.
For most commercial properties, the long-term savings from fewer restripes, avoided code penalties, and lower liability exposure outweigh the higher initial investment. Understanding these trade-offs leads naturally into how project size and property type shift the balance between DIY and professional striping.
How Do Project Size and Property Type Affect Whether DIY or Professional Striping Makes Sense?
Project size and property type affect whether DIY or professional striping makes sense by determining the complexity of layout, compliance requirements, and scheduling constraints involved. Small lots, large multi-building properties, and high-traffic facilities each present distinct challenges.
When Might DIY Striping Be Reasonable for Small Commercial Lots?
DIY striping might be reasonable for small commercial lots when the scope is limited to refreshing a few clearly defined stall lines on an existing, well-maintained layout. Properties with fewer than 20 spaces, minimal ADA requirements, and low daily traffic volume present the simplest conditions for a property manager using a walk-behind striper.
Even in these cases, the work still demands accurate measurement. According to the University of Houston’s campus design guidelines, standard parking stalls must be no less than 8.5 feet wide by 18 feet long, while parallel stalls require 10 by 20 feet. Misaligning even one row on a small lot reduces usable capacity and creates traffic flow problems. For most small commercial properties, DIY is only practical for minor touch-ups on an already code-compliant layout.
Why Do Larger or Multi-Building Properties Typically Require Professional Striping?
Larger or multi-building properties typically require professional striping because the scale introduces compounding variables that exceed DIY capability. Coordinating stall geometry, directional arrows, fire lanes, pedestrian crossings, and ADA-compliant spaces across multiple connected lots demands integrated layout planning and commercial-grade equipment.
Multi-building sites also face stricter code scrutiny. Each parking facility on a site must have its accessible spaces calculated independently, not pooled across the total lot count. Mistakes in spacing, slope, or signage placement multiply across every sub-lot, creating compliance exposure at each one. Professional crews handle this coordination with engineered site plans, calibrated striping machines, and knowledge of local code variations, which is why property managers overseeing campuses, office parks, or shopping centers rarely attempt this work themselves.
How Do High-Traffic or 24/7 Facilities Influence the DIY vs. Pro Striping Decision?
High-traffic or 24/7 facilities influence the DIY vs. pro striping decision by compressing the available work window and raising the stakes of every application error. Hospitals, distribution warehouses, and retail centers that never fully close require phased striping schedules that keep portions of the lot operational while fresh markings cure.
Professional crews execute phased closures efficiently because they use fast-dry formulations and equipment that applies consistent film thickness in a single pass. A DIY approach on a busy lot risks incomplete curing, uneven lines, and prolonged lane closures that disrupt tenants, customers, and emergency access. The margin for error shrinks as daily vehicle counts rise, making professional execution not just convenient but operationally necessary for facilities that cannot afford downtime.
Understanding how project scale shapes this decision helps clarify the cost differences between each approach.
How Do Cost and Budget Compare for DIY vs. Professional Pavement Striping?
Cost and budget for DIY vs. professional pavement striping compare across three dimensions: upfront expenses, long-term maintenance, and liability-related costs. The following subsections break down material and equipment costs, re-striping frequency, and how striping quality affects total cost of ownership.
How Do Upfront Material and Equipment Costs Compare Between DIY and Professional Striping?
Upfront material and equipment costs between DIY and professional striping differ significantly in scale and capability. DIY approaches require purchasing or renting a walk-behind striper, paint, stencils, measuring tools, and glass beads separately. Professional contractors arrive with commercial-grade airless striping machines, pre-loaded material inventories, and layout tools calibrated for code-compliant spacing.
Although the initial cash outlay for a DIY project appears lower, hidden costs accumulate quickly. Poor spray consistency from consumer equipment often demands extra paint to achieve adequate coverage. According to the Federal Highway Administration, pavement-marking unit costs run approximately $0.10 to $0.25 per foot for conventional markings, a benchmark that reflects efficient professional application rather than retail material pricing.
For most commercial properties, the apparent savings of DIY purchasing dissolve once material waste, equipment learning curves, and labor hours are factored into the true upfront investment.
How Do Long-Term Maintenance and Re-Striping Costs Differ Between DIY and Professional Striping?
Long-term maintenance and re-striping costs differ between DIY and professional striping primarily because of durability. Professionally applied markings use controlled film thickness and proper glass bead embedment, which extends service life and delays the next re-stripe cycle. DIY applications, often applied too thin or on improperly prepared surfaces, fade faster and require more frequent reapplication.
According to the Texas Department of Transportation, thermoplastic pavement markings can last five to eight years when properly formulated and applied, though typical service lives range from two to three years depending on traffic volumes. Inconsistent DIY application rarely achieves the minimum film thickness needed for that durability range, compressing re-stripe intervals and multiplying cumulative costs over a property’s lifecycle.
Budgeting for striping should account for total cycles over five to ten years, not just the next application.
How Does Striping Quality Affect Liability, Insurance, and Total Cost of Ownership?
Striping quality affects liability, insurance, and total cost of ownership by determining whether markings meet enforceable legal standards. Non-compliant ADA spaces, faded fire lanes, or unclear pedestrian crossings create exposure to lawsuits, regulatory fines, and insurance claim denials. These costs can dwarf any savings from a cheaper application method.
According to the Electronic Code of Federal Regulations (28 CFR Part 36), ADA civil penalties can reach $75,000 for a first violation and $150,000 for subsequent violations. A single mismarked accessible space, whether caused by incorrect dimensions or faded paint, can trigger enforcement action that exceeds years of professional striping budgets combined.
Property owners who treat striping as a compliance investment rather than a maintenance line item protect themselves from financial exposure that no amount of DIY savings can offset. Understanding these cost dynamics sets the stage for evaluating specific safety and ADA compliance factors.
How Do Safety, Liability, and ADA Compliance Affect the DIY vs. Professional Striping Choice?
Safety, liability, and ADA compliance affect the DIY vs. professional striping choice by determining the legal and financial risk a property owner assumes. The sections below cover ADA accessibility risks, trip and traffic liability, and fire lane requirements.
How Can DIY Striping Create ADA Compliance and Accessibility Risks?
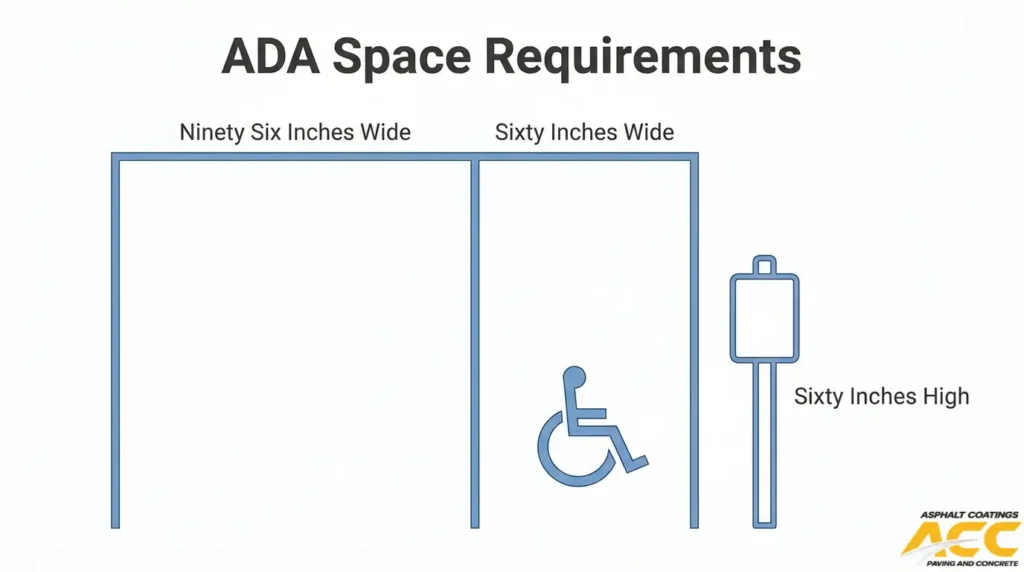
DIY striping can create ADA compliance and accessibility risks when spaces, access aisles, or signage fail to meet federal dimensional and slope standards. Car accessible spaces must be at least 96 inches wide with an access aisle at least 60 inches wide, mounted signage at least 60 inches above ground, and a surface slope no greater than 2.08%, according to the U.S. Department of Justice. Even small measurement errors, common without professional layout equipment, can render an entire lot non-compliant.
The consequences extend beyond corrections. Civil penalties under 28 CFR Part 36 reach $75,000 for a first ADA violation and $150,000 for subsequent violations. DIY operators rarely carry the surveying tools or code knowledge needed to avoid these costly mistakes.
How Does Professional Striping Help Reduce Trip, Fall, and Traffic Liability?
Professional striping helps reduce trip, fall, and traffic liability by applying markings at controlled thicknesses and under verified surface conditions that maximize durability and visibility. According to the Texas Department of Transportation, thermoplastic pavement markings typically last two to three years under normal traffic, and proper application requires pavement temperatures of at least 50°F, air temperatures of at least 55°F, and surfaces free of dirt, dust, and moisture.
When these conditions are not met, markings fail prematurely, leaving faded lines that obscure lane boundaries and pedestrian paths. Professionally applied lines at the correct mil thickness maintain retroreflectivity longer, which directly reduces the window during which a property owner faces negligence claims from unclear traffic guidance. Consistent marking quality is one of the most cost-effective liability protections a commercial property can invest in.
How Do Fire Lanes, Loading Zones, and Emergency Access Requirements Impact Your Decision?
Fire lanes, loading zones, and emergency access requirements impact your decision by adding code-specific dimensions and color standards that vary by local jurisdiction. According to the National Fire Protection Association, fire access roads must remain unobstructed to a minimum width of 20 feet and a minimum height of 13 feet 6 inches, though the local authority having jurisdiction can alter these dimensions to accommodate responding apparatus.
Incorrect fire lane widths or missing curb markings can trigger code violations during fire marshal inspections and delay emergency response times. Loading zones add another layer, often requiring specific striping colors and no-parking signage dictated by municipal code rather than a single national standard. Professional striping crews research these local requirements before layout begins, a step DIY projects frequently skip.
With compliance risks clarified, the next consideration is how materials and equipment choices differ between approaches.
How Do Materials, Equipment, and Application Methods Differ for DIY vs. Professional Striping?
Materials, equipment, and application methods differ significantly between DIY and professional striping in coating types, machine precision, and surface preparation rigor. The sections below compare paint formulations, equipment capabilities, and curing practices.
What Types of Paints and Coatings Do Professionals Use That DIY Often Does Not?
The types of paints and coatings professionals use that DIY often does not include thermoplastic markings, durable waterborne formulations, and high-mil solvent-based paints engineered for specific film thicknesses. DIY projects typically rely on standard latex traffic paint from hardware stores, which lacks the binder depth and glass-bead integration needed for long-term durability.
Professional coatings differ in several key ways:
- Thermoplastic markings are applied at 60 mils on hot-mix asphalt surfaces and can last two to eight years depending on traffic volume.
- Durable waterborne paints require a minimum binder thickness of 25 mils, nearly double the 14-mil wet film of standard waterborne paint.
- Solvent-based professional paints are applied at 16 mils for a 4-inch line, with calibrated glass-bead drop rates for retroreflectivity.
According to the Iowa Department of Transportation, specified waterborne markings must achieve a minimum coefficient of retroreflected luminance of 300 mcd/m²/lx for white lines and 200 mcd/m²/lx for yellow lines. Most consumer-grade paints cannot meet these thresholds because they lack embedded retroreflective glass beads applied at controlled rates.
How Does Professional Striping Equipment Compare to Hardware-Store Stripers?
Professional striping equipment compares to hardware-store stripers in precision, output volume, and consistency. Commercial-grade airless striping machines deliver paint at controlled pressure and uniform film thickness across thousands of linear feet. Hardware-store walk-behind stripers use gravity-fed or low-pressure systems that produce inconsistent line widths and uneven coverage.
Key differences include:
- Professional machines maintain calibrated spray tips that ensure exact mil thickness per pass.
- Commercial units handle thermoplastic and epoxy materials that require heated application systems.
- Layout equipment such as laser-guided stenciling tools and chalk-line rigs ensure straight lines and precise stall dimensions.
For most commercial properties, the gap in equipment capability is the single biggest factor separating a parking lot that meets code from one that does not.
How Do Surface Preparation and Curing Practices Differ Between DIY and Professional Work?
Surface preparation and curing practices differ between DIY and professional work in thoroughness, sequencing, and environmental compliance. Professional crews clean the pavement surface of dirt, dust, and contaminants, then verify that both pavement and air temperatures meet minimum thresholds before applying any coating.
According to the Texas Department of Transportation, the pavement surface must be free of moisture, with pavement temperature at least 50°F and air temperature at least 55°F to ensure proper adhesion and cooling. DIY applicators frequently skip moisture testing and temperature verification, leading to premature peeling and adhesion failure.
Professional preparation also includes:
- Crack filling and patching damaged areas before any coating application.
- Power washing or mechanical sweeping to remove oil, debris, and loose aggregate.
- Allowing adequate cure time before opening lanes to traffic, which prevents tire tracking and smearing.
Skipping any of these steps shortens marking lifespan considerably, making the initial savings of a DIY approach misleading. Understanding these material and method differences helps clarify how climate conditions further influence striping outcomes.
How Do Climate and Environmental Conditions Affect DIY vs. Professional Striping Outcomes?
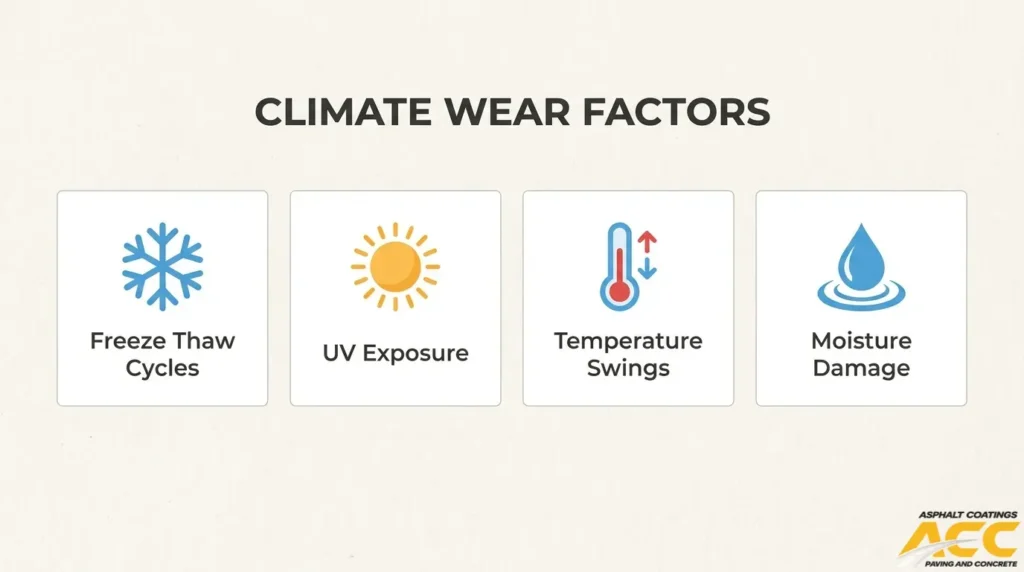
Climate and environmental conditions affect DIY vs. professional striping outcomes by determining how well paint bonds, cures, and lasts. Freeze-thaw cycling, UV exposure, altitude, and temperature windows each create challenges that the sections below address.
Why Is Freeze–Thaw Cycling a Challenge for DIY Pavement Striping?
Freeze-thaw cycling is a challenge for DIY pavement striping because water infiltrates micro-cracks in paint film, expands when frozen, and physically lifts the coating from the asphalt surface. Each cycle widens the bond failure, accelerating flaking and delamination far faster than in stable climates.
Professional contractors mitigate this risk through several practices that most DIY applicators skip:
- Applying crack filler and cleaning all debris before striping so moisture has fewer entry points beneath the film.
- Using thicker coatings with flexible binders designed to expand and contract without cracking.
- Timing application to avoid late-season windows when early freezes can catch uncured paint.
For properties along Colorado’s Front Range, where temperatures can swing 40°F or more in a single day, even a well-applied DIY coat often fails within one winter if surface preparation was inadequate. In my experience, freeze-thaw damage is the single most common reason property managers end up paying twice: once for the DIY attempt and again for professional correction.
How Do UV Exposure and Altitude Impact Striping Durability and Visibility?
UV exposure and altitude impact striping durability and visibility by accelerating pigment degradation and binder breakdown. At higher elevations, thinner atmosphere filters less ultraviolet radiation, so pavement markings fade and lose retroreflectivity faster than identical coatings applied at sea level.
This matters for several measurable reasons:
- Pigment molecules absorb UV energy and break apart, causing white lines to yellow and yellow lines to lose contrast.
- Binder resins become brittle under sustained UV bombardment, leading to chalking and surface erosion.
- Retroreflective glass beads lose their anchor in degraded binder, reducing nighttime visibility.
Professional-grade formulations address altitude-specific UV stress with stabilizers and higher-quality resins that consumer-grade hardware-store paints typically lack. For Colorado properties sitting above 5,000 feet, this distinction becomes critical. Choosing a coating without UV-resistant chemistry is one of the most underestimated mistakes in DIY striping projects at elevation.
How Do Temperature and Weather Windows Influence Scheduling for DIY vs. Professional Striping?
Temperature and weather windows influence scheduling for DIY vs. professional striping by dictating when paint can properly bond, flow, and cure. According to the Texas Department of Transportation, pavement surface temperature must be at least 50°F and air temperature at least 55°F for proper application and cooling of pavement markings.
These thresholds create practical scheduling constraints:
- Surfaces must also be free of moisture, dirt, and contaminants at the time of application.
- High humidity or approaching rain can trap moisture under the film, causing adhesion failure.
- Nighttime temperature drops can halt curing before the coating reaches full hardness.
Professional crews monitor surface temperature with infrared thermometers and track weather forecasts to schedule within optimal windows. DIY applicators frequently misjudge conditions, applying paint on mornings when pavement looks dry but retains overnight moisture. In regions with short seasonal windows, like Colorado’s Front Range, professionals can mobilize quickly when conditions align, while property managers attempting DIY work often lose weeks waiting for another suitable day.
Understanding these climate factors helps clarify why material choices and application techniques matter so much for lasting results.
How Do Layout, Design, and Traffic Flow Planning Differ Between DIY and Professional Striping?
Layout, design, and traffic flow planning differ between DIY and professional striping in scope, precision, and code compliance. Below, each subsection covers stall optimization with pedestrian safety, ADA-compliant stall design, and specialty marking placement.
How Do Professionals Optimize Stall Count, Traffic Flow, and Pedestrian Safety?
Professionals optimize stall count, traffic flow, and pedestrian safety by engineering a unified layout that balances maximum capacity with safe circulation patterns. According to University of Houston design guidelines, the parking lot design objective is to maximize total spaces while providing continuous traffic flow and safe pedestrian movement from parking to buildings, with standard stalls measuring a minimum of 8.5 feet wide by 18 feet long.
DIY efforts typically replicate existing lines without analyzing whether the current layout actually maximizes capacity or directs traffic efficiently. Professional stripers evaluate:
- One-way versus two-way aisle widths based on angled or perpendicular stall orientation.
- Dedicated pedestrian corridors separated from vehicle drive aisles.
- Entry and exit points positioned to prevent bottlenecks during peak hours.
- Sight-line clearances at intersections within the lot.
Pedestrian safety in parking areas is not a minor concern. From 2014 to 2020, the CDC’s National Institute for Occupational Safety and Health reported 2,258 pedestrian worker deaths from struck-by-vehicle incidents in the United States. Well-planned striping with clearly marked crosswalks and separated walkways directly reduces this risk in ways that unmeasured DIY layouts cannot replicate.
How Are ADA Stalls, Access Aisles, and Ramps Correctly Designed and Laid Out?
ADA stalls, access aisles, and ramps are correctly designed and laid out by following federal dimensional and signage standards established under the Americans with Disabilities Act. Car-accessible spaces require a minimum width of 96 inches, paired with an access aisle at least 60 inches wide. Each space must have a surface that is firm, stable, and slip-resistant, with slopes not exceeding 2.08% in any direction, and signage mounted at least 60 inches above the ground.
At least one of every six accessible spaces in each parking facility must be van-accessible. Getting these ratios wrong, or miscalculating aisle widths by even a few inches, can trigger ADA violations. For most property managers, this level of precision makes professional layout planning worth the investment over guesswork with a tape measure.
How Should Specialty Markings Like Arrows, Numbers, and Branded Stalls Be Planned?
Specialty markings like arrows, numbers, and branded stalls should be planned as integrated elements within the overall traffic flow design, not added as afterthoughts. Directional arrows guide one-way circulation and reduce confusion at intersections. Numbered stalls support assigned parking enforcement in office parks and apartment complexes. Branded or reserved stalls designate spaces for visitors, EV charging, or tenant-specific use.
Professional stripers plan these markings during the initial layout phase so placement aligns with:
- Aisle direction and turning radii.
- ADA access routes and loading zones.
- Fire lane boundaries and emergency vehicle clearances.
DIY projects often add arrows or numbers after stall lines are already painted, which can create conflicting directional cues or block required clearance zones. Planning specialty markings within the full site design prevents costly corrections later.
With the layout finalized, recognizing when existing markings need repainting keeps the design effective over time.
What Are the Signs Your Current Pavement Striping Needs Repainting or Redesign?
The signs your current pavement striping needs repainting or redesign include faded or low-visibility markings, changes in property use that alter layout requirements, and time-based wear from traffic and weather. The sections below cover fading thresholds, property-use triggers, and restriping frequency.
How Faded or Worn Can Markings Be Before They Become a Liability?
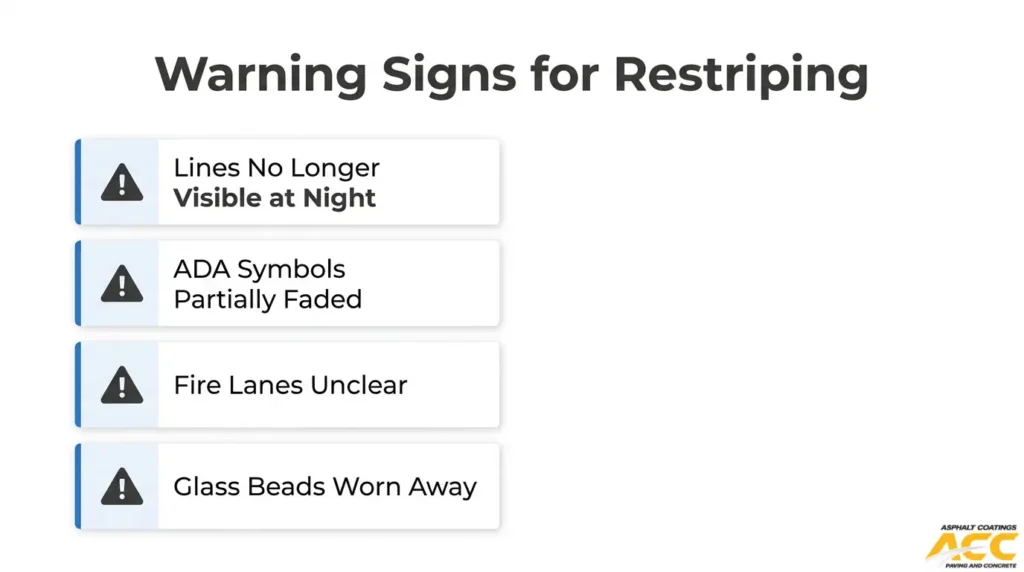
Markings become a liability when fading reduces visibility enough to obscure lane guidance, parking boundaries, or ADA designations for drivers and pedestrians. According to the Iowa Department of Transportation, specified waterborne markings must maintain a minimum retroreflected luminance of 300 mcd/m²/lx for white lines, symbols, and legends, and 200 mcd/m²/lx for yellow lines. When markings fall below these thresholds, nighttime and wet-weather visibility drops sharply, increasing the risk of collisions, pedestrian incidents, and code violations. Key warning signs include:
- Glass beads are worn away, eliminating nighttime reflectivity.
- Line edges are no longer crisp or distinguishable from the pavement surface.
- ADA symbols, crosshatching, or “No Parking” legends are partially illegible.
- Colors have shifted or bleached to the point where white and yellow lines look similar.
Waiting until markings are barely visible is a common mistake; by that point, liability exposure has already been building for months.
When Does a Change in Property Use Require a New Parking Lot Layout?
A change in property use requires a new parking lot layout whenever the updated occupancy type, tenant mix, or traffic pattern alters the minimum number of parking spaces, accessible stalls, or circulation requirements. Converting a warehouse to retail, adding a medical tenant, or expanding an existing building all trigger recalculation. According to the U.S. Access Board, the minimum number of accessible spaces must be calculated separately for each parking facility on a site, and at least one of every six accessible spaces must be van-accessible. Situations that typically demand a full redesign include:
- Zoning or occupancy reclassification that changes required stall counts.
- Addition of a new building or tenant with distinct ADA and fire-lane obligations.
- Shift from low-turnover use (office) to high-turnover use (retail or medical).
Failing to update the layout after a use change is one of the fastest paths to ADA enforcement action.
How Often Should Commercial Parking Lots Typically Be Restriped?
Commercial parking lots should typically be restriped every 18 to 24 months, though actual frequency depends on traffic volume, climate severity, and the marking material used. High-traffic retail lots and 24/7 facilities often need annual attention, while lower-volume office parks may extend to 24 months or slightly beyond. Several site-specific factors accelerate wear:
- Heavy truck or delivery traffic that abrades paint faster than passenger vehicles.
- Frequent snow plowing, which scrapes marking surfaces.
- UV exposure at higher altitudes, which degrades binder integrity.
- Lot design factors such as tight turning radii where tires scuff repeatedly.
According to the Town of Holly Springs, North Carolina, street and lot design accounts for traffic volumes, zoning, on-street parking, and surrounding development patterns, all of which influence how quickly markings deteriorate. Rather than waiting for visible fading, scheduling proactive restriping based on these variables protects both compliance status and long-term maintenance budgets.
Recognizing these warning signs early helps property managers decide whether a simple repaint or a full professional redesign is the right next step.
How Should Property Managers and Facility Owners Evaluate Striping Contractors?
Property managers and facility owners should evaluate striping contractors by asking targeted questions, verifying crew structure, and confirming insurance and licensing. The following subsections cover key hiring questions, the value of in-house crews, and essential credentials to verify.
What Questions Should You Ask a Professional Striping Contractor Before Hiring?
The questions you should ask a professional striping contractor before hiring focus on experience, process, and compliance capabilities. Before signing any agreement, request answers to the following:
- What pavement marking materials do you use, and how do they perform under local climate conditions?
- Do you handle ADA-compliant layout design, including accessible stall sizing and access aisle placement?
- Can you provide a detailed scope of work covering surface preparation, material specifications, and curing timelines?
- What is your process for coordinating traffic control and minimizing business disruption during the project?
- Do you employ in-house crews, or do you subcontract the work?
- Will you provide a written warranty on materials and workmanship?
Each answer reveals how well a contractor understands code requirements, material science, and project logistics. Vague or evasive responses to any of these questions should be treated as a red flag, particularly around ADA compliance and crew accountability.
Why Do In-House Crews and Single-Source Accountability Matter for Striping Projects?
In-house crews and single-source accountability matter for striping projects because they eliminate the communication gaps and quality inconsistencies that subcontracting introduces. When one company controls every phase, from surface preparation through final curing, responsibility for the outcome stays with a single point of contact.
Subcontracted work often fragments accountability. If a layout error occurs or markings fail prematurely, property managers can spend weeks sorting out which party is responsible. A contractor operating with its own trained crews maintains direct quality control over equipment calibration, material application rates, and line accuracy. This structure also simplifies scheduling, since there is no need to coordinate availability across multiple vendors. For commercial properties where downtime costs money, that scheduling efficiency is a meaningful advantage.
What Insurance, Licensing, and References Should You Verify With a Striping Contractor?
The insurance, licensing, and references you should verify with a striping contractor include general liability coverage, workers’ compensation, applicable state or local business licenses, and project-specific references from comparable commercial properties. According to an Austin Peay State University procurement specification, surety companies issuing bonds for pavement coating projects must be licensed to transact business by the relevant state department of commerce and insurance.
Key credentials to confirm before hiring include:
- General liability insurance with coverage limits appropriate for commercial property work.
- Active workers’ compensation insurance covering all crew members on site.
- A valid business license for the state and municipality where the project takes place.
- At least three references from recent commercial striping projects of similar scope.
- Bonding capacity, if your project or facility requires it.
Always request certificates of insurance directly from the contractor’s insurer, not just a verbal confirmation. Verifying these credentials protects property owners from absorbing liability for on-site injuries or substandard work.
With contractor evaluation criteria in place, the next step is choosing the right approach for your property.
How Should You Approach DIY vs. Professional Pavement Striping With Asphalt Coatings Company?
You should approach DIY vs. professional pavement striping with Asphalt Coatings Company by evaluating your project’s complexity, compliance needs, and long-term durability goals. The sections below cover how Asphalt Coatings Company’s services simplify that decision and summarize the key takeaways from this guide.
How Can Asphalt Coatings Company’s Professional Striping and ADA Services Help You Choose the Right Approach?
Asphalt Coatings Company’s professional striping and ADA services help you choose the right approach by providing in-house crews, code-compliant layouts, and surface preparation expertise under one contractor. Since 1986, Asphalt Coatings Company has handled commercial parking lot striping, ADA-compliant concrete work, sealcoating, and crack sealing across Colorado’s Front Range. This single-source model means surface repairs, striping, and accessibility upgrades happen in coordinated phases rather than through disconnected vendors. Proper crack filling and surface cleaning before seal coating, as specified in institutional procurement standards from Austin Peay State University, reflect the preparation standards Asphalt Coatings Company follows on every project. For property managers weighing a DIY attempt against professional execution, having one accountable team eliminates the compliance gaps and scheduling conflicts that make self-managed striping risky.
What Are the Key Takeaways About DIY vs. Professional Pavement Striping We Covered?
The key takeaways about DIY vs. professional pavement striping covered in this guide are:
- DIY striping may suit very small, low-traffic lots, but commercial properties face ADA, fire lane, and local code requirements that demand professional precision.
- Proper surface preparation, correct film thickness, and material selection directly determine marking longevity and retroreflectivity.
- ADA stall dimensions, access aisle widths, and van-accessible space ratios carry federal enforcement penalties when done incorrectly.
- Climate factors like freeze-thaw cycling and UV exposure at altitude shorten marking life, making professional material choices critical.
- Layout design affects stall count, pedestrian safety, and traffic flow; professionals optimize all three simultaneously.
- Evaluating contractors on licensing, insurance, in-house crews, and single-source accountability protects your investment.
For most commercial property managers, professional striping is not just a convenience; it is the only reliable path to compliant, durable results.