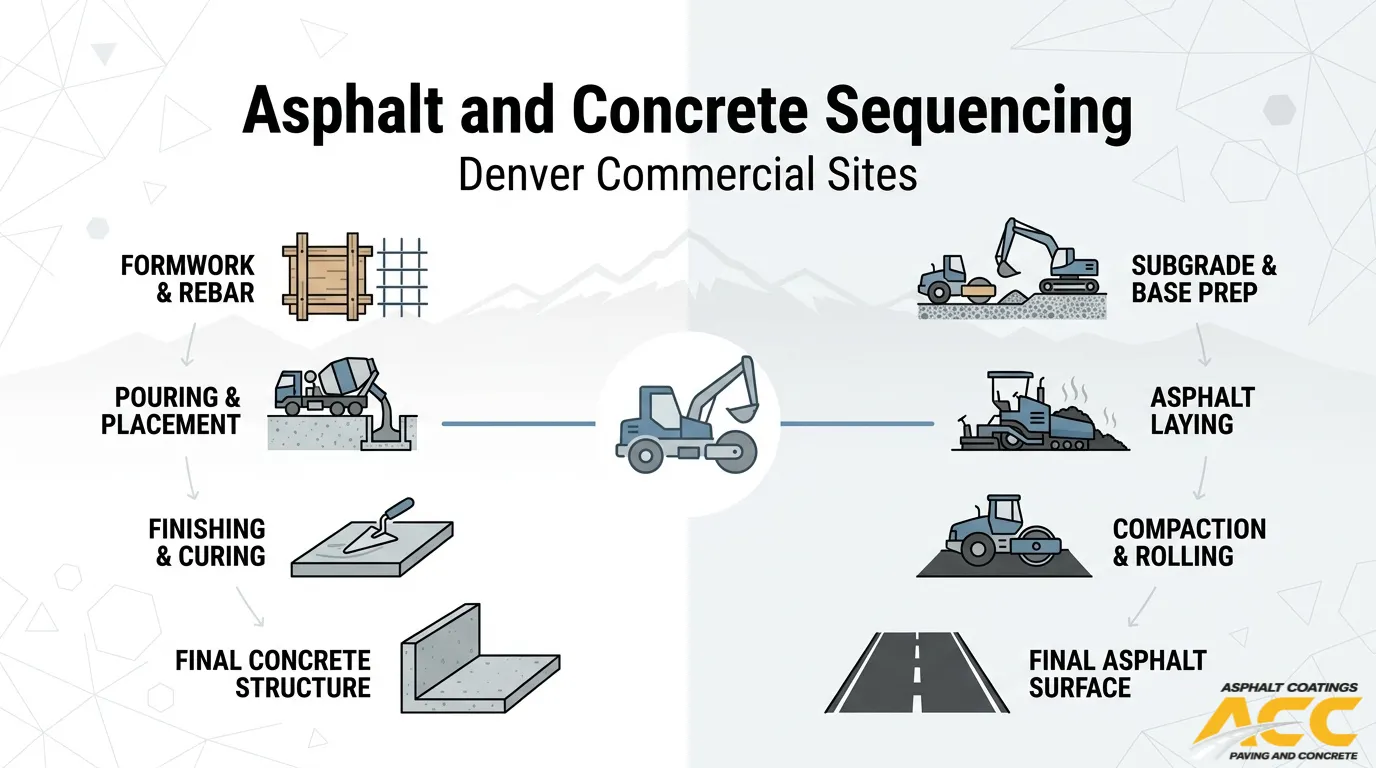
Sequencing asphalt and concrete work on a Denver commercial site with active tenants and ROW constraints is the process of ordering demolition, material placement, curing, and finishing activities so that each phase maintains safe tenant access, meets city permit requirements, and falls within viable temperature windows. Poor sequencing leads to rework, weather-driven cost premiums, and preventable tenant disruption.
This guide covers Front Range climate and material constraints, ROW permitting and city coordination, tenant access phasing across property types, critical-path construction sequencing, and ADA compliance throughout every phase.
Denver’s 5,280-foot elevation forces adjustments to both concrete mix designs and asphalt placement temperatures, compressing the viable paving season and making the order of operations between the two materials a high-stakes scheduling decision. Winter concrete placements carry significant cost premiums, and CDOT specifications set strict minimum temperatures for each asphalt lift thickness.
ROW work introduces a separate regulatory layer. Denver DOTI permit reviews average 14 to 20 weeks for commercial projects, and mandatory coordination meetings, traffic control plans, and Street Cut Pavement Repair Markers add sequential hold points that do not apply to private on-site work. Filing permits months before your target construction window is the first critical-path item.
Phasing for active tenants requires dividing the site into work zones sized to keep parking, entrances, and life-safety routes functional at all times. Strategies like half-and-half paving and front-to-back sequencing preserve close-in stalls, while property-specific adaptations address overnight parking at apartments, peak-hour demands at retail centers, and uninterrupted emergency access at healthcare facilities.
Construction sequencing follows a strict dependency chain: drainage improvements first, then subgrade stabilization and base installation, followed by concrete curbs and flatwork, asphalt paving, and finally crack sealing, sealcoating, and striping. Each layer depends on the one beneath it, and finishing treatments require specific cure times and temperature conditions before the next can proceed.
ADA compliance runs through every phase, not just the final one. Temporary accessible routes must be established before any existing accessible features are removed, with cross-slopes verified at each transition and detectable warnings coordinated with ROW curb ramp inspections.
Why Does Phasing Asphalt and Concrete Work Matter More on Denver Commercial Sites With Active Tenants?
Phasing asphalt and concrete work matters more on Denver commercial sites with active tenants because the combination of altitude-driven material constraints, seasonal cost premiums, and uninterrupted tenant access demands creates sequencing challenges that single-phase projects simply avoid.
Denver’s 5,280-foot elevation complicates both asphalt and concrete placement in ways that directly affect phasing decisions. Concrete mix designs at this altitude require adjustments to water-cement ratio and air entrainment compared to sea-level formulations, meaning each pour phase needs precise batching. Winter placements between mid-November and mid-March demand heated enclosures or insulated blankets, adding cost and logistical complexity to every phase that falls within that window.
When tenants remain operational throughout construction, each phase must function as a self-contained project with safe access routes, available parking, and clear wayfinding. Industry best practices recommend breaking projects into manageable phased sections rather than closing entire parking areas simultaneously. Poor sequencing forces rework, extends exposure to Denver’s volatile weather, and compounds the winter construction cost premium across multiple mobilizations.
For property managers balancing tenant satisfaction against construction timelines, the margin for scheduling error shrinks considerably. A missed weather window on one phase cascades into delays on every subsequent phase. This is why experienced contractors treat phasing not as a convenience but as the single most consequential planning decision on an active commercial site.
The sections that follow address how Denver’s Front Range climate, site analysis, ROW permits, and tenant coordination each shape the ideal construction sequence.
How Do Colorado Front Range Climate and Denver-Specific Conditions Affect the Order of Asphalt and Concrete Work?
Colorado Front Range climate and Denver-specific conditions affect the order of asphalt and concrete work by imposing strict temperature minimums, altitude-driven mix adjustments, and costly winter premiums that compress the viable paving season. These factors dictate whether concrete or asphalt goes down first and when each material can be placed safely.
Denver sits at 5,280 feet with rapid temperature swings, intense UV exposure, and punishing freeze-thaw cycles. According to the CDOT 2023 Standard Specifications, minimum placement temperatures for the top asphalt layer vary by thickness:
- Lifts under 1.5 inches require a minimum air and surface temperature of 60°F.
- Lifts between 1.5 and 3 inches require 50°F.
- Lifts over 3 inches require 45°F.
Below-top-layer requirements drop slightly to 50°F, 40°F, and 35°F respectively. These thresholds mean thin surface courses and final striping get pushed into warmer months, while thicker base lifts can proceed earlier in spring or later in fall.
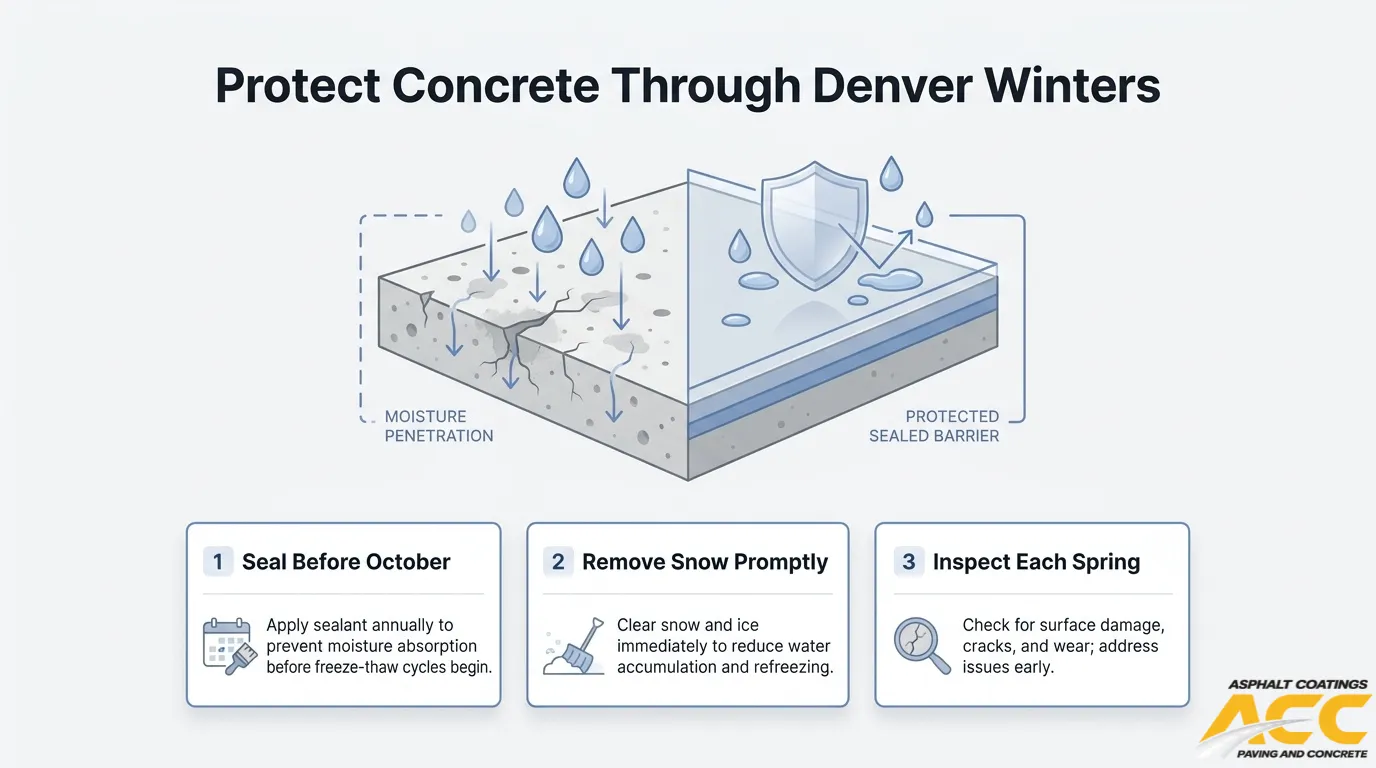
Concrete faces its own set of constraints at altitude. The American Concrete Institute (ACI 306R-16) defines cold weather concreting as three or more consecutive days below 40°F. A 20°F temperature drop approximately doubles concrete setting time, which directly delays form removal, curing, and the ability to open adjacent areas to traffic. Concrete must reach 500 psi before any freezing exposure, typically requiring about 48 hours at 50°F, and 3,500 psi before withstanding freeze-thaw cycles. Air entrainment is mandatory for durability at this elevation.
These temperature dependencies create a clear sequencing logic. Concrete curbs, gutters, and flatwork should be placed first during the warmest available window, allowing adequate cure time before asphalt abuts those edges. Scheduling concrete early in the season also provides a buffer if cold snaps slow curing. Asphalt paving follows once concrete has reached full design strength and ambient temperatures consistently meet CDOT minimums for the planned lift thickness. Asphalt Coatings Company has managed this concrete-first sequencing across Colorado’s Front Range since 1986, coordinating in-house concrete and asphalt crews to eliminate handoff delays between trades
Winter work carries a significant financial penalty. Concrete placements between mid-November and mid-March require heated enclosures or insulated blankets, adding $1.50 to $3.50 per square foot on slab work. Denver’s altitude also demands mix design adjustments for water-cement ratio and air entrainment, which adds $6 to $12 per cubic yard compared to sea-level mixes. These premiums make off-season paving not just risky from a quality standpoint but substantially more expensive, reinforcing the value of sequencing both materials within the April-through-October window whenever project timelines allow.
For experienced contractors on the Front Range, building the schedule around these climate realities is not optional; it is the single most important factor in determining whether concrete or asphalt work leads the sequence on any given commercial site.
How Should You Analyze Site Conditions, Existing Pavement, and Traffic Patterns Before Setting the Sequence?
You should analyze site conditions, existing pavement, and traffic patterns by conducting a systematic field assessment that evaluates subgrade integrity, pavement distress, drainage behavior, and peak vehicle and pedestrian circulation. This pre-construction analysis determines which zones need full reconstruction versus overlay, where utility conflicts exist, and how tenant traffic flows dictate phasing boundaries. Without this data, sequencing decisions become guesswork that leads to costly rework and avoidable tenant disruption. Asphalt Coatings Company’s approach to commercial projects begins with comprehensive site analysis, using our 39 years of Front Range experience to identify subgrade issues, drainage deficiencies, and traffic flow constraints before the first crew mobilizes.
The assessment starts with the ground itself. Subgrade soil conditions vary widely across a single commercial parcel, and weak zones left unidentified will undermine even properly placed asphalt or concrete. According to Pavement Interactive, the upper six inches of subgrade must be compacted to a minimum 95% of maximum laboratory density, while fill areas below that depth require at least 90% compaction. Soils that cannot meet these thresholds need stabilization or over-excavation before any paving sequence begins. Geotechnical borings or dynamic cone penetrometer testing at representative locations across the site reveal bearing capacity variations that directly shape which areas require concrete versus asphalt, and which sections must be addressed first in the phasing plan.
Existing pavement tells its own story. A thorough condition survey should document every distress type and severity level across the site:
- Alligator cracking indicates structural failure in the base or subgrade, requiring full-depth removal.
- Longitudinal cracking along joints or lane edges suggests movement at seams or inadequate edge support.
- Rutting or depressions reveal compaction failures or subgrade settlement beneath the surface.
- Spalling or joint deterioration on concrete sections signals freeze-thaw damage or poor original mix design.
- Standing water or staining patterns expose drainage deficiencies that must be corrected before repaving.
Mapping these distresses onto a site plan creates a clear picture of reconstruction zones versus maintenance zones. This distinction is critical for sequencing because full-depth reconstruction areas demand longer subgrade preparation windows and heavier equipment, while overlay zones can often be completed in tighter timeframes with less disruption to adjacent tenant areas.
Drainage analysis deserves its own focused evaluation. Walk the site during or immediately after rainfall to observe where water collects, how it flows across pavement surfaces, and whether existing inlets function properly. Ponding areas indicate low spots or failed drainage infrastructure that must be corrected during the grading and subgrade phase, not discovered after fresh asphalt is placed. Slope measurements confirm whether existing grades direct water toward collection points or allow it to pool against building foundations and curb lines.
Traffic pattern analysis is equally essential. Peak traffic counts at every driveway, access drive, and parking aisle reveal which areas carry the heaviest vehicle and pedestrian loads, and at what times. This data directly determines phasing boundaries. Key elements to document include:
- Morning and evening peak vehicle volumes at each entrance and exit.
- Delivery truck routes, loading dock schedules, and turning radius requirements.
- Pedestrian paths between parking areas, building entries, and transit stops.
- Emergency vehicle access lanes and fire department connection locations.
- Tenant-specific demands like drive-through queuing lanes or after-hours access needs.
Overlaying traffic data with pavement condition data produces a sequencing priority map. Areas with the worst pavement distress and the lowest traffic volumes become logical first-phase candidates, because they offer the longest uninterrupted work windows with the least tenant impact. High-traffic zones are scheduled for phases that align with off-peak periods or weekend windows.
For projects involving right-of-way interfaces, the analysis must also document how site traffic merges with public street traffic. Driveway throat lengths, sight distance triangles, and pedestrian crossing patterns at the ROW boundary all influence where construction staging can occur without creating safety hazards or triggering additional DOTI requirements. Overlooking this step often results in mid-project redesigns of traffic control plans.
From a practical standpoint, this pre-construction analysis phase is the single most undervalued step in commercial paving projects. Property managers and owners often want to move directly into construction, but every week spent on thorough site analysis saves multiple weeks of rework and change orders during execution. The data gathered here feeds directly into the phasing plan, the ROW permit applications, and the tenant communication timeline that follow.
How Do You Coordinate With the City on Right-of-Way (ROW) Permits and Inspections Before Work Starts?
You coordinate with the city on right-of-way permits and inspections before work starts by submitting applications through Denver’s E-Permits system, attending required DOTI coordination meetings, and building permit review timelines into your project schedule. The steps below cover permit types, review timelines, coordination meetings, and traffic control requirements.
What ROW Permits Does Denver Require for Commercial Paving Projects?
Denver requires multiple ROW permits for commercial paving projects that interface with public streets, alleys, or sidewalks. The Department of Transportation and Infrastructure (DOTI) mandates that a Street Occupancy Permit is always required in addition to a Street Cut or Construction Permit when any portion of the public right-of-way is occupied. All applications are submitted through the Denver E-Permits system.
Failing to secure both permits before mobilizing equipment is one of the most common causes of project shutdowns. Contractors should treat permit acquisition as the first critical-path item in any ROW-adjacent scope.
How Long Should You Allow for Permit Review and Approval Timelines?
You should allow 14 to 20 weeks for permit review and approval timelines on commercial projects in Denver. According to Terrapin Construction Group’s 2026 Denver commercial construction cost analysis, projects located in historic overlay zones or areas requiring special review can see timelines extend up to 24 weeks.
These durations mean permit applications must be filed months before the target construction window. For phased paving projects with weather-sensitive materials, a late permit approval can push work into unfavorable temperature conditions and force costly schedule adjustments.
What Coordination Meetings and Traffic Control Plans Does DOTI Require?
DOTI requires mandatory coordination meetings and approved traffic control plans for all ROW work on commercial paving projects. Projects in high-density areas must attend bi-weekly downtown coordination meetings or bi-monthly Cherry Creek North coordination meetings, depending on location.
Traffic control plans must be submitted and approved before any work begins. Additionally, all patches within the ROW must be marked with Street Cut Pavement Repair Markers to ensure long-term accountability. These requirements reinforce why early DOTI engagement, ideally during the design phase, prevents delays once crews are ready to mobilize.
With permits and inspections mapped into the schedule, the next step is building a phasing plan that keeps tenants moving safely through every stage of construction.
How Do You Build a Phasing Plan That Maintains Tenant Access, Parking, and Life-Safety Paths?
You build a phasing plan that maintains tenant access, parking, and life-safety paths by dividing the project into sequential work zones, each sized to keep critical circulation routes open. The subsections below cover zone prioritization, ADA route continuity, and shared access coordination.
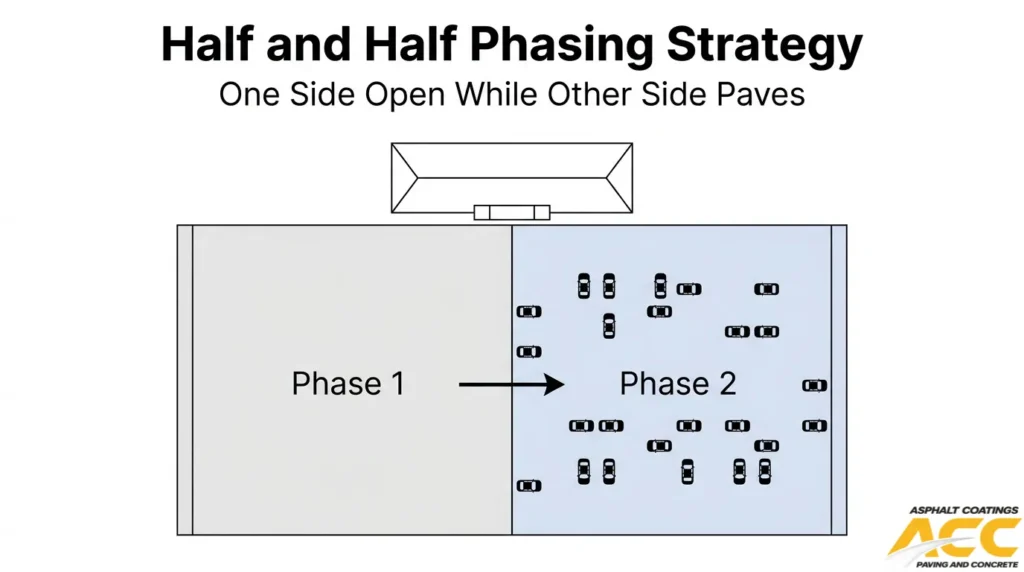
How Do You Prioritize Which Parking Areas, Drives, and Entrances Get Done First?
You prioritize parking areas, drives, and entrances by starting with zones farthest from primary building entries and working inward. Closing an entire parking lot simultaneously is highly disruptive and generally avoided on active commercial sites.
Industry best practices recommend phased paving, which breaks the project into manageable sections. Common prioritization strategies include:
- Half-and-half approach: One side of the lot is paved while the other remains open for tenant use.
- Front-to-back sequencing: Stalls farthest from entrances are completed first, keeping close-in parking available throughout the project.
Temporary parking solutions, such as overflow sections or off-site lots, must be clearly communicated before work begins. A multi-tiered notice cadence is essential: notifications should go out three to four weeks prior, one week prior, 24 to 48 hours prior, and again via day-of signage. For apartment complexes, move-in and move-out logistics require specific planning so accessible parking remains compliant at every stage.
How Can You Maintain ADA-Accessible Routes While Rotating Work Zones?
You maintain ADA-accessible routes while rotating work zones by designating compliant pedestrian paths before each phase begins and verifying that no construction activity blocks them. The Manual on Uniform Traffic Control Devices (MUTCD) Part 6 requires that pedestrians with disabilities have access through Temporary Traffic Control zones via an ADA-accessible path or an approved detour.
Key compliance requirements for each active work zone include:
- Curb ramps must retain detectable warning surfaces spanning the full ramp width.
- Cross slopes on accessible routes must remain within regulated limits, and running grades must meet standards for street and highway rights-of-way.
- Traffic control devices must not intrude into usable sidewalk width.
Healthcare facilities demand the strictest protocols. Contractors must maintain over 50 percent of parking availability at all times, and dedicated ambulance lanes with marked entry points must stay unobstructed. Ambulance providers should be notified of construction timelines and alternate routes well in advance. Overlooking emergency access during zone rotation is one of the costliest mistakes a contractor can make on a 24/7 facility.
How Do You Handle Shared Access Drives and Cross-Access Easements With Neighboring Properties?
You handle shared access drives and cross-access easements by reviewing recorded easement agreements before scheduling any work that affects jointly used pavement. These legal documents define maintenance responsibilities, permitted closures, and required notice periods for each party.
Coordination with neighboring property owners or managers should begin during preconstruction. Phasing plans must keep shared drives passable during every work zone rotation, since blocking cross-access can disrupt neighboring businesses and trigger legal disputes. Temporary signage and traffic control at shared entry points help direct both tenant populations safely.
When easement language is ambiguous about construction protocols, getting written consent from the adjacent property owner before mobilization eliminates costly mid-project conflicts and keeps the schedule on track.
How Should You Sequence Concrete and Asphalt Work Relative to Each Other on a Typical Commercial Site?
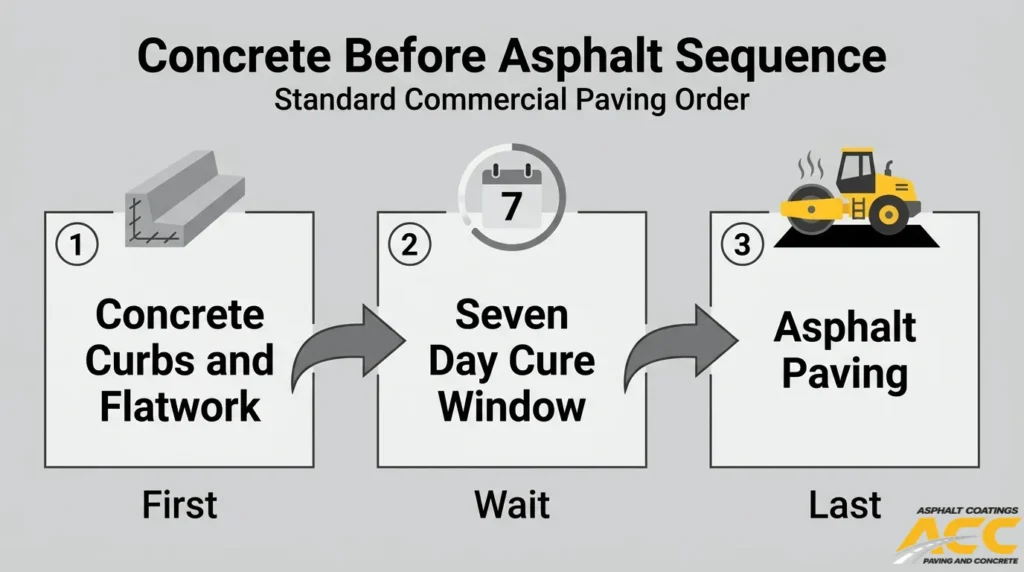
You should sequence concrete work before asphalt paving on most commercial sites. Concrete curbs, gutters, and flatwork establish the grade and containment edges that asphalt needs for proper compaction and drainage. The subsections below cover scheduling concrete first, phasing interface areas, and sequencing demolition and grading tasks.
When Should You Schedule Concrete Flatwork, Curbs, and Gutters Before Asphalt Paving?
You should schedule concrete flatwork, curbs, and gutters before asphalt paving in nearly every phased commercial project. Curbs and gutters define the pavement edge, establish drainage flow lines, and create the rigid boundary against which asphalt is compacted. Without these elements in place, rollers cannot achieve uniform density at pavement edges, and surface water has no defined path to inlets.
Concrete flatwork at building entries and loading docks also needs to cure and reach design strength before heavy paving equipment crosses it. For most commercial projects, this means placing concrete a minimum of seven days before asphalt operations begin in the same zone. Sequencing concrete first eliminates rework and prevents edge failures that compromise the finished surface.
How Do You Phase Work When Concrete Ramps, Sidewalks, and Crosswalks Interface With Asphalt Drives?
You phase work at interface areas by completing concrete ramps, sidewalks, and crosswalks in advance of adjacent asphalt paving, then matching asphalt grades to the finished concrete elevation. Denver’s Department of Transportation and Infrastructure (DOTI) requires specific permits through the E-Permits system for any work affecting the public right-of-way, including a Street Occupancy Permit in addition to a Street Cut or Construction Permit.
These permit requirements often dictate phasing order. Concrete ramps and crosswalks in the ROW must pass city inspection before asphalt tie-ins can proceed. Staging interface work in this sequence prevents grade mismatches and avoids costly permit violations that stall the entire project.
How Do You Sequence Sawcutting, Removal, Grading, and Proof-Rolling Between Concrete and Asphalt Areas?
You sequence sawcutting, removal, grading, and proof-rolling by working outward from concrete sections toward asphalt zones in a controlled progression:
- Sawcut clean joints at the boundary between existing concrete and areas designated for asphalt.
- Remove deteriorated pavement and haul debris before grading equipment enters the zone.
- Grade the exposed subgrade to design elevation, ensuring proper cross-slope for drainage toward inlets.
- Proof-roll the subgrade with a loaded tandem truck to identify soft spots that need correction before base placement.
Completing proof-rolling before any new material is placed prevents trapped failures beneath the finished surface. This sequence ensures that concrete edges remain undamaged and that asphalt base courses bond cleanly against cured concrete joints.
With material sequencing established, the next step is coordinating right-of-way work that changes the ideal construction order.
How Does the Right-of-Way (ROW) Portion of the Project Change the Ideal Construction Sequence?
The ROW portion of the project changes the ideal construction sequence by introducing public agency oversight, stricter accessibility mandates, and detour requirements that do not apply to private on-site work. Key differences include phasing constraints, pedestrian safety obligations, and utility coordination.
How Should You Phase Work Differently for On-Site Parking Lots Versus ROW Sidewalks and Curb Ramps?
You should phase work differently for on-site parking lots versus ROW sidewalks and curb ramps because each zone operates under distinct regulatory frameworks and finishing requirements. On-site parking lots allow flexible half-and-half phasing controlled by property management, while ROW sidewalks and curb ramps require city permits, public pedestrian detours, and compliance with PROWAG standards before any closure.
Striping sequencing also differs significantly. Standard traffic paint requires application temperatures between 50°F and 95°F, while thermoplastic markings used for crosswalks and stop bars in the ROW require application temperatures of 400°F to 450°F. Faded or confusing pavement markings create safety hazards, making high-visibility striping especially critical in high-stress environments like hospital parking lots. For ROW work, completing concrete curb ramps and sidewalks before scheduling thermoplastic crosswalk markings prevents rework and keeps the public pedestrian network intact.
How Do You Maintain Pedestrian and Vehicle Detours Safely in the ROW During Construction?
You maintain pedestrian and vehicle detours safely in the ROW during construction by providing temporary accessible routes that meet federal ADA standards and local noise regulations throughout every phase. The ADA Standards and PROWAG mandate that accessible pedestrian routes maintain a minimum continuous width of 4 feet, with no exceptions for temporarily reducing the Pedestrian Access Route within the right-of-way.
The MUTCD Part 6 requires that pedestrians with disabilities have access through Temporary Traffic Control zones via an ADA-accessible path or approved detour. Traffic control devices must not intrude into usable sidewalk width. Denver’s 2025 updated noise ordinance adds another scheduling layer: construction noise is permitted only from 7:00 a.m. to 9:00 p.m. on weekdays and 8:00 a.m. to 5:00 p.m. on weekends. Coordinating detour installations within these permitted hours prevents violations while keeping public routes safe.
How Do Utility Adjustments, Tie-Ins, and City Inspections in the ROW Affect Your Schedule?
Utility adjustments, tie-ins, and city inspections in the ROW affect your schedule by introducing dependencies that are outside the contractor’s direct control. Utility relocations or adjustments for water, gas, or electrical lines must be completed and inspected before new concrete or asphalt can be placed in the disturbed area. Each utility provider operates on its own timeline, and coordination failures can idle an entire crew.
City inspections add sequential hold points. Denver DOTI requires inspection approval at specific stages before work can proceed, and all patches in the ROW must be marked with Street Cut Pavement Repair Markers for accountability. Building these inspection windows into the schedule as fixed milestones, rather than treating them as flexible, prevents cascading delays across both ROW and on-site phases.
Understanding ROW scheduling constraints positions your team to manage the broader challenge of adapting sequences for different property types.
How Should You Adapt Your Sequence for Different Commercial Property Types With Active Tenants?
You should adapt your sequence by aligning phase timing, work zones, and access priorities to each property’s unique operational rhythm. Shopping centers require daytime parking preservation, apartment communities need overnight coordination, and healthcare sites demand uninterrupted emergency access.
How Do You Phase Work on Shopping Centers and Retail Pads With Peak-Hour Parking Demands?
You phase work on shopping centers and retail pads by scheduling heavy construction during off-peak hours and keeping high-traffic stalls open during business operations. According to The Pavement Group, phased paving that breaks projects into manageable sections minimizes disruption while keeping storefronts accessible to customers.
Effective retail phasing follows these priorities:
- Schedule milling, paving, and concrete removal for early morning hours before stores open.
- Keep entrance drives and fire lanes fully operational during peak shopping periods, typically 10 a.m. to 7 p.m.
- Use front-to-back sequencing so close-in parking near anchor tenants stays available longest.
- Coordinate phase transitions with tenant lease requirements that may guarantee minimum parking counts.
For multi-tenant retail pads with shared parking, each phase should preserve direct access to every occupied storefront. Losing even one business day of customer access can create liability disputes that far exceed the cost of a more conservative phasing plan.
How Do You Sequence Work at Apartment Communities Where Residents Park Overnight?
You sequence work at apartment communities by shifting primary operations to daytime hours when most residents are away and providing clearly communicated temporary parking during each phase. Overnight parking creates a constraint that retail and office sites do not share: the lot is fullest precisely when residents are home and least tolerant of noise.
Key sequencing considerations include:
- Issue parking relocation notices 48 hours before each phase, with building-specific maps showing temporary assigned areas.
- Begin milling and paving after morning departure, targeting completion before evening return.
- Maintain accessible parking spaces and at least one compliant path of travel to every occupied building throughout each phase.
- Coordinate around move-in and move-out schedules, which spike at month-end and can block drives with moving trucks.
Resident communication matters more here than on any other property type. A multi-tiered notice cadence, starting three to four weeks before mobilization and reinforced at one-week and 24-hour intervals, significantly reduces complaints and after-hours confrontations with crew members.
How Do You Plan and Phase Around Critical Operations at Healthcare and Medical Office Sites?
You plan and phase around critical operations at healthcare and medical office sites by maintaining continuous emergency vehicle access and preserving over 50 percent of parking availability at all times. Healthcare facilities operate around the clock, so there is no true off-peak window comparable to retail or residential properties.
Critical phasing requirements for these sites include:
- Keep dedicated ambulance lanes and marked emergency department entry points completely unobstructed during every phase.
- Notify ambulance providers of construction timelines and alternate routing well in advance of mobilization.
- Preserve ADA-accessible paths connecting parking areas to building entrances without interruption, since patients with mobility limitations cannot navigate detours through active construction zones.
- Coordinate phase transitions with facility administrators to avoid conflicts with high-census periods or scheduled surgical blocks.
Healthcare paving projects are the most operationally sensitive commercial work a contractor can take on. Phasing plans that look efficient on paper often fail in practice if they do not account for the unpredictable nature of emergency operations, so building generous float into each phase transition is essential.
Understanding how each property type drives your phasing strategy sets the stage for managing the day-to-day tenant interactions those phases create.
How Do You Work Around Active Tenants While Minimizing Complaints, Safety Risks, and Disruptions?
You work around active tenants by combining clear communication protocols, physical traffic controls, and schedule adjustments tailored to each site’s operations. The following subsections cover notification strategies, on-site safety measures, and working-hour flexibility.
How Should You Communicate Phasing, Access Changes, and Noise Windows to Property Managers and Tenants?
You should communicate phasing, access changes, and noise windows through a multi-tiered notice cadence that starts well before mobilization. Effective tenant coordination follows a structured timeline:
- Issue written project overviews to property managers three to four weeks before work begins.
- Send detailed phase maps showing affected parking areas and alternate routes one week prior.
- Deliver unit-specific or suite-specific notices 24 to 48 hours before each phase shift.
- Post day-of signage at every affected entrance, exit, and pedestrian path.
Each notice should specify the exact hours when noise-producing activities will occur, which access points remain open, and where temporary parking is available. Property managers serve as the primary communication relay, so providing them with a single-page phase summary they can distribute saves time and reduces conflicting information. In my experience, projects that skip the one-week notice almost always generate the most tenant complaints, because people need that lead time to adjust routines and parking habits.
How Do You Use Signage, Flaggers, and Barricades to Direct Traffic Safely During Each Phase?
You use signage, flaggers, and barricades by deploying a layered traffic control system that adapts as work zones rotate through each phase. Advance warning signs should be placed at property entry points before drivers commit to a lane or turn. Channelizing barricades then define the boundary between active work zones and open traffic lanes, keeping vehicles and pedestrians separated from equipment and fresh pavement.
Flaggers are essential at transition points where vehicles cross active haul routes or where sight lines are obstructed by equipment. Pedestrian detour signs must guide foot traffic along routes that maintain a clear, firm walking surface. Every element should be repositioned at the start of each new phase to match the updated site plan. Treating traffic control as a daily setup task, not a one-time installation, is what separates safe sites from liability-prone ones.
How Can You Adjust Working Hours, Weekend Work, and Night Work on Busy Commercial Sites?
You can adjust working hours, weekend work, and night work by aligning your production schedule with both tenant activity patterns and Denver’s noise ordinance. Denver permits weekend construction from 8:00 a.m. to 5:00 p.m., with any “plainly audible” construction noise prohibited from 5:00 p.m. to 8:00 a.m. on weekends. This “plainly audible” standard, which replaced previous decibel-based limits, makes enforcement more stringent near active tenant areas.
Weekend and early-morning shifts work well for retail centers and medical offices where weekday disruption costs are highest. However, off-hours work carries cost implications; winter construction alone adds $1.50 to $3.50 per square foot on slab work, according to Denver Public Works data, and night shifts compound labor premiums further. Balancing tenant convenience against budget requires honest conversations with property managers about which phases genuinely need off-peak scheduling and which can proceed during standard hours.
With disruption controls established, the next step is aligning your sequence to Denver’s weather and temperature windows.
How Do You Schedule Around Denver Weather, Freeze–Thaw Cycles, and Temperature Windows for Asphalt and Concrete?
You schedule around Denver weather by aligning concrete placement with cold-weather protection thresholds and asphalt paving with CDOT minimum temperature specifications. The subsections below cover concrete timing, asphalt temperature constraints, and building weather contingencies into the schedule.
How Should You Time Concrete Placement and Curing for Reliable Performance in Denver’s Climate?
You should time concrete placement and curing to avoid freeze-thaw exposure before the mix reaches adequate compressive strength. According to ACI 306R-16 and the National Ready Mixed Concrete Association, cold weather concreting applies whenever temperatures fall below 40°F for three or more consecutive days. Concrete must be protected from freezing until it reaches at least 500 psi, which typically requires about 48 hours at 50°F.
A 20°F drop in temperature approximately doubles the setting time, so late-fall and early-spring pours demand careful monitoring. Before any exposure to freeze-thaw cycles, the concrete must be air-entrained and must reach 3,500 psi. For Denver commercial sites, this means scheduling concrete flatwork and curb pours during sustained warm windows or budgeting for heated enclosures and insulated blankets when winter placement is unavoidable.
How Do You Plan Asphalt Paving, Striping, and Sealcoating Around Temperature and Weather Constraints?
You plan asphalt paving, striping, and sealcoating by matching each activity to its minimum temperature threshold. The CDOT 2023 Standard Specifications set clear air and surface temperature minimums based on asphalt layer thickness:
- Top layer under 1.5 inches requires a minimum of 60°F.
- Top layer between 1.5 and 3 inches requires a minimum of 50°F.
- Top layer over 3 inches requires a minimum of 45°F.
Thicker lifts retain heat longer, which is why they carry lower minimums. Sealcoating and striping share similar temperature sensitivity; standard traffic paint needs at least 50°F for proper adhesion and drying. In practice, scheduling thin overlays and finish coats for late spring through early fall provides the widest margin of safety against sudden temperature drops common on the Front Range.
How Do You Build Weather Contingencies and Float Into the Project Schedule?
You build weather contingencies and float into the project schedule by adding buffer days at each phase transition that depends on temperature compliance. Denver’s spring and fall weather can swing 30°F or more within a single day, so rigid schedules without float risk costly mobilization cancellations.
Effective contingency planning includes:
- Adding two to three float days before every temperature-sensitive activity, such as concrete pours and thin asphalt lifts.
- Sequencing weather-independent tasks (sawcutting, removal, subgrade grading) as alternates that crews can execute during cold snaps.
- Monitoring seven-day forecasts and setting go/no-go decision points 48 hours before each scheduled pour or pave.
This approach keeps crews productive even when conditions shift, which is especially important on active-tenant sites where extended downtime compounds disruption and cost.
With weather windows defined, the next step is sequencing critical-path activities like drainage, subgrade prep, and base installation.
How Should You Sequence Critical Path Activities Like Drainage, Subgrade Prep, and Base Installation?
You should sequence critical path activities by completing drainage first, then subgrade preparation, and finally base installation. Each layer depends on the one beneath it, so the order below covers drainage improvements, subgrade and base phasing for concrete versus asphalt, and the integration of finishing treatments.
In What Order Should You Address Drainage Improvements, Inlets, and Slopes?
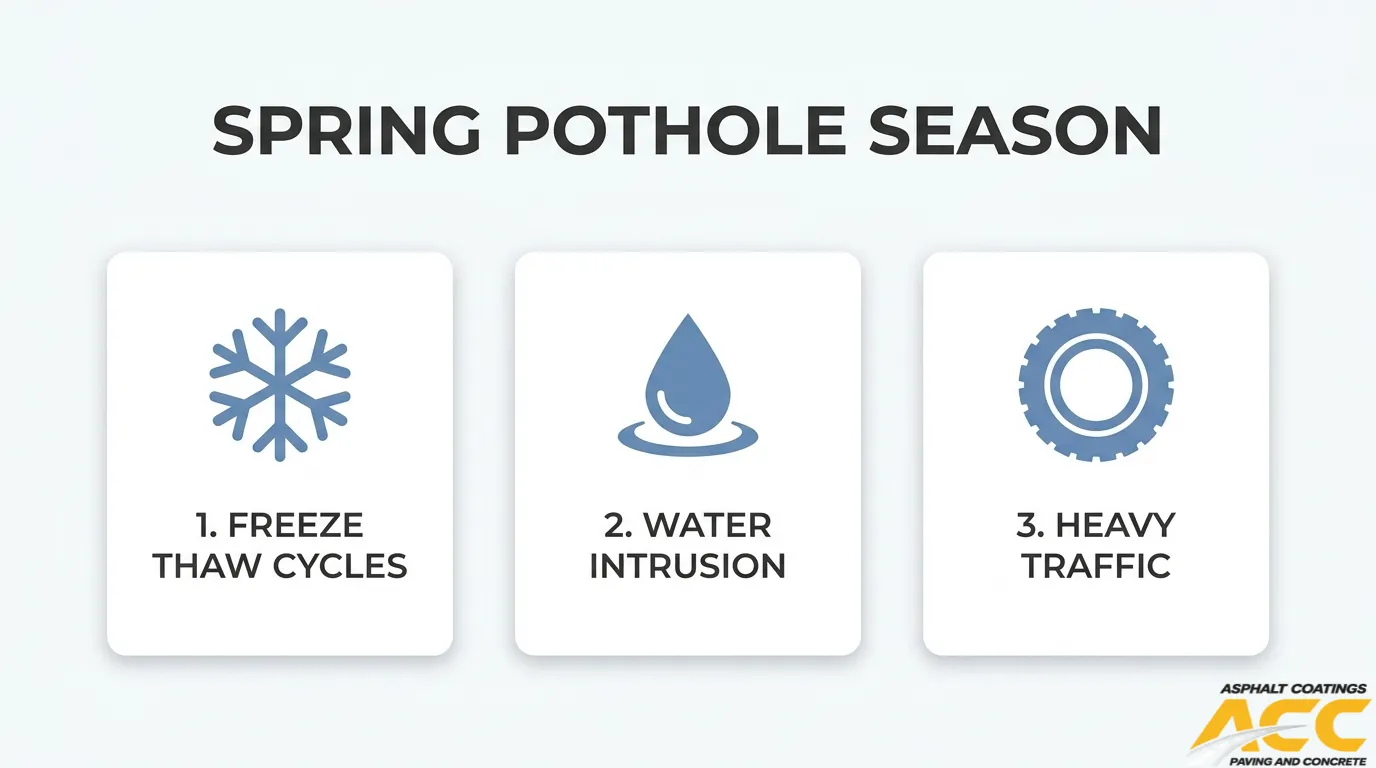
You should address drainage improvements, inlets, and slopes before any subgrade or base work begins. Drainage is the first structural activity on the critical path because water infiltration undermines every layer above it. A well-drained subgrade mitigates freeze-thaw damage and loss of bearing capacity, making it the prerequisite for stable compaction.
The correct sequence is:
- Install or repair storm drain lines and underground piping.
- Set inlet structures and catch basins to final grade.
- Establish positive drainage slopes across the subgrade surface.
- Verify water flows to collection points before compaction begins.
Skipping ahead to subgrade prep before drainage is resolved is one of the most common scheduling mistakes on commercial sites. Trapped moisture will compromise compaction results regardless of how well the soil is prepared.
How Do You Phase Subgrade Stabilization and Aggregate Base Placement Under Concrete Versus Asphalt?
You phase subgrade stabilization and aggregate base placement differently under concrete versus asphalt because each surface type has distinct structural and temperature requirements. According to the American Concrete Pavement Association, subgrade soil must be compacted to at least 95% of maximum laboratory density in the top six inches, with fill areas below that reaching a minimum of 90%.
When in-situ soils provide inadequate support, stabilization with lime suits highly plastic soils, while cement stabilization works for less plastic soils. Base courses above the subgrade require the same rigorous compaction and elevation tolerances.
The key phasing distinction: concrete areas need subgrade and base completed well ahead of placement because concrete curing is temperature-sensitive. Asphalt areas offer slightly more scheduling flexibility, though CDOT 2023 Standard Specifications still mandate minimum surface temperatures of 60°F for lifts under 1.5 inches. For most Denver commercial projects, completing concrete subgrade zones first gives the schedule the most float.
When Should You Integrate Crack Sealing, Sealcoating, and Striping Into the Overall Sequence?
You should integrate crack sealing, sealcoating, and striping after all structural paving and curing is complete. These finishing treatments require specific temperature windows and cure times that make them the final critical path activities.
Crack sealing requires a minimum pavement temperature of 40°F and performs best in spring or fall when cracks are moderately open. According to AsphaltPro’s crack sealing best practices guide, if an overlay is planned, the crack seal must cure for at least two weeks before the new surface is applied to ensure proper adhesion and prevent tracking.
The correct finishing sequence is:
- Crack sealing on existing or new pavement surfaces.
- Sealcoating after crack seal has fully cured.
- Striping and pavement markings as the final activity.
Each step depends on the previous one being fully cured, so compressing this sequence invites adhesion failures. Building these cure windows into the schedule from the start prevents last-minute delays that disrupt tenant access.
With drainage, subgrade, base, and finishing treatments properly sequenced, maintaining ADA compliance across every phase becomes the next scheduling priority.
How Do You Maintain ADA Compliance at Every Stage of a Phased Asphalt and Concrete Project?
You maintain ADA compliance at every stage of a phased asphalt and concrete project by sequencing temporary accessible routes before demolition begins, coordinating curb ramp and detectable warning installations with ROW work, and verifying slope tolerances at each phase transition. The following subsections cover parking and path sequencing, curb ramp coordination, and slope verification.
How Should You Sequence Temporary and Permanent ADA Parking, Paths, and Ramps?
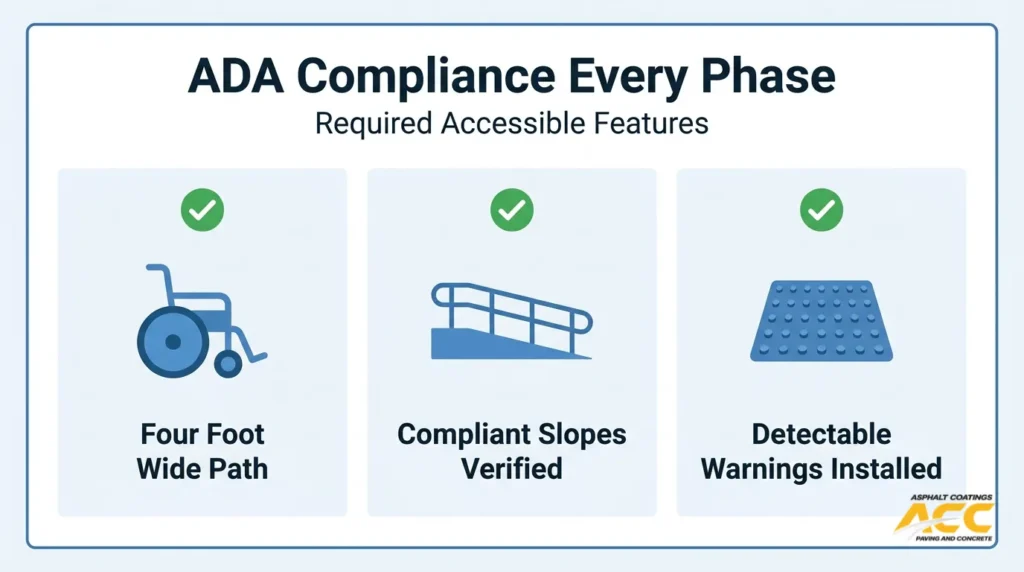
You should sequence temporary and permanent ADA parking, paths, and ramps by establishing compliant temporary routes and designated accessible stalls before removing any existing accessible features. The ADA requires that accessible pedestrian routes maintain a minimum continuous width of 4 feet at all times, with no exceptions for active construction zones.
Effective sequencing follows this order:
- Install temporary ADA-compliant parking stalls, signage, and access routes in unaffected areas.
- Demolish and reconstruct permanent ADA features in the active work zone.
- Verify that temporary paths meet cross-slope and running grade requirements before opening them to pedestrian traffic.
- Transition users to permanent ADA features only after final inspection confirms compliance.
Skipping step one, even briefly, exposes property owners to first-offense penalties of up to $75,000 per the U.S. Department of Justice. For most commercial sites, the safest approach is treating ADA route continuity as the single non-negotiable constraint that dictates phasing order.
How Do You Coordinate the Installation of ADA Curb Ramps and Detectable Warnings in the ROW?
You coordinate the installation of ADA curb ramps and detectable warnings in the ROW by aligning concrete pour schedules with ROW permit windows and city inspection milestones. Curb ramps must include detectable warning surfaces that extend a minimum of 2 feet in the direction of travel and span the full width of the ramp.
Key coordination steps include:
- Scheduling curb ramp concrete pours before adjacent asphalt paving so finished ramp elevations set the grade reference.
- Embedding detectable warning panels during the pour rather than retrofitting, which ensures full bond and correct depth.
- Requesting DOTI inspection of each completed ramp before proceeding to the next phase of adjacent work.
Traffic control devices must not intrude into the usable sidewalk width during installation. When phasing prevents simultaneous completion of opposing ramps at an intersection, a temporary ADA-accessible detour route is required until both sides are finished.
How Can You Verify Slopes, Cross-Slopes, and Landing Areas as You Move From Phase to Phase?
You can verify slopes, cross-slopes, and landing areas as you move from phase to phase by performing digital level and smart-level checks at every transition point before opening each section. The maximum allowable cross-slope on accessible routes is 2%, and the maximum running grade within street and highway ROW is 5%.
Because typical phase durations run 24 to 48 hours per section, verification must happen quickly. A practical verification workflow includes:
- Checking cross-slope at 10-foot intervals along every accessible path using a calibrated digital level.
- Measuring landing areas at the top and bottom of each ramp for both slope and minimum clear dimensions.
- Documenting readings with timestamped photos before barricades are removed.
Phase-to-phase joints deserve particular attention; differential settlement or elevation mismatches at construction joints can push cross-slopes out of tolerance. Catching a 0.5% deviation during a 48-hour phase window is far less costly than tearing out and replacing cured concrete after final striping.
With ADA tolerances verified at each phase transition, the next consideration is how budget constraints and multi-year planning affect your overall sequencing strategy.
How Do Budget, Occupancy Constraints, and Multi-Year Phasing Influence Your Sequencing Strategy?
Budget, occupancy constraints, and multi-year phasing influence your sequencing strategy by forcing you to balance financial limits, tenant access needs, and construction timelines across multiple seasons. The sections below cover fiscal-year phasing, parking revenue protection, and prioritization of deteriorated areas over cosmetic work.
How Can You Phase Work Over Multiple Fiscal Years Without Creating Long-Term Safety Hazards?
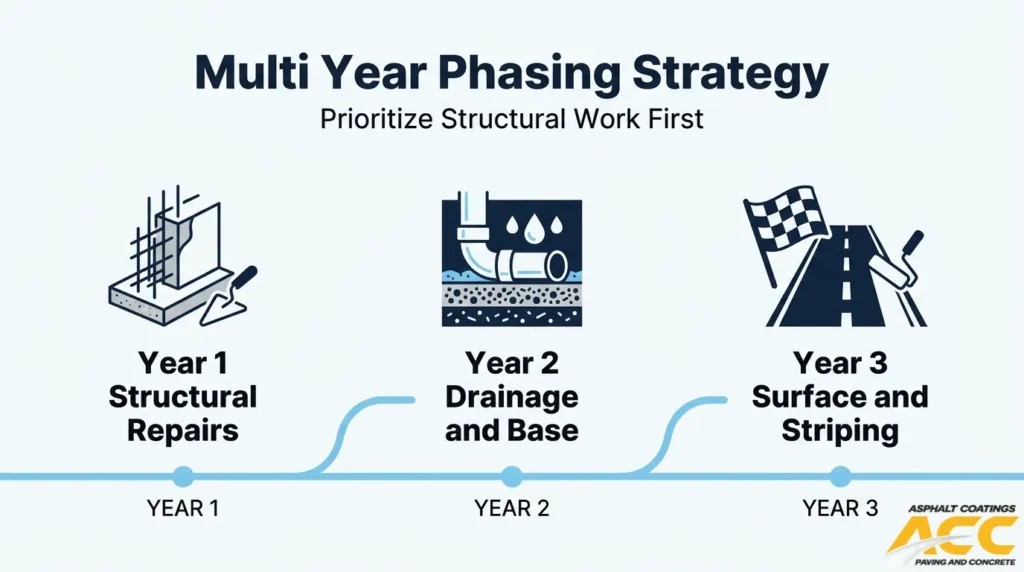
You can phase work over multiple fiscal years without creating long-term safety hazards by completing structurally critical repairs first and leaving cosmetic treatments for later budget cycles. Each fiscal year should conclude with the work zone in a safe, trafficable condition. Temporary transitions between old and new pavement need proper grade matching to prevent trip hazards and ponding water.
Key practices for safe multi-year phasing include:
- Completing full-depth repairs and subgrade corrections in year one so structural failures do not worsen between budget cycles.
- Installing permanent drainage improvements early, since deferred drainage accelerates deterioration of every adjacent surface.
- Applying interim crack sealing and patching to areas scheduled for future phases to slow moisture infiltration during the gap period.
- Ensuring every phase boundary includes ADA-compliant transitions, temporary striping, and clear signage.
Leaving a partially completed project without proper interim stabilization is one of the most common mistakes in multi-year commercial paving. The cost of re-repairing neglected gap areas often exceeds what the deferred approach was meant to save.
How Do You Sequence Work to Keep Revenue-Generating Parking Stalls Available?
You sequence work to keep revenue-generating parking stalls available by using phased paving strategies that limit the number of stalls taken offline at any given time. Common industry approaches include the half-and-half method, where one side of the lot remains open while the other is paved, and front-to-back sequencing, which keeps close-in stalls near tenant entrances accessible during construction.
Effective stall-preservation sequencing follows these priorities:
- Schedule work on the lowest-demand sections first, typically rear or overflow areas.
- Coordinate phase timing with tenant lease calendars and seasonal revenue peaks.
- Limit each phase to 24 to 48 hours per section to minimize cumulative downtime.
- Communicate temporary parking alternatives, such as overflow lots or shared adjacent parcels, before each phase begins.
For retail and medical properties where every stall directly supports revenue, even a single poorly timed closure can damage tenant relationships and lease renewals.
How Should You Prioritize High-Risk Deteriorated Areas Versus Aesthetic Upgrades Within Budget Limits?
You should prioritize high-risk deteriorated areas over aesthetic upgrades within budget limits by addressing structural and safety failures first. Severely alligatored pavement, failing subgrade sections, and non-compliant ADA surfaces present liability exposure that cosmetic treatments like sealcoating and fresh striping cannot resolve.
A practical prioritization framework includes:
- Repair areas with active base failure, potholes deeper than two inches, or standing water that indicates drainage failure.
- Correct ADA deficiencies, including non-compliant slopes, missing detectable warnings, and damaged curb ramps.
- Address moderate surface distress through crack sealing and overlay to prevent escalation before the next budget cycle.
- Schedule aesthetic upgrades, such as sealcoating and restriping, only after structural and safety items are resolved.
This approach protects the property from costly emergency repairs and liability claims while stretching limited capital across multiple years. Aesthetic improvements deliver diminishing returns when applied over a structurally compromised base, so the sequencing order matters as much as the budget itself.
With budget and phasing priorities established, selecting the right contractor and delivery method determines how effectively these plans translate into executed work.
How Should You Choose a Contractor and Delivery Method for Complex Phased Asphalt and Concrete Work?
You should choose a contractor and delivery method based on verified phasing experience, crew control, and preconstruction planning. The subsections below cover what to ask candidates, how crew structure affects scheduling, and why mock-up phases prevent costly sequencing errors.
What Should You Ask Potential Contractors About Experience With Active-Tenant and ROW Projects in Denver?
You should ask potential contractors about their direct experience managing active-tenant access plans, ROW permit coordination, and Denver-specific regulatory compliance. Key questions to include:
- How many phased commercial projects have you completed where tenants remained open during construction?
- Can you provide a sample traffic control plan for ROW work?
- Have you attended Denver DOTI coordination meetings for high-density area projects?
- How do you handle Street Cut Pavement Repair Marker requirements for ROW patches?
Denver DOTI requires bi-weekly downtown coordination meetings and bi-monthly Cherry Creek North coordination meetings for projects in high-density areas. A contractor unfamiliar with these mandatory sessions will fall behind on approvals before the first truck arrives.
How Do In-House Crews Versus Subcontracted Crews Affect Schedule Control and Sequencing?
In-house crews provide significantly greater schedule control and sequencing flexibility than subcontracted crews. When a single company controls its own labor, equipment, and foremen, phase transitions can happen within hours rather than days. Subcontracted crews introduce scheduling dependencies: if the concrete subcontractor runs late on another job, your asphalt overlay window closes.
The practical differences affect phased work directly:
- Accountability: In-house crews answer to one project manager who controls the full sequence.
- Mobilization speed: No rebooking or renegotiating when weather delays shift a phase by 48 hours.
- Trade coordination: Concrete, asphalt, and striping crews communicate internally instead of across separate companies.
For multi-trade projects combining concrete flatwork, asphalt paving, and striping, a single-source contractor with in-house capabilities eliminates the coordination gaps that derail tight phasing schedules.
How Can Preconstruction Meetings and Mock-Up Phases Reduce Sequencing Problems?
Preconstruction meetings and mock-up phases reduce sequencing problems by identifying conflicts, access bottlenecks, and material timing issues before mobilization. A structured preconstruction process should address:
- Phase-by-phase walkthrough with the property manager, confirming tenant access routes for each stage.
- Traffic control plan review aligned with ROW permit conditions.
- Material lead time verification for concrete, hot-mix asphalt, and striping materials.
Mock-up phases take this further. Completing one small, representative section first reveals real-world cure times, equipment access limitations, and tenant impact before scaling to the full site. Problems caught during a mock-up cost a fraction of what they cost mid-project. This approach is especially valuable on sites combining both asphalt and concrete with active tenants, where even minor sequencing miscalculations cascade into access failures and schedule overruns.
With contractor selection and delivery method determined, the final step is partnering with a team that integrates these capabilities into a cohesive phased plan.
How Should You Approach Sequencing Asphalt and Concrete Work on an Active Denver Site With Asphalt Coatings Company?
You should approach sequencing asphalt and concrete work on an active Denver site with Asphalt Coatings Company by leveraging integrated paving, concrete, and ADA services under one contractor to simplify phasing and ROW coordination.
How Can Asphalt Coatings Company’s Commercial Paving, Concrete Flatwork, and ADA Services Support a Phased Plan With ROW Constraints?
Asphalt Coatings Company’s commercial paving, concrete flatwork, and ADA services support a phased plan with ROW constraints by providing all critical trade disciplines through in-house crews rather than multiple subcontractors. This single-source structure eliminates scheduling gaps between concrete curb installation, asphalt paving, and ADA ramp construction, keeping each phase tightly sequenced. Asphalt Coatings Company has served Colorado’s Front Range since 1986, bringing 39 years of experience with Denver DOTI permitting, CDOT specifications, and Front Range freeze-thaw conditions. Services including subgrade preparation, crack sealing, sealcoating, and parking lot striping allow the full scope of work to stay under one project timeline. For properties with active tenants, this coordination reduces the number of mobilizations and handoff delays that commonly stall phased projects.
What Are the Key Takeaways About How to Sequence Asphalt and Concrete Work on a Denver Commercial Site With Active Tenants and ROW Constraints We Covered?
The key takeaways about how to sequence asphalt and concrete work on a Denver commercial site with active tenants and ROW constraints are:
- Start permitting early; according to Terrapin Construction Group, commercial building permit reviews in Denver currently average 14 to 20 weeks, and projects in historic overlay zones can extend to 24 weeks.
- Complete concrete curbs, gutters, and ADA ramps before asphalt paving to establish grade control and drainage paths.
- Phase parking areas so tenants always retain access, using half-and-half or front-to-back sequencing.
- Maintain ADA-accessible pedestrian routes through every active work zone with no exceptions.
- Schedule asphalt and concrete placement within CDOT and ACI temperature windows, building weather float into each phase.
- Coordinate ROW work with Denver DOTI inspection requirements and noise ordinance restrictions.
Proper sequencing protects both pavement quality and tenant operations; Asphalt Coatings Company can help you build that plan from the first permit application through final striping.