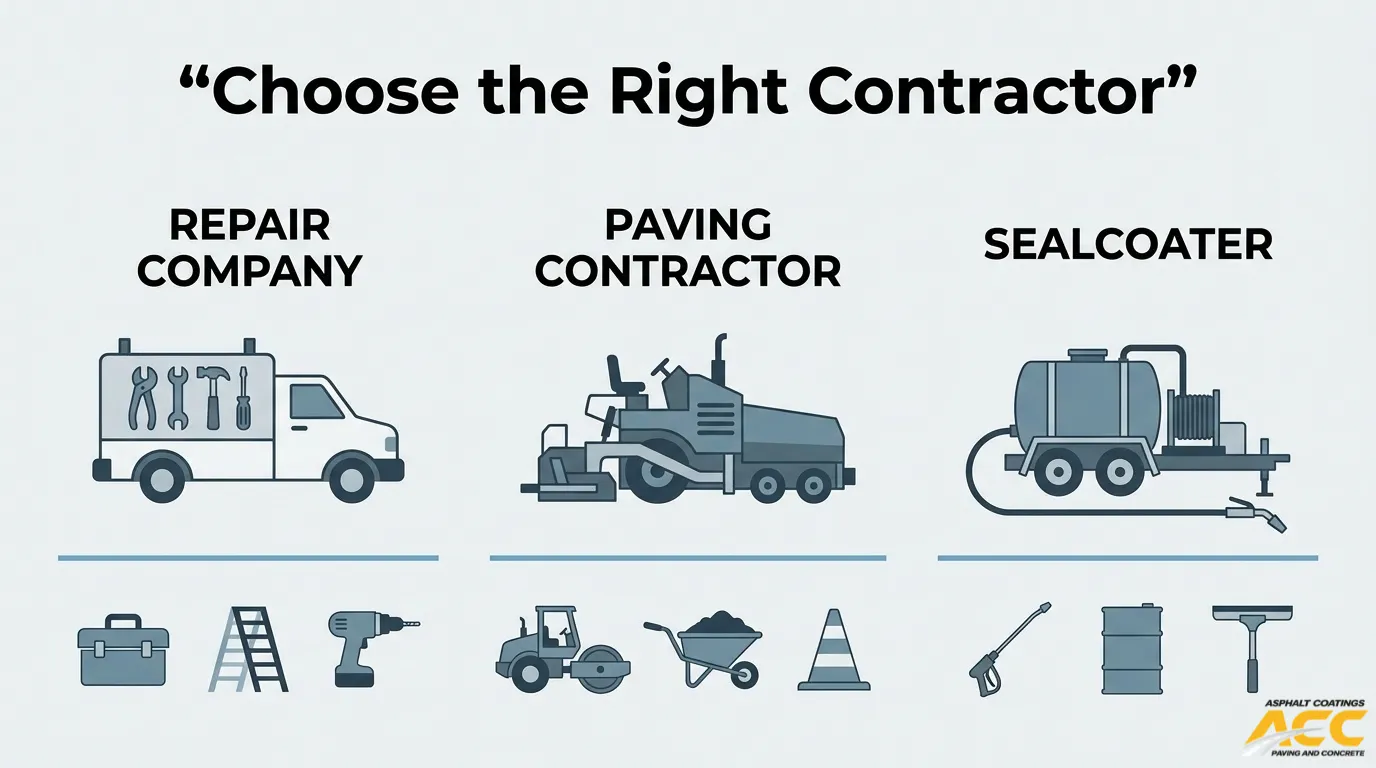
Commercial asphalt striping is the application of painted lines, symbols, and markings to parking lots, drive lanes, and loading areas on commercial properties. These markings direct traffic flow, define parking stalls, designate accessible spaces, and communicate safety zones.
This guide covers project planning and code compliance, surface preparation and pavement repair, marking types and material selection, the step-by-step application process, climate and durability factors, ongoing maintenance and budgeting, ADA and safety requirements, and choosing the right contractor.
Effective striping begins well before paint touches pavement. Planning involves evaluating lot layout, confirming ADA dimensions, fire lane clearances, and MUTCD color standards, then deciding whether to re-stripe the existing configuration or redesign it entirely.
Surface preparation requires removing oil spots, debris, and flaking paint, then repairing cracks and potholes so markings bond to a stable substrate. Pavement must be dry and at the correct temperature before application starts.
Marking types range from standard white stall lines and directional arrows to blue ADA symbols, red fire lane designations, and specialty stencils like numbered stalls or logos. Material options include waterborne and solvent-based traffic paints for routine use, with thermoplastic or epoxy providing multi-year durability in high-traffic areas.
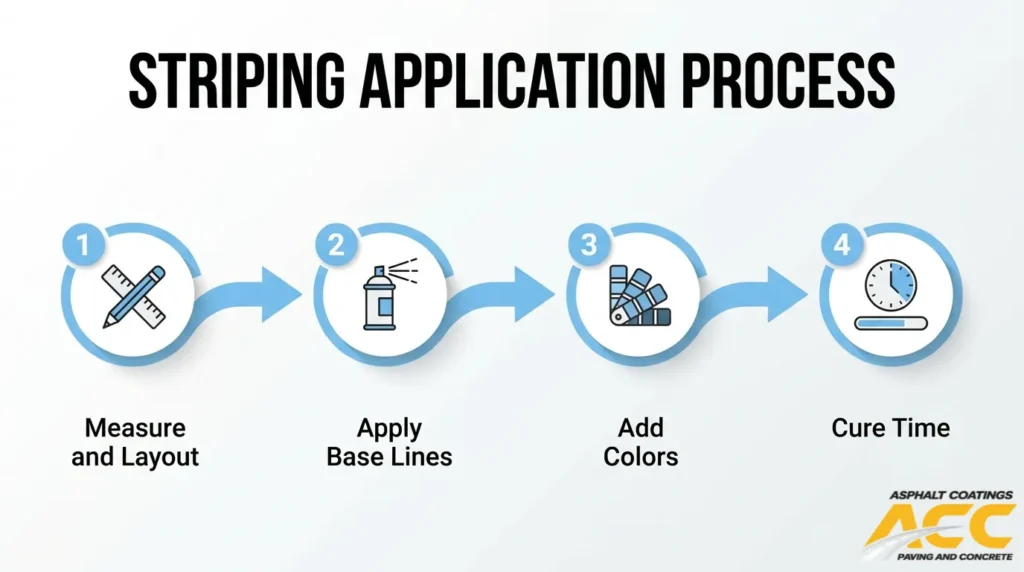
The application process follows a precise sequence: measuring and chalking the layout, spraying base lines and symbols with calibrated machines, sequencing multiple coats and colors, then allowing proper cure time before reopening the lot.
Climate conditions directly affect performance. Freeze-thaw cycles crack pavement beneath markings, snowplow blades scrape paint from surfaces, and UV exposure degrades binder resins. Adjusting materials and scheduling for local conditions extends marking life significantly.
Maintaining markings through routine inspections, coordinated re-striping alongside sealcoating, and multi-year budgeting keeps a property compliant and safe. Professional contractors bring equipment precision and code expertise that protect against costly ADA violations and liability exposure.
What Is Commercial Asphalt Striping And Why Does It Matter For Your Property?
Commercial asphalt striping is the process of applying painted lines, symbols, and markings to paved surfaces such as parking lots, drive lanes, and loading areas on commercial properties. These markings guide traffic flow, designate parking stalls, identify accessible spaces, and communicate safety zones. According to the Transportation Research Board (National Academies of Sciences, Engineering, and Medicine), each dollar spent on pavement striping yields $60 in benefits on average, with the benefit-cost ratio rising alongside traffic volume.
Properly applied striping serves several critical functions for commercial properties:
- Traffic safety: Clear lane markings, directional arrows, and stop bars reduce confusion and prevent collisions in busy lots.
- ADA and fire code compliance: Accessible parking spaces, access aisles, and fire lanes must meet precise dimensional and color standards set by federal and local authorities. Non-compliant markings expose property owners to civil penalties that can reach $75,000 for a first ADA violation under Title III.
- Liability reduction: Faded or missing markings create hazardous conditions that increase slip-and-fall claims, vehicle accidents, and legal exposure.
- Property value and curb appeal: Crisp, well-defined striping signals that a property is professionally maintained, which influences tenant retention and customer perception.
As the American Public Works Association states, “Pavement markings play one of the most important safety functions on our roads.” That principle applies equally to private commercial lots where pedestrians and vehicles share space daily. Without consistent, code-compliant markings, even a well-paved surface fails to protect occupants or meet regulatory expectations.
For property managers overseeing shopping centers, office parks, healthcare facilities, or industrial complexes, striping is not a cosmetic upgrade. It is a functional requirement that directly affects daily operations, legal standing, and long-term pavement management costs. The sections ahead break down how to plan, prepare, execute, and maintain a commercial striping project from start to finish.
How Should You Plan A Commercial Asphalt Striping & Marking Project?
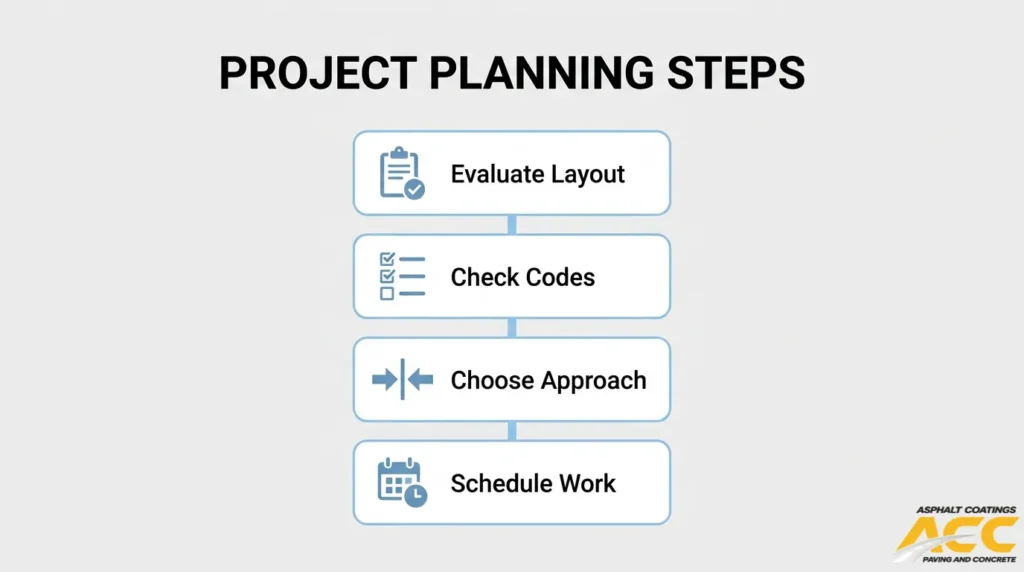
You should plan a commercial asphalt striping and marking project by evaluating your lot’s layout, confirming code compliance, choosing between re-striping or redesign, and scheduling strategically. The following subsections cover each planning phase.
How Do You Evaluate Your Parking Lot Layout, Traffic Flow, And Safety Needs?
You evaluate your parking lot layout, traffic flow, and safety needs by conducting a thorough site assessment before any striping begins. Walk the entire property and document current stall counts, drive aisle widths, pedestrian pathways, and entry/exit points.
Key elements to assess include:
- Total parking capacity versus actual demand during peak hours.
- Drive lane widths and one-way versus two-way traffic patterns.
- Pedestrian crosswalk placement relative to building entrances.
- Loading zones, dumpster pads, and delivery vehicle turning radii.
- Sight lines at intersections, corners, and blind spots.
Mapping these details first prevents costly mid-project changes. For properties with high truck traffic or complex circulation needs, even minor layout miscalculations can create bottlenecks that compromise both safety and daily operations.
What Local Codes, ADA Requirements, And Industry Standards Must Your Striping Plan Follow?
Your striping plan must follow local municipal zoning codes, ADA accessibility requirements, fire lane regulations, and MUTCD color and marking standards. These overlap, so compliance means satisfying all of them simultaneously.
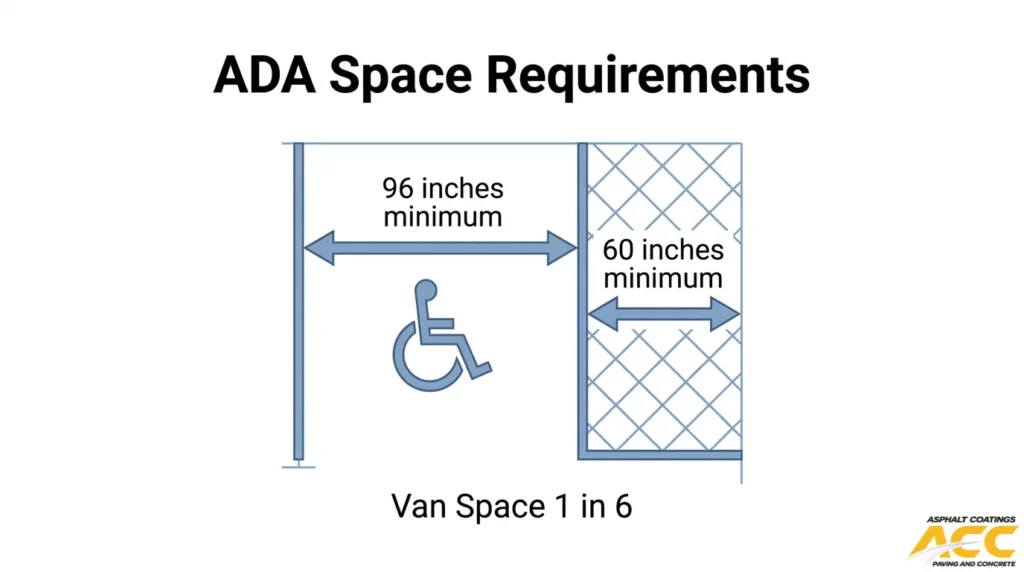
ADA standards require accessible spaces at least 96 inches wide with 60-inch access aisles, and at least one in every six accessible spaces must be van-sized. Fire codes typically mandate unobstructed access roads no less than 20 feet wide. The MUTCD governs marking colors: yellow, white, red, blue, and purple are standard. Local jurisdictions may add their own requirements for stall dimensions, signage height, or curb painting. Skipping any layer of compliance risks fines, liability claims, or forced re-work. Verifying all applicable codes before layout begins is the single most cost-effective step in the planning process.
How Do You Decide Between Re-Striping An Existing Layout And Redesigning It?
You decide between re-striping an existing layout and redesigning it by comparing your current configuration against updated codes, actual usage patterns, and any changes to the property.
Re-striping the existing layout makes sense when:
- Current stall dimensions and ADA spaces already meet code.
- Traffic flow works well with no recurring congestion or accidents.
- The pavement surface is in good condition with no major repairs planned.
Redesigning the layout is warranted when:
- Building use has changed, altering parking demand or vehicle types.
- ADA requirements have been updated since the last striping.
- Recurring traffic conflicts, pedestrian safety issues, or capacity shortfalls exist.
- Upcoming sealcoating or overlay work will erase all existing markings anyway.
A redesign costs more upfront but often increases usable spaces, improves flow, and eliminates compliance gaps in a single project.
When Is The Best Time To Schedule Striping To Minimize Disruption?
The best time to schedule striping to minimize disruption is during low-traffic periods, ideally aligning with your broader pavement maintenance calendar. Weekends, holidays, and off-peak business hours reduce the impact on tenants and customers.
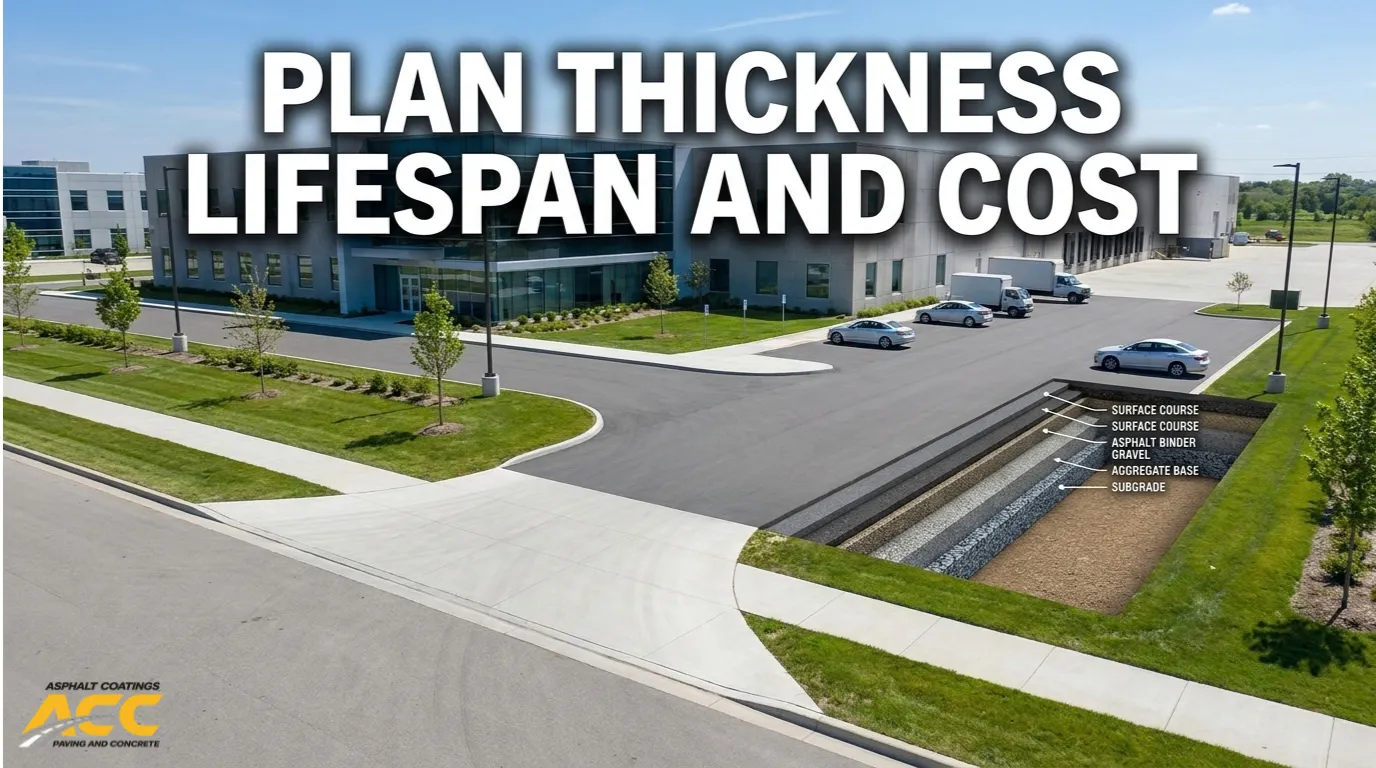
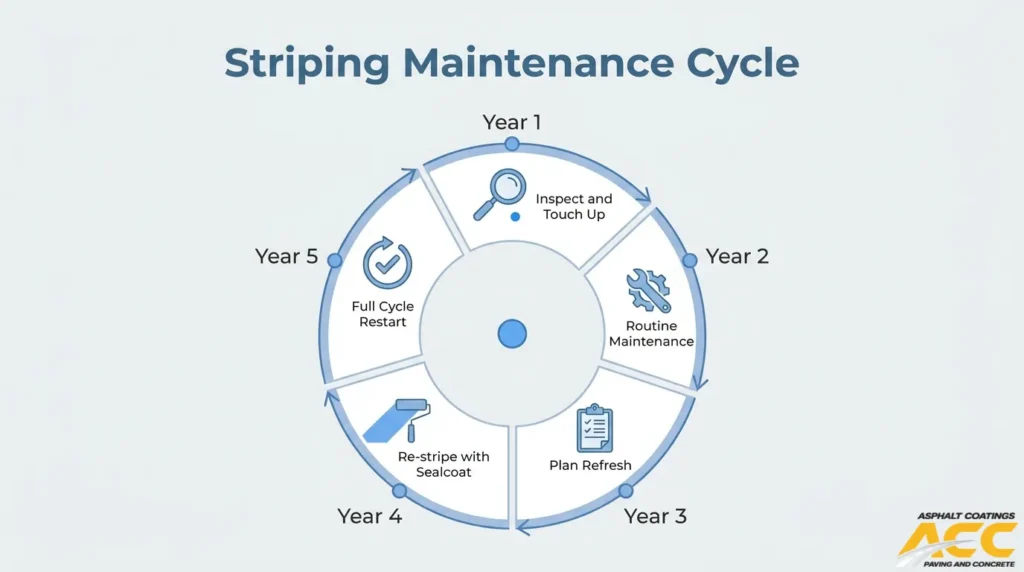
According to Davenport University’s Facilities Department, a well-structured parking lot maintenance timeline calls for striping during Years 1 through 4 alongside crack fill and pothole repair, then again at Year 5 and Year 10 with sealcoating or overlay, and at Year 15 with another sealcoat cycle. Coordinating striping with these scheduled maintenance events avoids redundant mobilization costs and ensures fresh markings sit on properly prepared surfaces. Planning at least four to six weeks ahead gives your contractor time to verify weather windows and stage phased closures so the lot never goes fully offline.
With a solid project plan in place, the next step is preparing the pavement surface for marking adhesion.
What Surface Preparation Is Required Before Commercial Asphalt Striping?
Surface preparation before commercial asphalt striping requires assessing pavement condition, removing contaminants, repairing structural defects, and confirming favorable weather. The following sections cover each step.
How Do You Assess Pavement Condition Before Marking Begins?
You assess pavement condition before marking begins by inspecting the entire surface for structural defects, contamination, and moisture. A thorough walkthrough identifies cracks, potholes, oil saturation, loose aggregate, and areas where old markings have deteriorated.
This assessment determines which paint formulation suits the surface. According to the California Department of Transportation (Caltrans) construction manual, contractors must verify the pavement is dry, clean, and at the specified surface temperature before applying striping or markings. Condition assessment also confirms whether the layout aligns with the planned design. Skipping this step risks applying markings to compromised surfaces, which accelerates peeling and reduces retroreflectivity within months.
Why Must Oil Spots, Debris, And Existing Flaking Paint Be Removed First?
Oil spots, debris, and existing flaking paint must be removed first because these contaminants prevent paint from bonding to the asphalt surface. Oil saturates the pavement’s pore structure, creating a barrier that causes fresh markings to peel or blister prematurely. Loose debris and flaking paint create an unstable substrate that compromises adhesion uniformity.
According to the Federal Highway Administration, very large or heavily saturated oil spots may need aggressive washing with approved detergents and rinsing with clean water; in some cases, heavily contaminated pavement should be removed and replaced entirely. Standard removal methods include:
- Power washing or pressure cleaning to flush surface contaminants
- Wire brushing or grinding to strip deteriorated old markings
- Detergent application for petroleum-based stains
- Shot blasting for heavily scaled or layered surfaces
When Should Cracks, Potholes, And Failing Areas Be Repaired Before Striping?
Cracks, potholes, and failing areas should be repaired before striping whenever structural damage intersects planned marking locations. Paint applied over active cracks or sunken patches loses adhesion as the pavement continues to move, creating illegible lines within one season.
Prioritize repairs in these situations:
- Alligator cracking or base failure beneath stall lines or lane markings
- Potholes within drive aisles, fire lanes, or ADA access routes
- Utility cuts or trench patches that have settled below grade
- Edge deterioration along curb lines where stop bars or crosswalks will sit
Completing hot-mix patching, crack sealing, and any overlay work before the striping crew arrives ensures a stable, uniform surface. For most commercial lots, addressing these repairs simultaneously with striping reduces mobilization costs and total project downtime.
How Do Weather, Moisture, And Pavement Temperature Affect Prep Work?
Weather, moisture, and pavement temperature affect prep work by controlling how quickly surfaces dry, how well cleaning agents perform, and whether the pavement is ready to accept markings. Residual moisture trapped in cracks or pores prevents proper paint adhesion, while cold pavement slows solvent evaporation and binder curing.
Key environmental factors to monitor include:
- Surface temperature: Most traffic paints require pavement temperatures above 50°F for proper curing.
- Ambient humidity: High humidity slows drying and can cause paint to blister or bloom.
- Dew point proximity: If air temperature is within a few degrees of the dew point, condensation forms on the surface.
- Recent precipitation: Pavement typically needs 24 to 48 hours of dry conditions after rain before prep work begins.
Scheduling prep work during stable, dry weather windows protects both the cleaning effort and the subsequent marking application.
With the surface properly assessed, cleaned, and repaired, the next step is selecting the right marking types for your lot layout.
What Are The Main Types Of Commercial Asphalt Markings Used In Parking Lots?
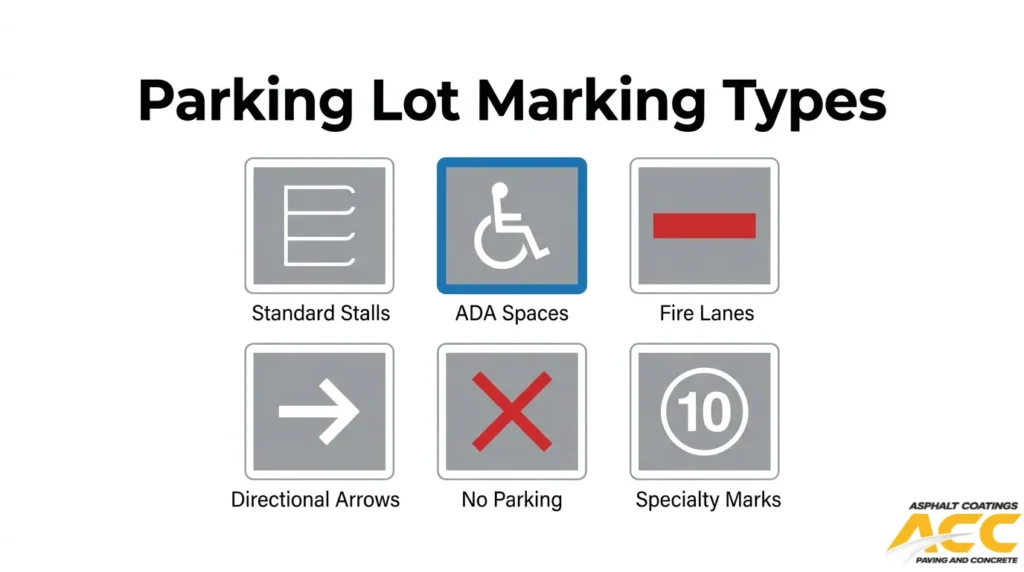
The main types of commercial asphalt markings used in parking lots are standard parking stalls, drive lanes, ADA accessible spaces, fire lanes, no-parking zones, directional symbols, and specialty markings. Each type serves a distinct function for traffic flow, safety, and regulatory compliance.
How Are Standard Parking Stalls And Drive Lanes Marked?
Standard parking stalls and drive lanes are marked using white or yellow line striping applied at uniform widths, typically four inches, to define individual spaces and traffic corridors. Stall configurations include 90-degree, 60-degree, and 45-degree angled layouts, each affecting vehicle circulation and lot capacity differently.
Drive lanes connect rows of stalls and require consistent widths, usually 24 feet for two-way traffic and 12 to 15 feet for one-way flow. Clean, straight lines with crisp edges are essential for maximizing usable space. Getting stall dimensions and lane widths right during the layout phase prevents wasted square footage, which is one of the most common and costly mistakes in commercial lot design.
How Are ADA Accessible Stalls, Access Aisles, And Ramps Marked?
ADA accessible stalls, access aisles, and ramps are marked with blue paint, the International Symbol of Accessibility, and hatched access aisle striping that clearly delineates protected space. According to the U.S. Access Board, at least one of every six accessible spaces, or fraction of six, must be van-accessible, and curb ramps require a landing at least 36 inches deep at the top.
Key ADA marking requirements include:
- Stall widths of at least 96 inches for car-accessible spaces.
- Access aisles at least 60 inches wide, marked with diagonal hatching.
- Signage with the accessibility symbol mounted at the correct height.
- Van-accessible spaces with wider aisles and appropriate signage.
ADA marking errors are among the fastest paths to compliance violations, so precision here is non-negotiable.
How Are Fire Lanes, No-Parking Zones, And Loading Areas Marked?
Fire lanes, no-parking zones, and loading areas are marked with red curb paint, bold lettering, and cross-hatched striping to communicate restricted access. Fire lanes typically require “NO PARKING FIRE LANE” stenciled in white on red curbing or pavement at regular intervals.
Loading zones use yellow curb paint or stenciled designations to reserve space for delivery vehicles. No-parking zones combine red paint with hatched markings to prevent vehicles from blocking sightlines, emergency access, or pedestrian crossings. These markings must remain highly visible because faded or missing fire lane striping can delay emergency response and expose property owners to code enforcement penalties.
How Are Directional Arrows, Stop Bars, And Traffic Control Symbols Marked?
Directional arrows, stop bars, and traffic control symbols are marked using standardized shapes and colors that guide driver behavior through parking facilities. According to the Federal Highway Administration’s 2009 MUTCD, Chapter 3A, markings shall be yellow, white, red, blue, or purple, and all colors must conform to standard highway specifications.
Common traffic control markings include:
- Directional arrows indicating one-way flow or turn movements.
- Stop bars placed at intersections and pedestrian crossings.
- Yield triangles at merge points.
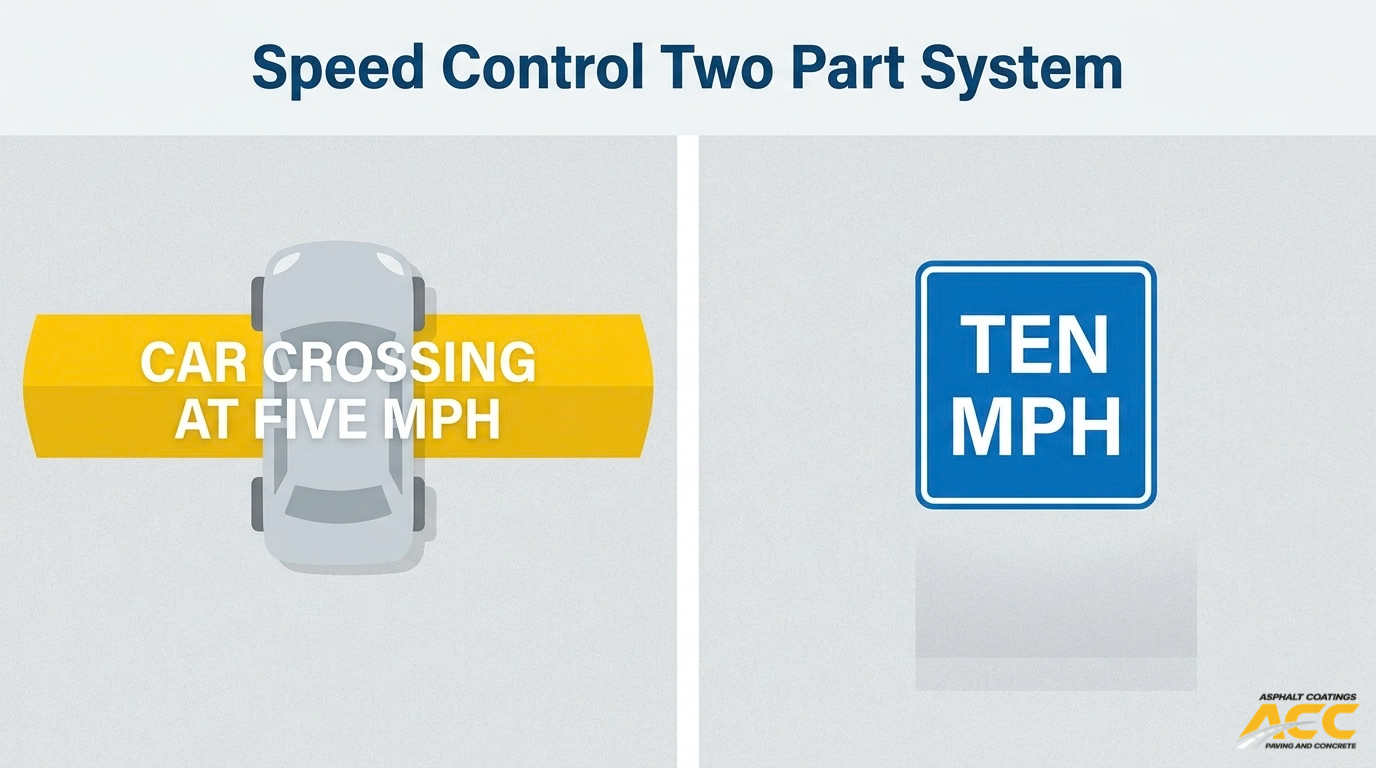
- Speed limit stencils in high-traffic areas.
- Crosswalk lines at pedestrian pathways.
Proper placement of these symbols reduces confusion and prevents collisions at high-conflict points within the lot.
How Are Specialty Markings Like Numbered Stalls, Logos, And Reserved Spaces Applied?
Specialty markings like numbered stalls, logos, and reserved spaces are applied using custom stencils, multi-color paint systems, or thermoplastic inlays for added durability. Numbered stalls help tenants, enforcement personnel, and visitors locate assigned parking quickly. Reserved space markings designate spots for management, visitors, electric vehicle charging, or specific tenants.
Logo applications typically involve larger stencils with brand-specific colors, requiring careful masking and multiple coats. These markings add a professional, branded appearance that elevates curb appeal. For properties with complex tenant arrangements or high visitor volume, numbered and reserved stall markings simplify enforcement and reduce parking disputes significantly.
With the right marking types selected, choosing the correct materials and equipment ensures each line performs under real-world conditions.
What Materials And Equipment Are Used For Commercial Asphalt Striping?
Commercial asphalt striping uses traffic paints, durable marking materials, application machines, and reflective additives. The following sections cover paint types, advanced marking options, equipment for precision, and glass beads for nighttime visibility.
What Are The Differences Between Waterborne, Solvent-Based, And Acrylic Traffic Paints?
The differences between waterborne, solvent-Based, and acrylic traffic paints center on composition, dry time, and environmental impact. According to the Texas Department of Transportation Pavement Marking Handbook, conventional traffic paint consists of three interwoven elements: pigment, binder, and glass beads, with formulations available in both solvent-based and water-based varieties.
- Waterborne paints use water as the carrier, produce lower VOC emissions, and dry relatively quickly in warm conditions.
- Solvent-based paints use petroleum-based carriers, offer stronger adhesion in cooler temperatures, and cure faster in damp environments.
- Acrylic traffic paints are a subset of waterborne formulations engineered with acrylic resins for improved flexibility and UV resistance.
For most commercial parking lots, waterborne paints strike the best balance between regulatory compliance, cost, and performance.
When Are Thermoplastic, Epoxy, Or MMA Markings Used Instead Of Standard Paint?
Thermoplastic, epoxy, or MMA markings are used instead of standard paint when durability requirements exceed what conventional coatings can deliver. High-traffic commercial lots, drive lanes, and roadway crossings benefit most from these materials.
According to the Federal Highway Administration, thermoplastic markings can last five years if applied in good conditions, while the expected life of painted markings is only one to two years. Thermoplastic requires application at a minimum thickness of 100 mil for longitudinal markings on new sealcoat, as specified by the Texas Transportation Institute. Epoxy coatings provide chemical resistance and bond strength suited for warehouse floors and loading docks. MMA (methyl methacrylate) cures rapidly, even in cold temperatures, making it practical for time-sensitive projects. Standard paint remains useful as a temporary marking or surface primer before thermoplastic application.
How Do Striping Machines, Stencils, And Measuring Tools Ensure Accuracy?
Striping machines, stencils, and measuring tools ensure accuracy by controlling line placement, width, and paint distribution throughout the project. Professional-grade striping machines apply consistent film thickness at uniform speeds, eliminating the wavering edges common with manual methods.
Key accuracy tools include:
- Airless striping machines that maintain steady pressure for crisp, defined lines.
- Pre-cut stencils for ADA symbols, arrows, and letter markings that guarantee dimensional compliance.
- Measuring wheels and chalk lines that establish precise stall widths, aisle spacing, and layout geometry before any paint is applied.
- Metering devices that register accumulated line length for each gun, tracking material usage and verifying coverage.
Precision at the layout stage prevents costly rework and ensures every marking meets code specifications on the first pass.
How Do Glass Beads And Reflective Additives Improve Nighttime Visibility?
Glass beads and reflective additives improve nighttime visibility by retroreflecting vehicle headlight beams back toward the driver. When embedded into wet paint or thermoplastic during application, these tiny glass spheres create a reflective surface that makes lane lines, stop bars, and symbols visible in low-light conditions.
Uniform bead distribution is critical. Beads applied too sparsely leave dark gaps, while over-application wastes material without improving performance. Professional striping equipment dispenses beads at a calibrated rate synchronized with paint output, ensuring consistent retroreflectivity across every marking. Some contractors also use larger ceramic or high-index beads for enhanced brightness in areas with heavy nighttime traffic.
Selecting the right combination of marking material and reflective additive directly affects how well your lot performs after dark, which is where understanding the full application process becomes essential.
What Are The Step-By-Step Stages In A Commercial Asphalt Striping Project?
The step-by-step stages in a commercial asphalt striping project are measurement and layout, line and symbol application, coat and color sequencing, and curing before reopening. Each phase builds on the previous one to produce durable, code-compliant markings.
How Is The Parking Lot Measured, Charked, And Laid Out Before Painting?
The parking lot is measured, chalked, and laid out before painting using tape measures, chalk lines, and string lines to establish precise reference points for every stall, lane, and symbol. Crews begin by identifying fixed reference points, such as curb faces, building walls, and existing drain locations. From these anchors, they measure stall widths, aisle depths, and ADA access aisle dimensions. According to the California Department of Transportation (Caltrans), contractors must verify that traffic stripes and pavement markings will be correctly located and confirm the pavement is dry, clean, and at the specified surface temperature before applying any markings. Chalk snap lines then transfer these measurements onto the pavement as a full-scale blueprint. Skipping this verification step is the most common cause of costly rework on commercial lots.
How Are Base Lines, Stalls, And Symbols Sprayed Or Applied?
Base lines, stalls, and symbols are sprayed or applied using self-propelled striping machines that follow the chalked layout at calibrated paint flow rates. Operators typically spray long continuous lines for drive lanes and stall borders first, since uninterrupted runs produce straighter, more uniform edges. Stencils are then positioned for symbols such as handicap icons, directional arrows, stop bars, and fire lane lettering. Glass beads are dispensed simultaneously with the paint to provide retroreflective visibility under headlights. Each element must align precisely with the chalked grid; even small deviations compound across a large lot and can push ADA spaces or fire lanes out of compliance.
How Are Multiple Coats, Colors, And Phases Sequenced During The Job?
Multiple coats, colors, and phases are sequenced during the job by completing one color and allowing it to set before introducing the next. White stall lines and arrows are typically applied first across the entire lot. The University of Washington Facilities Pavement Markings Standard Specifications directs contractors to apply two applications of paint to pavement markings, ensuring the second coat sits squarely on top of the first. After white markings cure, crews switch to yellow for curbing and no-parking zones, then to blue for ADA designations and red for fire lanes. This phased approach prevents color bleeding and equipment contamination between paint changes.
How Long Should Paint Or Markings Cure Before Opening The Lot To Traffic?
Paint or markings should cure for a minimum of 30 minutes for standard waterborne traffic paint under warm, dry conditions, though full hardness can take several hours depending on temperature, humidity, and film thickness. Thermoplastic markings cool and harden faster, often within 5 to 10 minutes of application. Crews typically section off completed areas with cones and barricade tape, reopening zones progressively as each phase cures. Opening a lot too early causes tire tracking, which smears lines and embeds dirt into the film. For large commercial properties, phased closures allow portions of the lot to remain operational while fresh markings reach full cure in adjacent sections.
Understanding how each stage flows from layout through curing helps property managers coordinate striping with broader pavement maintenance.
How Do Climate And Weather Conditions Affect Asphalt Striping In Harsh Environments?
Climate and weather conditions affect asphalt striping in harsh environments by altering cure times, weakening paint adhesion, and accelerating wear. The sections below cover ideal application ranges, freeze-thaw damage, cold-weather scheduling, and coordination around precipitation.
What Temperature And Humidity Ranges Are Ideal For Applying Traffic Markings?
The ideal temperature range for applying traffic markings is between 50°F and 95°F, with pavement surface temperature at least 5°F above the dew point. Relative humidity should stay below 85% during application and initial cure.
When humidity climbs too high, water-based traffic paints lose the ability to coalesce properly, resulting in soft films that track under tires. Solvent-based paints tolerate slightly broader humidity windows but still require dry pavement. Cold surfaces below 50°F slow the chemical curing of thermoplastic and epoxy markings, producing weak bonds that peel within weeks. For high-altitude markets like Colorado, where thin air accelerates solvent evaporation, monitoring both air and surface temperature prevents premature skinning that traps moisture underneath the film.
How Do Freeze-Thaw Cycles And Snow Removal Practices Impact Marking Durability?
Freeze-thaw cycles and snow removal practices impact marking durability by cracking the pavement substrate and physically scraping paint from the surface. Water infiltrates micro-cracks beneath markings, expands when frozen, and lifts the paint film from the asphalt.
According to the Minnesota Department of Transportation, an increase in freeze-thaw events will result in detrimental impacts on pavement systems. This damage extends directly to striping; as the pavement fractures and shifts, even well-bonded markings lose adhesion along crack edges. Snowplow blades compound the problem. Research archived by the U.S. Department of Transportation National Transportation Library found that snow removal activities resulted in substantial damage to pavement markings in Virginia over a two-year period. Properties in regions with heavy winter maintenance should budget for annual touch-ups and consider recessed or grooved markings that sit below plow blade contact height.
How Should You Adjust Scheduling And Materials For High-Altitude Or Cold-Weather Markets?
You should adjust scheduling and materials for high-altitude or cold-weather markets by narrowing your application window and selecting formulations rated for faster cure at lower temperatures.
Key adjustments include:
- Scheduling: Compress striping into late spring through early fall when sustained surface temperatures reliably exceed 50°F.
- Material selection: Use fast-dry solvent-based paints or alkyd formulations that cure effectively in cooler, drier air. Thermoplastic remains viable when applied at proper melt temperatures, even in moderate cold.
- Thickness: Apply slightly thicker mil specifications to offset accelerated abrasion from sand, gravel, and deicer exposure common at higher elevations.
- Timing within the day: Start mid-morning after dew evaporates and finish before late-afternoon temperature drops.
For Colorado properties, these adjustments are not optional; they are essential to getting even a single full season of marking performance.
How Can You Coordinate Striping Around Rain, Snow, And Overnight Dew?
You can coordinate striping around rain, snow, and overnight dew by building weather-contingency windows into every project schedule and verifying surface conditions immediately before application.
Pavement must be completely dry at the time of application. Even a light dew layer prevents proper adhesion, so crews should test surfaces with moisture meters or simple touch checks before loading machines. Practical coordination steps include:
- Monitor hourly forecasts and require a minimum 24-hour dry window after application for water-based paints.
- Schedule application to begin after morning dew evaporates, typically mid-morning.
- Avoid striping within 24 hours before a predicted rain or snow event.
- Keep tarps or portable covers available for small-area work when isolated showers threaten.
Experienced contractors treat weather coordination as a scheduling discipline, not an afterthought. With proper planning, climate challenges in harsh environments become manageable rather than project-ending.
How Long Do Commercial Asphalt Markings Last, And What Affects Their Durability?
Commercial asphalt markings last one to five years depending on material type, traffic exposure, climate, and pavement condition. The following sections cover how traffic volume, environmental forces, surface quality, and maintenance schedules each influence marking lifespan.
How Do Traffic Volume And Vehicle Types Influence Marking Wear?
Traffic volume and vehicle types influence marking wear by accelerating the physical abrasion of paint and thermoplastic surfaces. High-turnover lots, such as those at shopping centers or distribution warehouses, subject markings to constant tire friction that grinds away the binder and glass bead layers. Heavy vehicles compound this effect; delivery trucks, forklifts, and loaded trailers exert far greater shear force per pass than standard passenger cars.
Tight turning areas, loading docks, and drive lane entry points typically fade fastest because tires scrub the surface during directional changes. According to the Transportation Research Board, each dollar spent on pavement striping yields $60 in benefits, with the benefit-cost ratio rising as traffic volume increases. For high-traffic commercial properties, investing in durable marking materials pays for itself quickly through reduced re-striping frequency.
How Do UV Exposure, Snowplows, And Sand Or Deicer Affect Paint Life?
UV exposure, snowplows, and sand or deicer affect paint life by breaking down binder resins, physically scraping marking surfaces, and chemically degrading adhesion. Prolonged ultraviolet radiation causes traffic paint pigments to chalk and fade, reducing both color intensity and retroreflectivity. This degradation accelerates at higher elevations where UV intensity is greater.
Mechanical snow removal poses an equally serious threat. A Virginia Transportation Research Council study found that snow removal activities resulted in substantial damage to pavement markings across Virginia over a two-year observation period. Plow blades catch raised thermoplastic edges and shear paint films from the asphalt substrate. Sand and chemical deicers further erode markings through abrasive scuffing and salt-induced deterioration of the paint’s binder system. Properties in cold climates should plan for shorter marking lifecycles and budget accordingly.
How Does Pavement Condition And Prior Sealcoating Impact Marking Performance?
Pavement condition and prior sealcoating impact marking performance by determining how well paint or thermoplastic bonds to the asphalt surface. Cracked, oxidized, or oil-contaminated pavement prevents proper adhesion, causing markings to peel or flake prematurely. Potholes and surface irregularities create uneven film thickness, which accelerates localized wear.
Freshly sealcoated surfaces require specific material considerations. According to the Texas Transportation Institute, thermoplastic should be applied at a minimum thickness of 100 mil on new sealcoat when no other durable marking exists, and water-based paint may serve as a temporary marking for up to six months or as a surface primer before thermoplastic application. Addressing pavement defects before striping is one of the most cost-effective ways to extend marking life.
How Often Should Commercial Parking Lots Be Re-Striped Under Normal Use?
Commercial parking lots should be re-striped every one to two years when using standard traffic paint, or every three to five years when using thermoplastic markings. According to the Federal Highway Administration, thermoplastic markings can last five years if applied in good conditions, while the expected life of painted markings is only one to two years.
Several factors may shorten these intervals:
- High daily traffic counts or heavy vehicle use
- Frequent snow removal or deicer application
- UV-intensive environments at higher elevations
- Pavement surfaces with existing cracks or poor sealcoat adhesion
Annual visual inspections help property managers identify faded or non-compliant areas before they become safety hazards or ADA violations. Proactive re-striping, timed alongside sealcoating and crack sealing, reduces long-term costs by consolidating mobilization and surface preparation work.
With re-striping intervals established, a structured maintenance plan keeps markings compliant and visible year-round.
How Should Property Managers Maintain And Refresh Parking Lot Markings?
Property managers should maintain and refresh parking lot markings through routine inspections, strategic touch-ups or full re-striping, and coordination with other pavement maintenance. The sections below cover inspection methods, touch-up versus full re-striping decisions, sealcoating coordination, and multi-year budgeting.
How Can Routine Inspections Help You Spot Faded Or Non-Compliant Markings?
Routine inspections help you spot faded or non-compliant markings by establishing a consistent schedule to evaluate visibility, color contrast, and ADA compliance across the lot. Walk the property at least twice per year, once after winter and once in late summer, checking for specific issues:
- Faded or worn stall lines that no longer guide drivers clearly
- ADA symbols, access aisles, or signage that have lost legibility
- Fire lane markings with diminished red curb paint or missing text
- Directional arrows and stop bars obscured by tire wear or debris
Documenting each deficiency with photos and dates creates a defensible maintenance record. For properties in Colorado, where snowplow traffic accelerates marking wear, inspections after spring thaw are particularly valuable for catching damage early.
When Is It Better To Touch Up Individual Areas Versus Re-Stripe The Entire Lot?
It is better to touch up individual areas when isolated spots show wear, such as high-turn zones near entrances or heavily trafficked drive lanes, while the majority of the lot remains legible. Spot touch-ups cost less and require shorter closures, making them practical between full re-striping cycles.
Full re-striping becomes the better choice when fading is widespread, when layout changes are needed, or when more than roughly 30% of markings have degraded. A complete re-stripe also ensures uniform color and reflectivity across the entire surface. Mixing fresh paint next to heavily faded lines creates inconsistent visibility that can confuse drivers and weaken compliance. When in doubt, a full re-stripe delivers more consistent, longer-lasting results than patchwork repairs.
How Can You Coordinate Striping With Sealcoating, Crack Sealing, And Other Maintenance?
You can coordinate striping with sealcoating, crack sealing, and other maintenance by sequencing work so each treatment has time to cure before the next begins. Crack sealing and pothole repair always come first, since fresh markings applied over damaged pavement will fail prematurely. Sealcoat follows once repairs cure, and striping is the final step.
According to the Texas Transportation Institute, waterbased paint may be used on a new sealcoat surface as temporary pavement marking for up to six months, or as a surface primer prior to thermoplastic application. This sequencing prevents costly rework. Bundling these services into a single project mobilization also reduces overall costs and minimizes the number of days the lot must be closed to traffic.
How Do You Budget And Plan Multi-Year Marking And Maintenance Cycles?
You budget and plan multi-year marking and maintenance cycles by mapping each maintenance activity to a timeline based on material lifespan, traffic volume, and pavement age. A widely referenced framework from Davenport University’s Facilities Department outlines a 20-year parking lot lifecycle: crack fill, pothole repair, and striping in years one through four; sealcoat with striping at year five; a mid-life overlay with striping at year ten; another sealcoat cycle at year fifteen; and full replacement at year twenty.
Property managers should build annual line items for marking maintenance and set aside contingency funds for unplanned repairs after severe weather. Tracking actual costs per cycle against this framework helps refine future budgets and avoid deferred maintenance that compounds into larger expenses.
With a maintenance plan in place, the next consideration is how ADA and safety compliance requirements shape your striping layout.
How Do ADA And Safety Compliance Requirements Shape Your Striping Layout?
ADA and safety compliance requirements shape your striping layout by dictating exact dimensions, marking colors, and placement for accessible spaces, fire lanes, and pedestrian routes. The sections below cover minimum ADA parking standards, accessible route design, fire lane marking, and the most common striping errors that create liability.
What Are The Minimum ADA Requirements For Accessible Parking Spaces?
The minimum ADA requirements for accessible parking spaces include specific dimensional, slope, and surface standards set by federal law. According to the U.S. Department of Justice (ADA.gov), car accessible spaces must be at least 96 inches wide, with an access aisle at least 60 inches wide, a maximum slope of 2.08% in all directions, and a surface that is firm, stable, and slip-resistant.
Additional ADA accessible parking requirements include:
- At least one van-accessible space for every six accessible spaces in the lot.
- The international symbol of accessibility painted in each space and posted on a sign.
- Blue striping to designate access aisles, preventing other vehicles from parking in them.
- Proximity to the building entrance along the shortest accessible route.
Overlooking even one of these dimensional or marking standards during layout is one of the fastest paths to a code violation, making precise measurement before any paint is applied essential.
How Should You Design Accessible Routes, Crosswalks, And Curb Ramps?
You should design accessible routes, crosswalks, and curb ramps to create a continuous, barrier-free path from accessible parking spaces to building entrances. Every accessible route must maintain a stable, slip-resistant surface with a running slope no steeper than 1:20 and a cross slope no greater than 1:48.
Key design elements for accessible pedestrian connections include:
- Crosswalk striping wide enough for wheelchair passage, typically a minimum of 36 inches clear width.
- Curb ramps with a maximum slope of 1:12, flared sides, and a detectable warning surface at the bottom.
- A level landing at least 36 inches deep at the top of each curb ramp.
- High-contrast painted markings that clearly delineate pedestrian crossings from vehicle travel lanes.
When space constraints arise during alterations, side flares with a 1:12 maximum slope can substitute for a standard landing. Treating these pedestrian elements as part of the striping layout, rather than an afterthought, prevents costly rework.
How Do You Ensure Fire Lane, Emergency Access, And Clear Sightlines Are Marked?
You ensure fire lane, emergency access, and clear sightlines are marked by following local fire code dimensions, using required paint colors, and keeping all designated zones free of obstructions. According to the Fairfax County, Virginia, Office of the Fire Marshal, fire apparatus access roads must maintain an unobstructed width of not less than 20 feet, exclusive of shoulders, and an unobstructed vertical clearance of not less than 13 feet 6 inches.
Effective fire lane and sightline marking involves:
- Red curb paint or red pavement striping with “NO PARKING / FIRE LANE” stenciled at regular intervals.
- Maintaining clear sightlines at lot entrances, exits, and intersections by keeping markings and signage out of the driver’s line of sight.
- Coordinating with the local fire marshal during layout to confirm jurisdiction-specific width, color, and signage requirements.
Fire lane dimensions and marking rules vary by municipality, so verifying local codes before finalizing any layout prevents failed inspections.
What Striping Errors Most Commonly Lead To Non-Compliance Or Liability Risk?
The striping errors that most commonly lead to non-compliance or liability risk involve incorrect dimensions, missing markings, and faded accessibility symbols. First-time ADA Title III violations can carry civil penalties up to $75,000, with subsequent violations reaching $150,000, according to the U.S. Department of Justice.
The most frequent compliance failures include:
- Access aisles striped too narrow or omitted entirely, blocking wheelchair access.
- Missing or incorrect international symbol of accessibility in designated spaces.
- Faded fire lane markings that no longer meet color or legibility requirements.
- Incorrect slope in accessible spaces due to poor site assessment before striping.
- Failure to provide the required ratio of van-accessible spaces to standard accessible spaces.
Proactive compliance audits before and after every striping project are the most cost-effective way to avoid these penalties and the litigation exposure that follows them.
With compliance requirements clearly mapped, choosing the right contractor ensures these standards translate accurately from plan to pavement.
How Should You Compare DIY Striping To Hiring A Professional Striping Contractor?
You should compare DIY striping to hiring a professional striping contractor by evaluating project scale, compliance risk, equipment needs, and long-term cost. The sections below cover feasible DIY scenarios, hidden risks of self-applied markings, professional crew capabilities, and layout optimization.
What Project Sizes And Conditions Might Be Feasible For DIY Striping?
DIY striping may be feasible for small, low-stakes projects with minimal compliance requirements. A warehouse floor with a handful of internal guide lines, a small private lot with fewer than ten spaces, or simple touch-ups on non-ADA stalls are scenarios where basic equipment and limited experience might produce acceptable results. Once a project involves ADA-accessible spaces, fire lanes, or public-facing traffic flow, the margin for error shrinks considerably. For most commercial properties, the threshold where DIY stops making sense arrives faster than property managers expect.
What Risks, Hidden Costs, And Quality Issues Are Common With DIY Markings?
The risks, hidden costs, and quality issues common with DIY markings include compliance violations, inconsistent line quality, wasted materials, and potential liability exposure. Without formal training, property managers may unknowingly violate MUTCD standards, ADA spacing requirements, or OSHA regulations. According to the American Traffic Safety Services Association, professional pavement marking training covers materials, application quality control, MUTCD standards, EPA and OSHA regulations, tort liability, and documentation compliance. Skipping that knowledge base means DIY projects often require costly rework. Uneven bead distribution, incorrect line widths, and poor adhesion from inadequate surface prep all reduce marking lifespan and create safety hazards that can trigger fines.
What Expertise And Equipment Do Professional Striping Crews Bring To The Job?
Professional striping crews bring specialized equipment, material knowledge, and code compliance expertise to every project. Commercial-grade striping machines apply uniform line widths and consistent paint thickness in a single pass. Crews understand material selection for specific pavement conditions, whether waterborne paint on fresh sealcoat or thermoplastic for high-traffic lanes. They also carry calibrated glass bead dispensers that ensure proper retroreflectivity for nighttime visibility. Beyond equipment, experienced contractors know how to sequence multi-phase jobs, manage traffic control during application, and verify surface temperature and moisture levels before any paint touches the pavement.
How Can A Professional Contractor Help Optimize Layout For Capacity And Safety?
A professional contractor can help optimize layout for capacity and safety by applying code knowledge and field experience to maximize usable space while maintaining full compliance. Experienced crews evaluate traffic flow patterns, turning radii, and pedestrian paths to position stalls, drive aisles, and crosswalks where they function best. They also ensure ADA ratios, fire lane clearances, and directional markings meet local and federal standards without sacrificing parking count. This layout expertise is difficult to replicate without years of on-site project experience. For commercial properties where every stall affects revenue, professional optimization consistently delivers better results than guesswork.
With layout and compliance handled, choosing the right striping partner becomes the next critical decision.
How Should You Choose A Commercial Asphalt Striping Partner For Your Property?
You should choose a commercial asphalt striping partner by evaluating experience, certifications, code knowledge, material quality, and bid transparency. The following sections cover what credentials to verify, how to assess compliance expertise, which questions to ask, and how to compare bids effectively.
What Experience, Certifications, And References Should You Look For?
The experience, certifications, and references you should look for include verified project history on commercial properties, industry-recognized training credentials, and direct client references from similar facilities. According to the American Traffic Safety Services Association, professional pavement marking courses cover materials, application processes, quality control, MUTCD standards, EPA and OSHA regulations, tort liability, and compliance documentation. A contractor who has completed this level of training demonstrates competence beyond basic line painting. Request a portfolio of completed commercial lots, contact references who manage properties similar to yours, and confirm the crew has hands-on experience with both paint and thermoplastic systems.
How Can You Evaluate A Contractor’s Knowledge Of Local Codes And ADA Rules?
You can evaluate a contractor’s knowledge of local codes and ADA rules by asking specific technical questions during the bidding process. A qualified striping partner should cite exact dimensional requirements without hesitation, such as the 96-inch minimum width for car-accessible spaces, 60-inch access aisles, and slope maximums established by ADA standards. They should also know MUTCD color designations and local fire lane clearance rules. Ask how they handle van-accessible ratios, curb ramp landing depths, and signage placement. Vague or generalized answers signal a contractor who may produce non-compliant work, which exposes property owners to civil penalties that can reach $75,000 for a first ADA violation.
What Questions Should You Ask About Materials, Warranties, And Scheduling?
The questions you should ask about materials, warranties, and scheduling focus on product specifications, longevity guarantees, and project timelines. Key questions include:
- What paint type do you recommend for this pavement surface, and why?
- Do you offer thermoplastic for high-traffic areas where longer durability is needed?
- What warranty covers premature fading, peeling, or adhesion failure?
- How many coats will be applied, and what dry times do you follow?
- What weather conditions will delay the project, and how do you reschedule?
- Will you coordinate striping around sealcoating or repair work already scheduled?
A contractor who answers these questions with material-specific details rather than generic assurances is far more likely to deliver markings that perform over multiple seasons.
How Can You Compare Striping Bids Beyond Just The Lowest Price?
You can compare striping bids beyond just the lowest price by evaluating scope, materials, compliance inclusion, and long-term value. The cheapest bid often omits critical line items. When reviewing proposals, compare these factors:
- Material grade: Does the bid specify paint type, mil thickness, and glass bead application rates?
- ADA and code compliance: Is layout design for accessible spaces, fire lanes, and signage included, or billed separately?
- Surface preparation: Does the scope cover cleaning, old marking removal, and crack repair coordination?
- Warranty terms: What is covered, for how long, and under what conditions?
- Scheduling clarity: Are mobilization, cure times, and lot closure plans detailed?
According to the Transportation Research Board, each dollar spent on pavement striping yields $60 in benefits, with the ratio rising alongside traffic volume. Choosing a partner based solely on the lowest number risks poor adhesion, premature wear, and compliance gaps that cost far more to correct than the initial savings.
With these selection criteria established, integrating striping into a broader pavement management plan maximizes long-term value.
How Should You Approach Commercial Asphalt Striping As Part Of Ongoing Pavement Management With Asphalt Coatings Company?
You should approach commercial asphalt striping as a recurring, integrated component of your overall pavement management plan. Asphalt Coatings Company coordinates striping alongside paving, sealcoating, and ADA compliance to protect your investment long term.
How Can Asphalt Coatings Company Integrate Striping With Paving, Sealcoating, And ADA Compliance For Your Property?
Asphalt Coatings Company integrates striping with paving, sealcoating, and ADA compliance by scheduling all pavement services through a single provider with in-house crews. This single-source approach eliminates coordination gaps between separate contractors, ensuring surface preparation, sealcoat curing, and marking application happen in the correct sequence.
Asphalt Coatings Company addresses several critical needs simultaneously:
- Sealcoating is completed and fully cured before new markings are applied, preventing adhesion failures.
- ADA-compliant accessible spaces, access aisles, and van-accessible stalls are verified against current federal standards during every re-stripe.
- Fire lanes and emergency access routes are remarked to maintain code compliance.
- Oil-contaminated or failing pavement sections are identified and repaired before any marking work begins, following Federal Highway Administration guidance that heavily saturated areas may require removal and replacement.
According to the Transportation Research Board, each dollar spent on pavement striping yields $60 in benefits, with the benefit-cost ratio rising alongside traffic volume. For high-traffic commercial properties, this makes proactive, bundled pavement management one of the strongest returns available.
What Are The Key Takeaways About The Commercial Asphalt Striping & Marking Process We Covered?
The key takeaways about the commercial asphalt striping and marking process are that quality results depend on proper planning, thorough surface preparation, compliant materials, and a defined maintenance cycle.
- Pavement must be clean, dry, and structurally sound before any markings are applied.
- ADA, fire lane, and MUTCD standards dictate specific dimensions, colors, and placement for every marking type.
- Material selection, whether traffic paint, thermoplastic, or epoxy, should match your traffic volume, climate exposure, and maintenance budget.
- Climate factors like freeze-thaw cycles, UV exposure, and snow removal directly impact marking durability and re-striping frequency.
- Professional contractors bring calibrated equipment, code knowledge, and quality control that DIY efforts rarely match.
Asphalt Coatings Company has served Colorado’s Front Range since 1986, delivering parking lot striping and marking as part of comprehensive commercial pavement programs. Asphalt Coatings Company partners with property managers to build multi-year plans that keep markings crisp, compliant, and cost-effective across every season.