A commercial paving planning guide is a structured framework that coordinates every decision, from site evaluation through post-construction maintenance, into a documented sequence that controls costs, meets code requirements, and delivers durable pavement. This guide covers project phasing, site condition evaluation, material selection, parking lot design and compliance, drainage and stormwater systems, cost estimation, permitting, timeline development, contractor selection, and long-term maintenance.
Commercial paving follows a structured life-cycle that spans scope definition, site assessment, design and engineering, permitting, construction management, and post-construction inspection. Each phase builds on the previous one, so skipping or rushing any step compounds risk and cost downstream.
Site conditions including soil type, subgrade stability, drainage patterns, underground utilities, and freeze-thaw exposure directly shape structural design. Weak subgrade soils, frost-susceptible clay, and poor drainage are leading causes of premature pavement failure when left unaddressed during planning.
Material selection between hot-mix asphalt, concrete, and recycled mixes depends on traffic volume, climate, load type, and life-cycle cost. Parking lot layout must integrate ADA-accessible space requirements, fire lane clearances, stormwater collection points, and pedestrian routing into a unified site plan.
Drainage systems, including surface grading, catch basins, and retention or detention ponds, protect pavement structure and satisfy stormwater discharge permit requirements for projects disturbing one or more acres. Costs range from under $20,000 for small lots to over $500,000 for large-scale projects, with subgrade repairs and ADA upgrades adding significant line items.
Contractor evaluation, realistic timeline development, and a scheduled maintenance program covering sealcoating, crack sealing, and resurfacing complete the planning process and protect the long-term investment.
Why Does Commercial Paving Require a Formal Planning Process?
Commercial paving requires a formal planning process because municipal regulations, design variables, and compliance requirements create layers of complexity that informal approaches cannot manage. Parking ratios, ADA standards, drainage permits, and site-specific conditions all demand coordinated, documented decision-making before construction begins.
Without a structured plan, property owners risk code violations, costly redesigns, and project delays. For example, parking requirements vary by municipality and use type; according to the Colorado Springs Municipal Code, indoor seating areas for commercial buildings require a minimum of 1 parking space per 300 square feet of Gross Floor Area, while certain retail and office categories in other Colorado districts may require as little as 1 space per 50,000 square feet of ground floor GFA. These wide variations make it impossible to estimate scope, materials, or budget without first researching the specific local codes that apply to a given property.
A formal planning process aligns every stakeholder, from engineers and contractors to municipal reviewers, around a single documented scope. It establishes the sequence of decisions: site evaluation, material selection, layout design, permitting, construction scheduling, and post-installation maintenance. Each phase builds on the one before it, so skipping or rushing any step compounds risk downstream. For commercial property owners managing tenant operations, budget cycles, and public safety obligations, this structured approach is not optional; it is the foundation of a successful project.
What Are the Key Phases of a Commercial Paving Project?
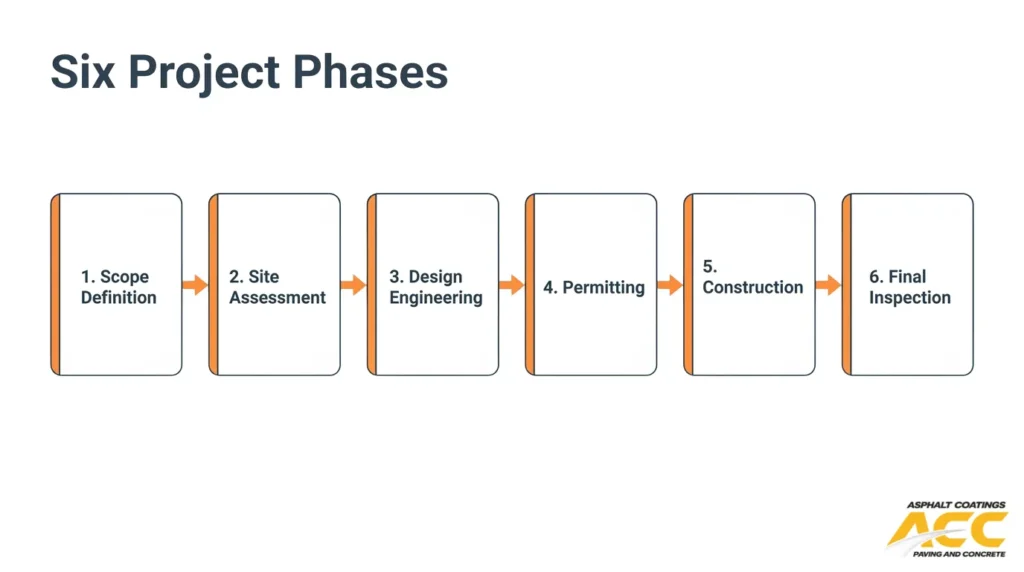
The key phases of a commercial paving project are scope definition, site assessment, design and engineering, permitting, construction, and post-construction inspection. Each phase builds on the previous one to control costs, meet code requirements, and deliver a durable pavement.
How Do You Define the Project Scope and Objectives?
You define the project scope and objectives by establishing the intended use, traffic volume, square footage, material preferences, budget ceiling, and completion deadline before any fieldwork begins. A clearly documented scope prevents costly changes mid-project.
Scope elements to lock in early include:
- Pavement type, such as asphalt, concrete, or overlay
- Total area and phasing requirements
- ADA compliance features and pedestrian zones
- Drainage and stormwater infrastructure needs
- Budget contingency percentage
Skipping formal scope documentation is one of the most common mistakes in commercial paving. Without it, contractors and property owners often work from different assumptions, which drives avoidable change orders during construction. Experienced commercial contractors use detailed scope documentation to align every stakeholder before work begins. Asphalt Coatings Company structures projects around transparent scope agreements that establish material specifications, phasing requirements, and timeline commitments upfront, minimizing change orders and keeping projects on budget.
How Do You Conduct a Site Assessment Before Paving?
You conduct a site assessment before paving by evaluating soil conditions, existing drainage patterns, underground utilities, surface grading, and any environmental constraints that could affect pavement performance.
A thorough assessment typically covers:
- Soil borings to determine subgrade bearing capacity
- Topographic survey for elevation and drainage flow
- Utility locates to map underground infrastructure
- Environmental review for wetlands or contamination
- Existing pavement condition evaluation, if applicable
Site assessments reveal hidden issues like poor subgrade soils or inadequate slope that would undermine pavement longevity if left unaddressed. Investing in this phase upfront consistently reduces unexpected costs during construction.
How Does the Design and Engineering Phase Work?
The design and engineering phase works by translating site assessment data into detailed structural plans, material specifications, grading designs, and drainage layouts that meet local codes. Pavement engineering follows a structured life-cycle that spans raw material selection, structural design, construction sequencing, and long-term maintenance planning.
According to research published by the American Society of Civil Engineers, project costs can escalate by approximately 29% above initial estimates when scope is not strictly managed during the construction phase. Precise engineering documentation prevents that escalation.
Key design deliverables include pavement cross-sections, subgrade treatment specifications, stormwater management plans, and ADA-compliant layout drawings. In regions with freeze-thaw exposure, soil type directly shapes pavement thickness and moisture mitigation strategies.
What Happens During Permitting and Regulatory Approval?
Permitting and regulatory approval happens when the project’s engineering plans are submitted to local authorities for review against zoning codes, stormwater regulations, ADA standards, and fire access requirements.
Common permits and approvals required include:
- Grading and excavation permits
- Stormwater discharge permits for sites disturbing one or more acres
- ADA compliance review for accessible parking and pathways
- Fire lane and emergency access verification
- Right-of-way or encroachment permits, if applicable
Permitting timelines vary by municipality, and incomplete applications are a frequent cause of project delays. Submitting thorough engineering documents with the initial application accelerates the review cycle significantly.
How Is the Construction Phase Managed From Start to Finish?
The construction phase is managed from start to finish through coordinated scheduling of subgrade preparation, base installation, paving, striping, and final site restoration, with quality checkpoints at each stage.
Construction management involves daily progress tracking, material testing, compaction verification, and schedule adjustments for weather delays. According to 2025 Colorado Department of Transportation data, concrete pavement prices averaged $136.80 per square yard, reflecting a $24.77 per square yard increase over previous periods, which underscores the importance of locking in material pricing early.
Effective construction management requires a single point of accountability. Projects managed by in-house crews rather than layered subcontractors tend to maintain tighter quality control and more predictable timelines. Asphalt Coatings Company maintains in-house crews for every phase of commercial paving, from subgrade preparation through final striping. This single-source structure eliminates coordination delays between subcontractors and ensures consistent quality standards across the entire project.
What Should the Post-Construction Inspection Phase Include?
The post-construction inspection phase should include a comprehensive review of pavement thickness, compaction density, surface smoothness, drainage function, striping accuracy, and ADA compliance before final project acceptance.
A thorough punch-list inspection covers:
- Core samples to verify pavement thickness meets specifications
- Density testing to confirm compaction standards
- Visual review of surface finish, joints, and transitions
- Drainage flow testing to ensure proper water movement
- ADA slope measurements at ramps, crosswalks, and accessible spaces
- Striping and signage placement verification
Post-construction inspection protects property owners by documenting that every specification was met before final payment. Any deficiencies identified at this stage are far less costly to correct than problems discovered months later under traffic loading.
With project phases clearly mapped, evaluating the specific site conditions that shape your pavement design is the next step.
What Site Conditions Should You Evaluate Before Paving?
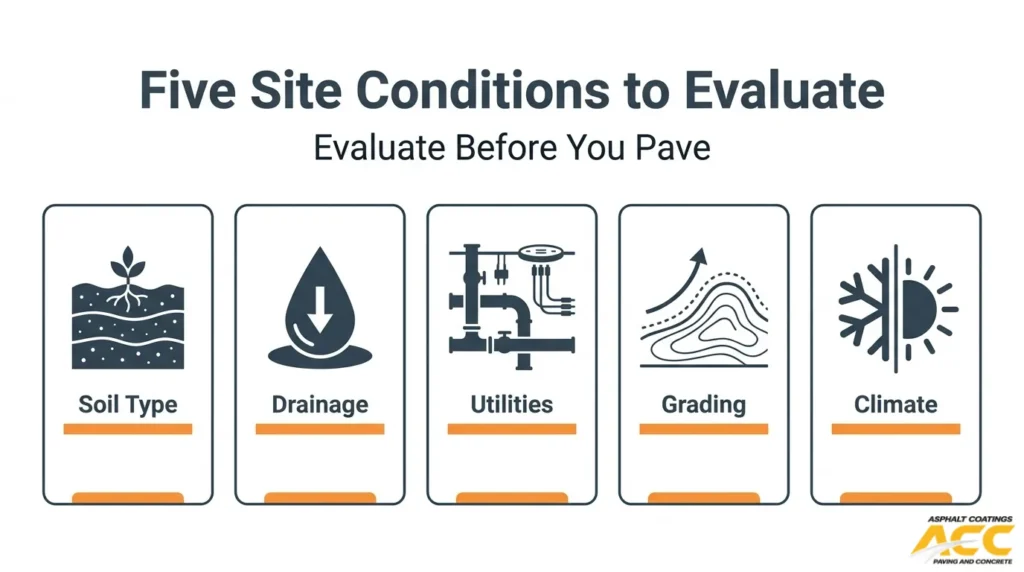
The site conditions you should evaluate before paving include soil type, drainage patterns, underground utilities, grading and elevation, and climate factors. Each condition directly shapes structural design, material selection, and long-term pavement performance.
How Do Soil Type and Subgrade Stability Affect Paving?
Soil type and subgrade stability affect paving by determining the structural support beneath the pavement surface. Weak or unstable subgrade soils cause deflection, cracking, and premature failure under traffic loads.
Research on subgrade stabilization from Iowa State University’s Institute for Transportation indicates that if a subgrade has a California Bearing Ratio (CBR) value less than 10, the subbase material will deflect under traffic loadings in the same manner as the subgrade itself. In Colorado, frost-susceptible soils add further complexity; water trapped beneath pavement can cause heaving during freeze-thaw cycles. Contractors with Colorado-specific experience design pavement structures that account for freeze-thaw cycling from the start. Asphalt Coatings Company has served Colorado’s Front Range since 1986, developing subgrade treatment methods and material specifications tailored to the region’s high-altitude conditions and seasonal temperature extremes.
Key subgrade evaluation steps include:
- Testing CBR values to determine load-bearing capacity.
- Identifying frost-susceptible clay or silt content.
- Assessing moisture levels and seasonal water table fluctuations.
- Specifying stabilization methods such as lime treatment or geotextile reinforcement when CBR falls below acceptable thresholds.
Skipping subgrade testing is one of the most common mistakes in commercial paving. The cost of proper soil analysis is minimal compared to repairing a failed pavement section two years after installation.
How Does Existing Drainage Impact Paving Design?
Existing drainage impacts paving design by dictating surface slopes, material permeability requirements, and stormwater infrastructure placement. Poor drainage is a leading cause of premature pavement failure.
When water infiltrates the pavement structure or pools on the surface, it weakens the subgrade and accelerates deterioration. Effective paving design must account for:
- Current surface water flow direction and collection points.
- Subsurface water table depth and seasonal variation.
- Existing storm drains, catch basins, and outfall locations.
- Required modifications to meet post-construction runoff standards.
Evaluating drainage before design begins prevents costly redesigns during construction.
How Do Underground Utilities Influence Site Preparation?
Underground utilities influence site preparation by restricting excavation depth, equipment placement, and subgrade compaction in specific zones. Utility conflicts are among the most frequent causes of paving project delays.
Before site work begins, the project team should:
- Request utility locates through Colorado 811 for all buried lines.
- Identify water mains, sewer laterals, gas lines, electrical conduits, and fiber optic cables.
- Coordinate with utility owners on required clearances and protection measures.
- Plan access panels or manholes that integrate with the finished pavement surface.
Undetected utilities discovered mid-project can force redesigns, increase costs, and extend timelines significantly.
How Does Site Grading and Elevation Change the Plan?
Site grading and elevation change the plan by establishing the slope, drainage direction, and pavement thickness requirements across the project area. Proper grading ensures water moves away from structures and toward designated collection points.
Standard municipal plans, such as those referenced by the American Public Works Association (APWA), specify minimum cross-slopes and longitudinal grades for paved surfaces. Critical grading considerations include:
- Establishing minimum 1% to 2% surface slopes for sheet flow drainage.
- Matching finished pavement elevations to building entries, curbs, and adjacent properties.
- Balancing cut-and-fill volumes to minimize material hauling costs.
- Verifying that grade transitions meet ADA-accessible slope requirements.
Grading errors compound through every subsequent construction phase, making accurate elevation control essential from the start.
How Do Freeze-Thaw Cycles and Climate Affect Site Readiness?
Freeze-thaw cycles and climate affect site readiness by altering soil moisture content, subgrade strength, and the timing window available for paving operations. Colorado’s high-altitude conditions make this evaluation especially critical.
Freeze-thaw cycling causes frost heave during winter and thaw weakening during spring, significantly degrading subgrade stability. The resilient modulus of subgrade soils varies considerably through these cycles, which means pavement structural design must treat the pavement and subgrade as an elastic layered system to remain accurate.
Climate-related readiness factors include:
- Scheduling paving during stable warm-weather windows when ambient and ground temperatures support proper asphalt compaction.
- Incorporating moisture mitigation strategies for frost-susceptible soils.
- Specifying adequate base depths to insulate the subgrade from frost penetration.
- Allowing for spring thaw recovery before beginning heavy construction on saturated subgrades.
Understanding these seasonal dynamics before project planning begins helps prevent structural failures that surface within the first few years of service.
How Do You Choose the Right Paving Material for Commercial Use?
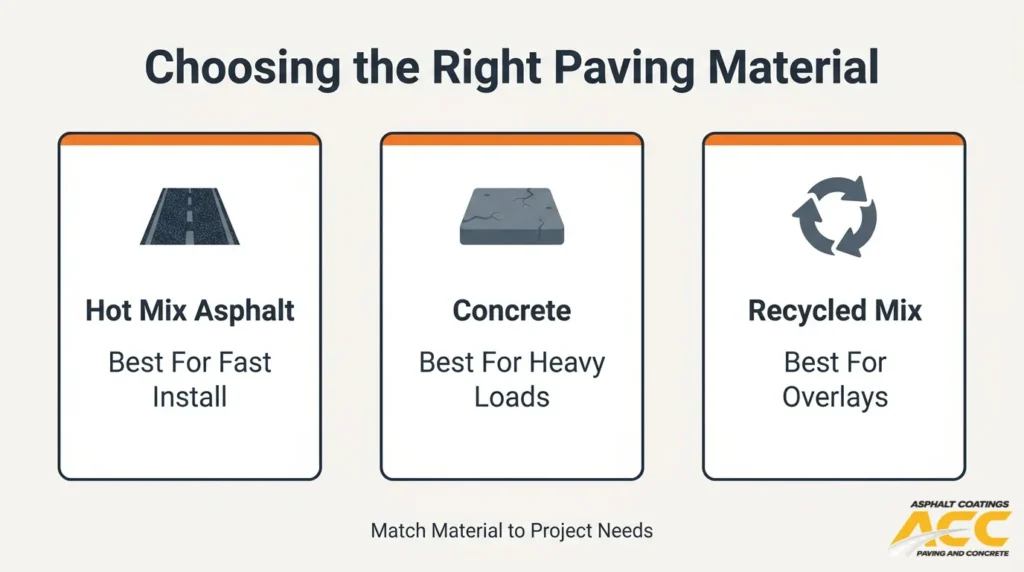
You choose the right paving material for commercial use by matching project demands, such as traffic volume, budget, and maintenance expectations, to each material’s performance characteristics. The following sections cover when hot-mix asphalt, concrete, or recycled asphalt mixes best serve commercial applications.
When Is Hot-Mix Asphalt the Best Choice?
Hot-mix asphalt is the best choice when a commercial project requires fast installation, lower upfront costs, and a smooth driving surface under heavy vehicle traffic. HMA cures quickly, often allowing lots to reopen within 24 to 48 hours after placement. Its flexibility makes it well suited for climates with freeze-thaw cycling, where rigid surfaces are more prone to cracking. Parking lots, access roads, and distribution yards benefit most from hot-mix asphalt because the material absorbs minor ground movement without structural failure. For most commercial lots prioritizing speed to occupancy and budget efficiency, HMA consistently delivers the strongest return on investment.
When Is Concrete Paving the Better Option?
Concrete paving is the better option when long service life and minimal maintenance outweigh initial cost concerns. Concrete resists rutting under sustained heavy loads, making it ideal for loading docks, fuel stations, and bus lanes where standing traffic concentrates weight in fixed positions. According to 2025 construction cost benchmarks, concrete paving runs approximately $249.43 per cubic yard for material, labor, and equipment, while asphalt sidewalk facilities cost around $19.30 per square foot. That higher upfront investment is offset by a longer lifespan, often 30 years or more with proper joint sealing. Where durability under static loads matters more than installation speed, concrete is the stronger long-term choice.
When Should You Consider Asphalt Overlay or Recycled Mix?
You should consider asphalt overlay or recycled mix when the existing pavement base remains structurally sound but the surface shows wear. An overlay applies a new hot-mix layer directly over old asphalt, restoring ride quality and drainage profiles without full-depth removal. Recycled asphalt mix, which incorporates reclaimed asphalt pavement (RAP), reduces raw material consumption and lowers material costs. Both options suit commercial lots where budget constraints or tight schedules make full reconstruction impractical. If core samples confirm adequate base integrity, an overlay or recycled mix can extend pavement life by 8 to 15 years at a fraction of new construction cost.
Understanding material trade-offs makes budgeting and layout decisions far more precise.
How Do You Design a Commercial Parking Lot Layout?
You design a commercial parking lot layout by integrating traffic flow, space counts, ADA compliance, emergency access, and pedestrian safety into a unified site plan. The following subsections cover each design element.
How Do Traffic Flow Patterns Shape the Layout?
Traffic flow patterns shape the layout by determining drive aisle direction, entry and exit placement, and internal circulation routes. One-way aisles paired with angled parking (typically 60 or 90 degrees) maximize space efficiency while reducing vehicle conflicts. Two-way aisles require wider lanes, generally 24 feet, but simplify navigation for drivers unfamiliar with the lot.
High-traffic generators like retail entrances and loading zones need dedicated circulation paths separated from general parking flow. Placing entries and exits on different street frontages, when possible, prevents bottlenecks during peak hours. For most commercial properties, designing a clear hierarchy of primary drive lanes feeding into secondary parking aisles keeps traffic moving predictably and reduces collision risk.
How Do You Determine the Correct Number of Parking Spaces?
You determine the correct number of parking spaces by applying local zoning ordinances that tie minimum counts to building use and square footage. Requirements vary significantly by municipality and property type. Indoor seating areas for commercial buildings in Colorado Springs, for example, require a minimum of 1 parking space per 300 square feet of Gross Floor Area.
Common municipal parking ratios include:
- Retail: 1 space per 200 to 300 square feet of GFA
- Office: 1 space per 250 to 400 square feet of GFA
- Restaurant: 1 space per 50 to 100 square feet of dining area
- Warehouse/industrial: 1 space per 1,000 to 2,000 square feet of GFA
Always verify the applicable code before finalizing counts, since some Colorado districts set ratios as low as 1 space per 50,000 square feet of ground floor GFA for certain categories. Oversizing the lot wastes budget on unnecessary pavement, while undersizing creates tenant dissatisfaction and code violations.
How Do ADA Accessibility Requirements Affect Lot Design?
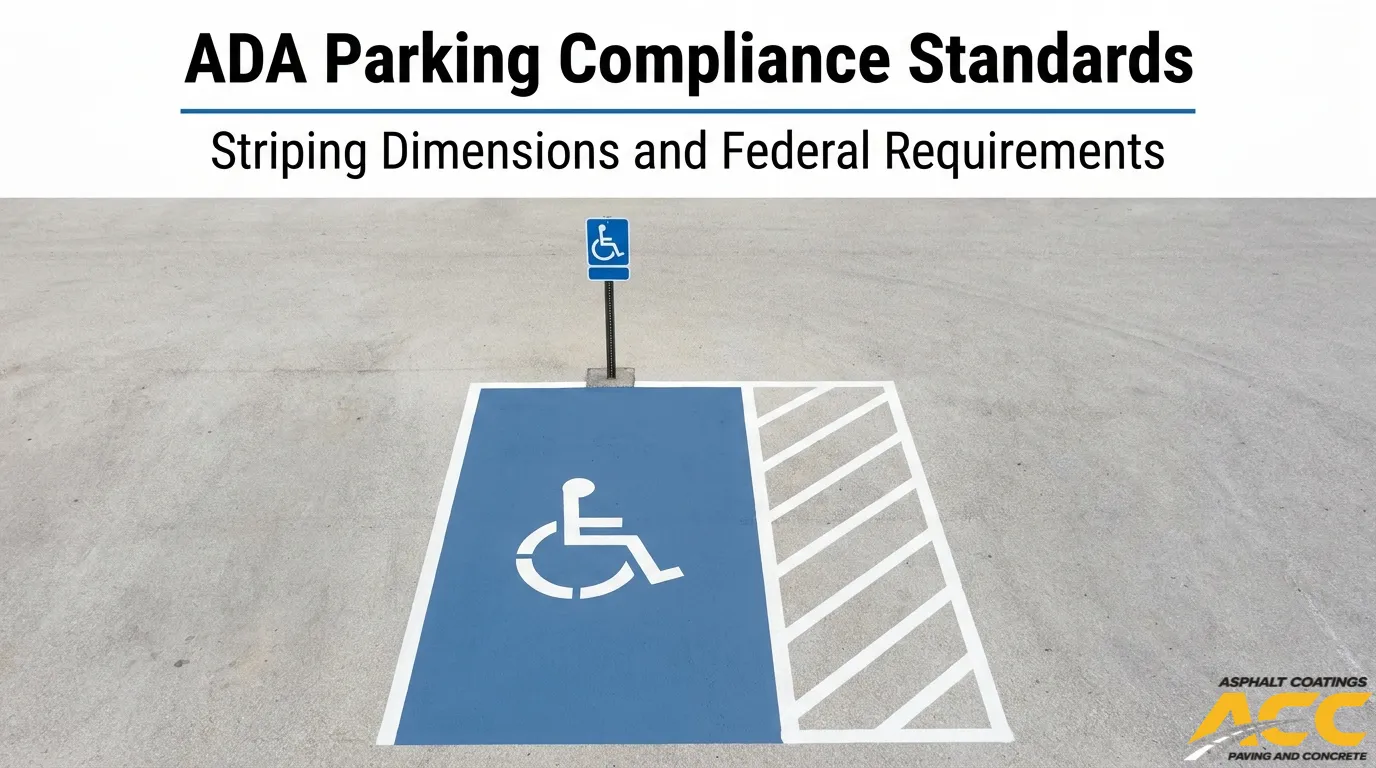
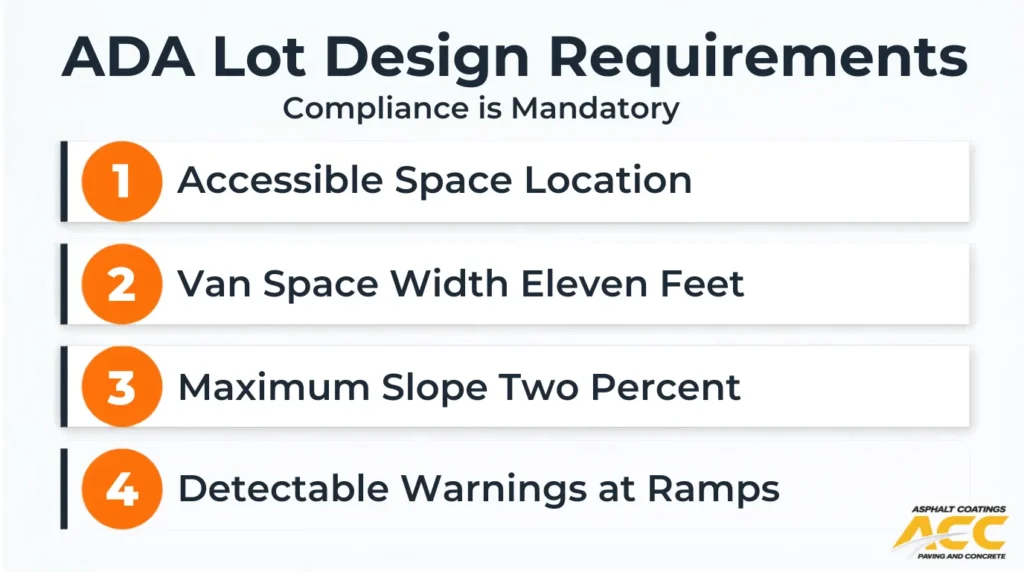
ADA accessibility requirements affect lot design by mandating minimum quantities of accessible spaces, van-accessible dimensions, compliant slopes, and detectable warning surfaces at transitions. The 2010 ADA Standards for Accessible Design require that all newly constructed or altered state and local government facilities commenced on or after March 15, 2012, must comply with strict scoping and technical requirements, according to the U.S. Department of Justice.
Key ADA design elements include:
- Accessible spaces located on the shortest accessible route to building entrances
- Van-accessible spaces measuring at least 11 feet wide with a 5-foot access aisle
- Maximum running slope of 1:48 (approximately 2%) within accessible parking spaces
- Detectable warning surfaces at curb ramps and pedestrian crossings
Non-compliance carries serious financial consequences, making ADA integration a planning priority rather than an afterthought. Proper grading during construction is far more cost-effective than retrofitting slopes and ramps later.
How Do Fire Lane and Emergency Access Codes Apply?
Fire lane and emergency access codes apply by establishing minimum clearance dimensions that must remain unobstructed at all times. According to the National Fire Protection Association, fire apparatus access roads must maintain an unobstructed width of at least 20 feet and a vertical clearance of 13.5 feet, with width requirements increasing to 26 feet where a fire hydrant is present.
Fire lanes must be clearly marked with signage, curb paint, or both, depending on local fire marshal requirements. These lanes cannot double as parking areas, loading zones, or dumpster pads. Designers should coordinate early with the local fire authority having jurisdiction, since turning radii for ladder trucks and pumper apparatus often dictate corner geometry and aisle widths throughout the lot. Overlooking fire code during design frequently triggers expensive redesigns after plan review.
Where Should Pedestrian Walkways and Crossings Be Placed?
Pedestrian walkways and crossings should be placed along the most direct routes between parking areas and building entrances, separated from vehicle travel lanes wherever feasible. Raised crosswalks or clearly striped crossings at drive aisle intersections alert drivers and protect foot traffic.
Effective pedestrian routing follows these principles:
- Sidewalks run parallel to the building facade, connecting all entries
- Crosswalks align with accessible parking aisles and ADA-compliant curb ramps
- Pedestrian paths avoid crossing behind parked vehicles where sightlines are limited
- Bollards or raised curbing separate walkways from adjacent drive aisles in high-traffic zones
Dedicating space for pedestrian infrastructure during the design phase prevents costly retrofits and reduces liability. With accessibility and emergency access established, drainage and stormwater systems complete the lot design.
What Drainage and Stormwater Systems Does Commercial Paving Need?
Commercial paving needs surface grading, catch basins, inlet drains, and retention or detention ponds to manage water effectively. Each system prevents structural damage and ensures regulatory compliance.
How Does Surface Grading Prevent Water Ponding?
Surface grading prevents water ponding by creating controlled slopes that direct runoff away from the pavement surface toward collection points. Without proper grade, standing water infiltrates pavement layers and accelerates structural failure. A minimum cross-slope of 1–2% is standard for most commercial lots, while longitudinal slopes guide water toward drains or swales at the perimeter.
Grading also plays a role in stormwater permit compliance. According to the Ohio Environmental Protection Agency, stormwater programs require managed discharge controls that begin with effective surface drainage design. Poorly graded surfaces create low spots where water pools, leading to freeze-thaw damage, pothole formation, and premature pavement deterioration. Correct grading during initial construction is far less costly than regrading after failure occurs.
What Role Do Catch Basins and Inlet Drains Play?
Catch basins and inlet drains play the role of collecting surface runoff at designated low points and channeling it into underground storm systems. Catch basins use a sump to trap sediment and debris before water enters the drainage pipe, reducing downstream clogging. Inlet drains, including curb inlets and grated inlets, intercept sheet flow across the pavement surface.
These components are essential because dysfunctional drainage systems cause flexible pavement failure through surface water infiltration and upward seepage from higher water tables, weakening the pavement structure, as documented by research published in Innovative Infrastructure Solutions. Proper sizing and spacing of catch basins depends on the lot’s square footage, slope, and expected rainfall intensity. Regular cleaning prevents sediment buildup that reduces inlet capacity over time.
When Is a Retention or Detention Pond Required?
A retention or detention pond is required when a commercial paving project disturbs one or more acres of land or when local stormwater ordinances mandate peak flow control. EPA regulations require a stormwater discharge permit for construction activity at this threshold to control soil erosion and nonpoint source pollution.
Retention ponds hold a permanent pool of water and treat runoff quality before gradual release. Detention ponds temporarily store excess stormwater during heavy rainfall and release it at a controlled rate. The choice between them depends on local code requirements, available land area, and downstream capacity. For large commercial lots, these ponds serve as a primary best management practice for managing both water quality and peak discharge volumes.
With drainage strategies in place, regular maintenance keeps these protections effective.
How Much Does Commercial Paving Cost to Plan and Build?
Commercial paving costs to plan and build depend on lot size, subgrade condition, ADA requirements, and material selection. The sections below break down pricing for small, mid-size, and large-scale lots, plus the budget impact of subgrade repairs and ADA upgrades.
What Does a Small Commercial Lot Under 10,000 SF Typically Cost?
A small commercial lot under 10,000 SF typically costs between $7,500 and $20,000 for standard asphalt paving, though final pricing shifts based on subgrade condition, drainage needs, and required ADA features. Even at this scale, compliance costs deserve serious attention. As of 2024, inflation-adjusted ADA civil penalties can reach $115,231 for a first violation and $230,464 for a second violation, according to updated federal enforcement data.
Smaller lots often carry a higher per-square-foot cost because mobilization, grading, and striping expenses are spread across less area. Skipping ADA-compliant access aisles or detectable warning surfaces to save money is a false economy that invites both legal liability and costly retrofits.
What Does a Mid-Size Lot Between 10,000 and 50,000 SF Cost?
A mid-size lot between 10,000 and 50,000 SF typically costs $25,000 to $125,000 or more for complete paving, depending on material thickness, drainage infrastructure, and site complexity. Projects at this scale often require stormwater management systems and heavier-duty pavement sections to handle increased traffic loads.
Budget planning should also account for timeline. A mid-size commercial construction project in this square footage range typically requires 9 to 15 months for full completion, meaning carrying costs, phasing logistics, and seasonal scheduling all influence total expenditure. Per-square-foot rates generally decrease at this scale, but unforeseen subgrade issues or utility relocations can quickly erode those savings.
What Does a Large-Scale Lot Over 50,000 SF Typically Cost?
A large-scale lot over 50,000 SF typically costs $150,000 to $500,000 or more, with pricing heavily influenced by pavement design, stormwater systems, and site preparation scope. At this scale, material procurement, phased construction, and project management complexity become primary cost drivers.
Cost overruns are a documented risk for large paving projects. Research published through ResearchGate on asphalt paving cost analysis found that roadway construction projects average approximately 4% in cost overruns above the original bid price, frequently tied to site discrepancies discovered during construction. For a $400,000 project, that translates to $16,000 in unplanned spending. Thorough geotechnical investigation before bidding remains the most effective way to control this risk.
How Do Subgrade Repairs Change the Overall Budget?
Subgrade repairs change the overall budget by adding $2 to $8 or more per square foot, depending on the severity of soil instability and the stabilization method required. Weak or saturated subgrades cannot support pavement loads without correction, making this line item non-negotiable when soil conditions are poor.
If a subgrade has a California Bearing Ratio below 10, the subbase material deflects under traffic in the same manner as the failing soil beneath it. Repair methods such as soil excavation and replacement, lime stabilization, or geotextile reinforcement each carry different costs. Investing in proper subgrade preparation before paving always costs less than reconstructing a failed pavement surface two years later.
How Do ADA Upgrades and Concrete Flatwork Affect Cost?
ADA upgrades and concrete flatwork affect cost by adding $5,000 to $30,000 or more to a commercial paving project, depending on the number of accessible spaces, ramp installations, and sidewalk requirements. Concrete curb ramps, detectable warning panels, and compliant access aisles all carry higher material and labor costs than standard asphalt work.
These are not optional enhancements. Under ADA Title III, the Department of Justice can impose civil penalties up to $75,000 for first-time violations by commercial facilities, escalating to $150,000 for subsequent offenses. Budgeting for ADA and flatwork from the outset is always more cost-effective than retrofitting after construction, and it protects property owners from significant legal exposure.
Understanding total project costs sets the stage for navigating the permits and code compliance required before construction begins.
What Permits and Code Compliance Steps Are Required?
The permits and code compliance steps required for commercial paving include grading permits, stormwater discharge permits, ADA accessibility compliance, fire access road approvals, and local zoning or land-use permits. Requirements vary by municipality, project size, and site disturbance area.
Commercial paving projects must satisfy multiple regulatory layers before construction begins. Skipping any single permit category risks stop-work orders, fines, or costly rework after installation. The core compliance categories cover stormwater management, accessibility standards, fire safety access, and local building codes.
Stormwater discharge permits apply to most commercial paving projects of meaningful scale. According to the EPA, any construction activity disturbing one or more acres of land requires a stormwater discharge permit to control soil erosion and nonpoint source pollution [13]. Colorado enforces this threshold through state-level permits, while local MS4 permits regulate municipal stormwater discharges in counties like Weld County [14].
ADA compliance is non-negotiable for commercial properties. The 2010 ADA Standards for Accessible Design mandate that all newly constructed or altered facilities commenced after March 15, 2012, meet strict scoping and technical requirements for accessible routes, parking spaces, and surface slopes [11]. Inflation-adjusted civil penalties for ADA violations reached $115,231 for a first offense and $230,464 for subsequent violations as of 2024 [10], making early compliance far cheaper than remediation.
Fire access road codes set minimum dimensional standards. NFPA guidelines require fire apparatus access roads to maintain an unobstructed width of at least 20 feet and a vertical clearance of 13.5 feet, with the width increasing to 26 feet where a fire hydrant is present [15].
Additional permits commonly required for commercial paving include:
- Grading and excavation permits from the local building department.
- Right-of-way or encroachment permits when work extends into public easements.
- Zoning or land-use approvals confirming the intended use matches site entitlements.
- Utility relocation permits when existing underground infrastructure must be moved.
- Environmental review clearances for sites near wetlands or protected areas.
Each municipality sets its own submittal requirements, review timelines, and inspection checkpoints. Property managers should budget four to eight weeks for permitting alone on mid-size projects, though complex sites or multiple jurisdictional overlaps can extend that window. Engaging a contractor experienced with local code authorities streamlines the process considerably. With permits secured, the next step is building a realistic project timeline.
How Do You Build a Realistic Commercial Paving Timeline?
You build a realistic commercial paving timeline by accounting for site preparation duration, project scale, permit requirements, and seasonal weather constraints. The sections below break down timelines for site work, installation by project size, and weather-related scheduling shifts.
How Long Does Site Preparation Usually Take?
Site preparation usually takes one to four weeks for most commercial paving projects, depending on existing conditions and scope. Smaller lots with stable subgrade soils and no utility conflicts can be cleared, graded, and compacted in five to seven business days. Larger sites requiring demolition of old pavement, subgrade correction, or drainage installation typically need two to four weeks.
Several factors extend this phase:
- Poor soil stability requiring excavation and imported base material.
- Underground utility relocations that must be coordinated with service providers.
- Grading adjustments to establish proper surface drainage slopes.
For projects in Colorado, freeze-thaw damage to existing subgrade can add unexpected remediation time. Scheduling site preparation early in the project prevents compounding delays during paving installation.
How Long Does Paving Installation Take by Project Size?
Paving installation takes anywhere from a few days to several weeks, scaled directly to the square footage and complexity of the project. Small commercial lots under 10,000 square feet can often be paved in two to five days. Mid-size projects between 10,000 and 50,000 square feet typically require one to three weeks. Large-scale lots exceeding 50,000 square feet may need three to six weeks or longer, particularly when phased to maintain partial site access.
Permit timelines also affect the schedule. According to EPA regulations, any construction project disturbing one or more acres of land requires a stormwater discharge permit to control erosion and nonpoint source pollution. Colorado enforces this threshold with state-specific stormwater permits and local MS4 requirements, which can add weeks to the pre-installation timeline if not filed early.
How Does Weather and Seasonal Timing Shift the Schedule?
Weather and seasonal timing shift the schedule by dictating when asphalt can be placed, compacted, and cured properly. Hot-mix asphalt requires ambient temperatures consistently above 50°F for proper compaction and binding. In Colorado, the optimal paving window runs from late April through October, though early spring and late fall projects face higher risk of overnight freezes that compromise fresh pavement.
Key weather-related scheduling factors include:
- Extended rain periods that saturate subgrade and delay compaction.
- Early snowfall closing the paving season ahead of schedule.
- High-altitude temperature swings requiring tighter daily work windows.
Planning paving during peak season (May through September) offers the most predictable conditions, but contractor availability tightens during these months. Booking crews and materials 60 to 90 days ahead helps lock in preferred dates. Understanding how permits, weather, and contractor selection interact is essential when evaluating your paving partner.
How Should You Evaluate and Select a Commercial Paving Contractor?
You should evaluate and select a commercial paving contractor by verifying credentials, confirming in-house crew capabilities, and asking targeted questions during bid review. These three steps protect project quality, budget, and timeline.
What Credentials and Insurance Should You Verify?
The credentials and insurance you should verify include state and local business licenses, general liability coverage, workers’ compensation policies, and commercial auto insurance. A valid contractor’s license confirms legal authority to operate, while adequate insurance protects property owners from liability if accidents occur on-site.
You should also confirm bonding capacity, which guarantees project completion even if the contractor defaults. Request certificates of insurance directly from the carrier, not just copies from the contractor. According to a study published in Construction Management and Economics, contractor selection criteria are directly related to project performance in terms of time and cost [23]. Verifying these documents before signing any agreement eliminates the most common sources of costly disputes.
Why Does Using In-House Crews Matter for Quality Control?
Using in-house crews matters for quality control because it gives the paving contractor direct oversight of every worker, piece of equipment, and process on the job site. Subcontracted labor introduces communication gaps, inconsistent standards, and scheduling conflicts that erode accountability.
When a single company employs its own paving, grading, and concrete teams, supervision stays unified from subgrade preparation through final striping. This structure also means faster problem resolution; a foreman can redirect crew members immediately rather than negotiating with a third-party subcontractor. For property managers overseeing complex commercial lots, in-house execution reduces finger-pointing and keeps the project on schedule. Contractors who rely heavily on subcontractors often struggle to maintain consistency across phases, which is where most quality breakdowns occur.
What Questions Should You Ask During the Bid Review?
The questions you should ask during the bid review focus on scope clarity, material specifications, timeline commitments, and warranty terms. Key questions include:
- Does the bid itemize costs for subgrade work, base material, asphalt tonnage, and striping separately?
- What hot-mix asphalt grade and thickness does the proposal specify?
- Are mobilization, traffic control, and permit fees included or billed as extras?
- What is the projected start date, and how are weather delays handled contractually?
- Does the warranty cover materials, labor, or both, and for how long?
Vague line items often signal potential cost overruns. A detailed, transparent bid reflects a contractor’s professionalism and reduces the risk of unexpected change orders mid-project.
With contractor selection finalized, a structured maintenance plan keeps your new pavement performing for years.
How Do You Maintain Commercial Pavement After Installation?
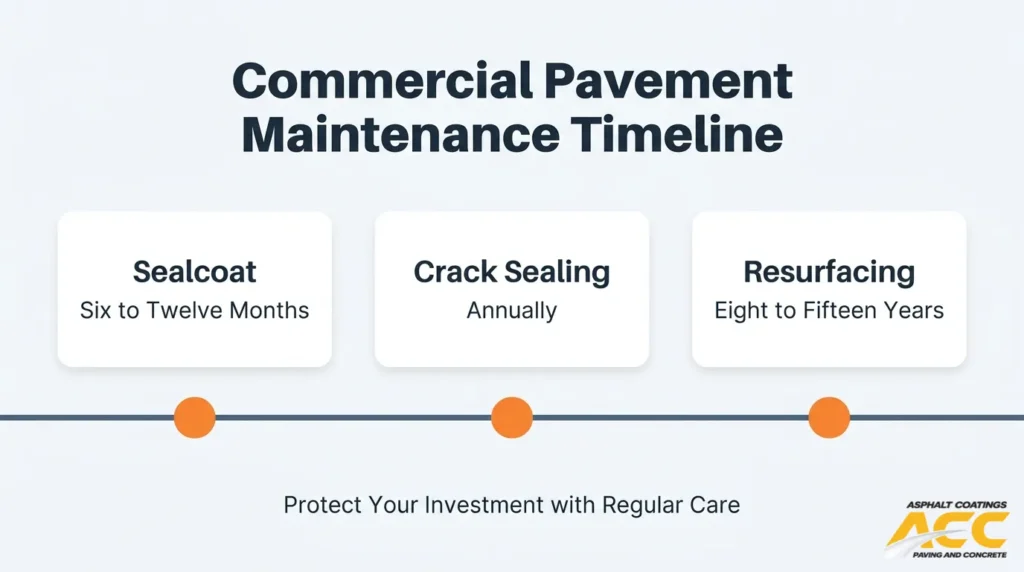
You maintain commercial pavement after installation through a scheduled program of sealcoating, crack sealing, and timely resurfacing. Each task targets a different stage of pavement deterioration.
When Should You Schedule Sealcoating After New Paving?
You should schedule sealcoating after new paving approximately 6 to 12 months after the initial asphalt installation. Fresh asphalt needs time to fully cure and oxidize before a sealant layer can bond properly. Applying sealcoat too early traps volatile oils in the pavement, which softens the surface and reduces long-term durability.
Once the first application is complete, most commercial lots benefit from resealing every two to three years. Factors like traffic volume, sun exposure, and climate accelerate surface oxidation, so higher-traffic properties often need more frequent applications. For property managers, a proactive sealcoating schedule is one of the most cost-effective ways to extend pavement life and delay more expensive repairs.
How Often Should Crack Sealing and Patching Be Performed?
Crack sealing and patching should be performed at least once per year, ideally during a spring or fall inspection cycle. Standard municipal maintenance plans specify that crack sealing should be applied when cracks measure at least 1-foot long and 1/4-inch wide, occurring more than once per 10 square feet, according to the American Public Works Association’s 2025 Manual of Standard Plans.
Property owners should watch for these indicators:
- Linear cracks exceeding one foot in length.
- Crack widths reaching or surpassing 1/4 inch.
- Crack density greater than one occurrence per 10 square feet.
- Alligator cracking in localized areas, which signals base failure.
Addressing cracks early prevents water infiltration, which is the primary cause of subbase erosion and pothole formation. Delaying repairs even one season can turn a minor sealant job into a costly structural patching project.
When Is Full Resurfacing Needed Instead of Maintenance?
Full resurfacing is needed instead of maintenance when surface deterioration covers more than 25 to 30 percent of the total pavement area, or when the existing base structure remains sound but the wearing course has failed. Common signs that maintenance alone is no longer sufficient include widespread alligator cracking, significant rutting in traffic lanes, and recurring potholes in the same locations despite repeated patching.
A mill-and-overlay approach removes the damaged surface layer and replaces it with new hot-mix asphalt, restoring ride quality and structural performance without full reconstruction. If subgrade failure is confirmed through core sampling, however, complete removal and rebuild becomes the only viable option. Scheduling a professional pavement evaluation helps determine whether resurfacing or reconstruction offers the best return on investment.
How Can a Colorado Paving Partner Simplify Your Planning?
A Colorado paving partner can simplify your planning by managing scope, timelines, and local compliance from a single point of contact. The following sections cover how Asphalt Coatings Company supports commercial projects and the key takeaways from this guide.
How Does Asphalt Coatings Company Support Commercial Projects?
Asphalt Coatings Company supports commercial projects by providing full-scope paving, concrete, and maintenance services with in-house crews across Colorado’s Front Range. Since 1986, Asphalt Coatings Company has built expertise in freeze-thaw mitigation, subgrade preparation, ADA-compliant concrete work, and parking lot construction for properties ranging from office parks to industrial complexes.
This single-source approach eliminates coordination between multiple subcontractors, which is critical given that large-scale Colorado paving projects can involve substantial material volumes. Jefferson County, Colorado, for example, has planned gravel road paving projects totaling 50,000 tons of asphalt within a single season, according to data from the Colorado School of Mines institutional repository. Asphalt Coatings Company handles every phase, from initial site assessment and grading through sealcoating and striping, keeping commercial timelines on track.
What Are the Key Takeaways From This Commercial Paving Guide?
The key takeaways from this commercial paving guide center on structured planning, material selection, regulatory compliance, and proactive maintenance. Every successful commercial paving project depends on completing these steps in sequence:
- Define project scope and objectives before requesting bids to prevent cost escalation.
- Evaluate site conditions, including soil stability, drainage, and freeze-thaw exposure, during the assessment phase.
- Select paving materials based on traffic load, climate, and life-cycle cost rather than upfront price alone.
- Design parking layouts with ADA accessibility, fire lane codes, and stormwater management integrated from the start.
- Build a realistic timeline that accounts for permitting, weather windows, and seasonal constraints.
- Establish a maintenance schedule covering sealcoating, crack sealing, and resurfacing triggers.
Partnering with an experienced Colorado contractor turns this complex process into a coordinated plan, protecting both your investment and your project timeline.